Visiting a Mid Century Modern home. *Patty, this one’s for you.

Our class at the Chippendale International School of Furniture recently visited the Woodcote House in Midlothian, Scotland. This was only one of several “field trips” that the class went on and was a wonderful and extremely valuable experience for me. I’m not a furniture designer, nor do I play one on TV, but I have designed (to some extent) all of the pieces I’ve made so far and am making now. The most interesting part of this though is that I’ve never really been attracted to the Mid Century Modern style, so it was a thoroughly pleasant and welcomed surprise for me to find that this visit was the most interesting and valuable to me of all of our field trips.

***Note*** That does not mean the other field trips were not each valuable. I found each of these visits to be eye-opening and wonderful with the up close and personal access to old and absolutely breathtaking pieces of furniture and art with the stories and history behind them.

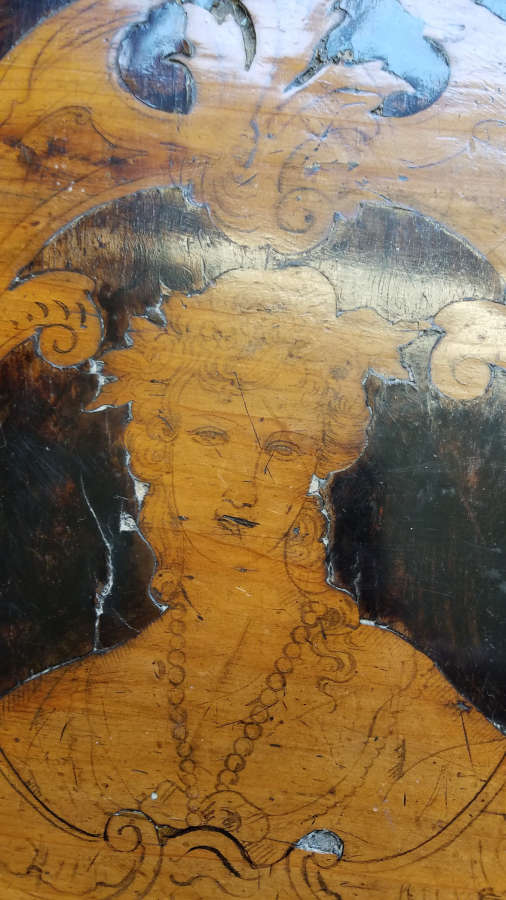
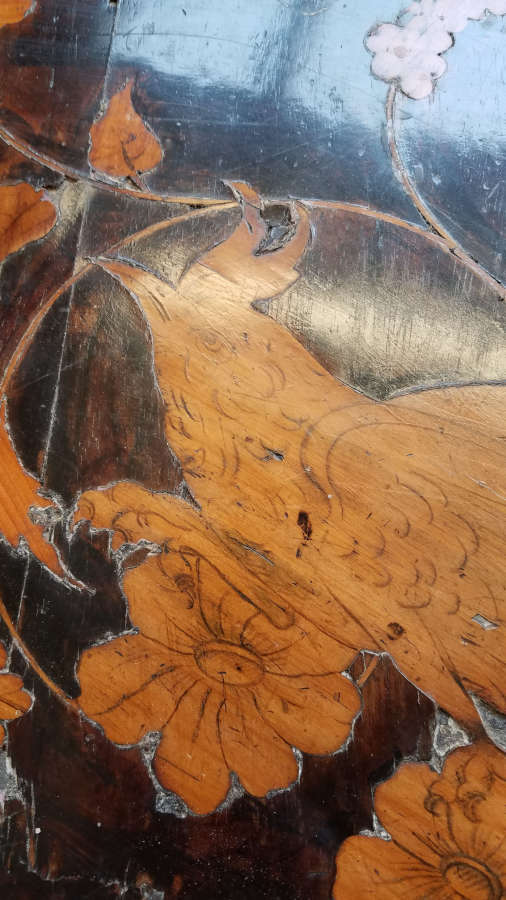
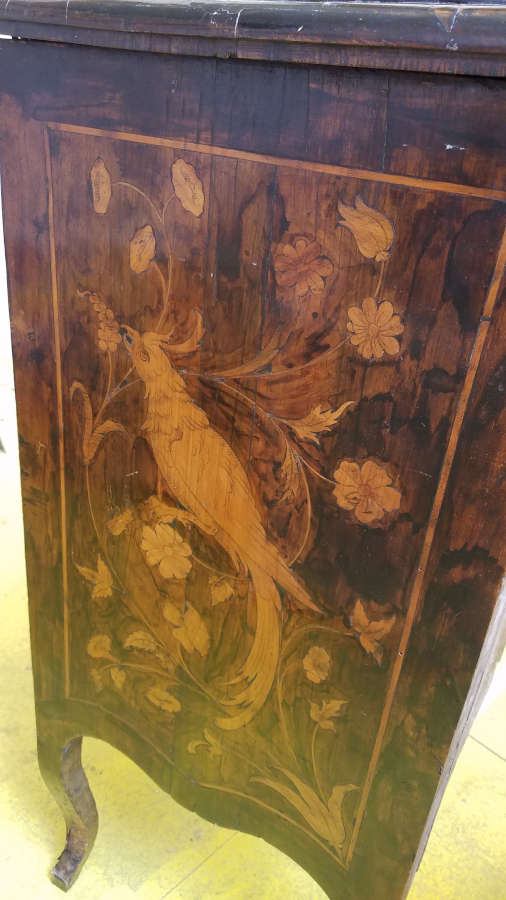
Eleanor Morris of Woodcote, PhD, PCRTPI Scotland was our very gracious hostess and an invaluable wealth of knowledge of the furniture there. She gave us the history of each piece and its significance to Scotland, with some great personal stories behind many of them. Unfortunately, I do not have a great (or even good) memory and can’t remember even one of those stories…but they were great!

Probably the most iconic piece we saw was the Le Corbusier Chaise Longue a Reglage or the LC4 or, I think, the B306, which sounds like a military bomber jet.

Le Corbusier Chaise Longue.

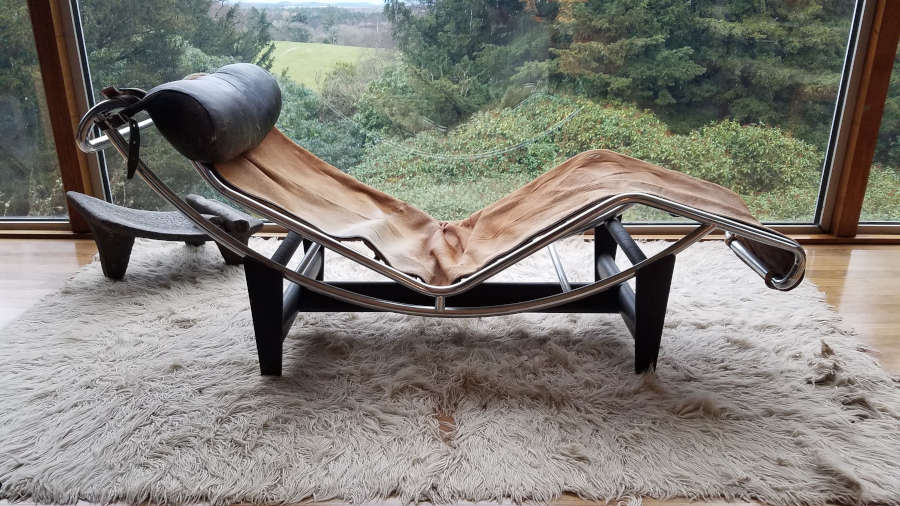
An early version of this had taller back legs. This one has a calfskin seat with chrome tubing and rubber guides so the seat frame doesn’t slip and slide while you are trying to sit down. It was designed by Le Corbusier, with Pierre Jeanneret and Charlotte Perriand. It has been in production since the 1930s, first made by Thonet and since the 1930s by Cassina.

There were also a pair of LC3 Grand Confort “Cushion Baskets” from about the same time in calfskin.

Le Corbusier LC3 Grand Confort (not a misspell) Cushion Baskets.

I sat in one of these for a bit, and even after 54 plus years (at least as old as I am) they are still very comfortable.

Next are some pieces by Mies van der Rohe. The Barcelona chairs and divan.

A pair of Barcelona chairs by Mies van der Rohe.
Barcelona divan (couch, daybed) in leather and possibly African Mahogany with a steel frame.

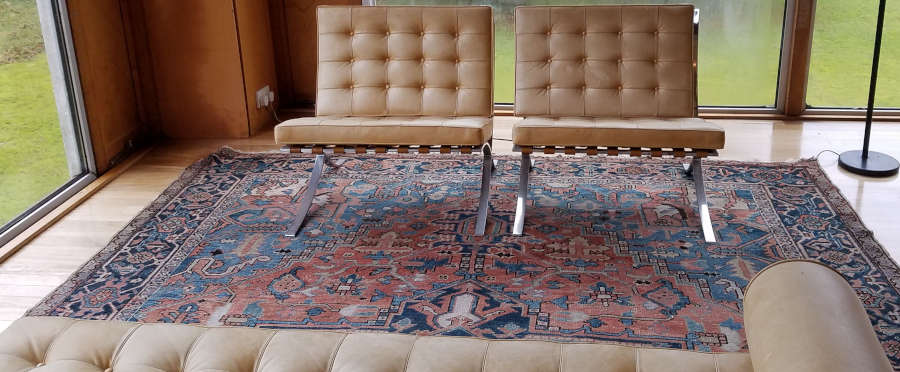
The couch was designed for a New York architect in the 1930s and became famous when it was shown in the Glass House, which was completed in 1949 in New Canaan, Connecticut.

Knoll took over production in 1964 and it wasn’t until 1987 that the divan was called the Barcelona (like the chair) because of its resemblance to the chair.

Les Arcs chair

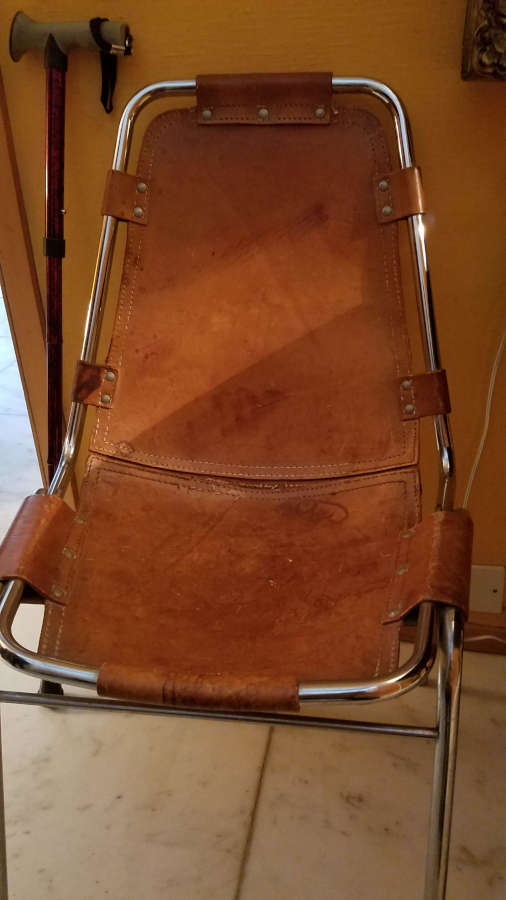
The Les Arcs resort chair, by Charlotte Perriand (or Italian designer DalVera). I’ve seen some pictures of these with black steel tubing. They were designed for the Les Arcs ski resort in Savoie, France.

Tulip table and chairs.

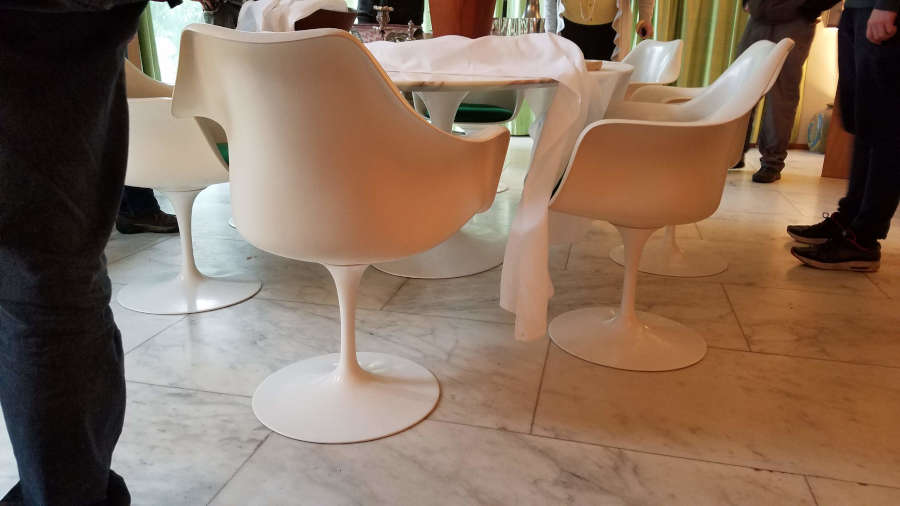
The Tulip table and chairs by Eero Saarinen were the first pieces we saw when we entered the house. The chairs were surprisingly comfortable and sturdy, even for a heavier person as myself. The table caused a bit of a stir when it came to Scotland. Seems that for safety reasons it was supposed to have two bases. Even with a half dozen of us sitting at the table, it was never tippy or unstable.

Wassily chairs.

Marcel Bruer was influenced by the De Stijl movement while an apprentice at the Bauhaus and drew on the bicycle frame as inspiration for the Wassily chair in 1925.

Several of the other students sat in these chairs and said they were quite comfortable.

There were quite a few other very memorable pieces at the house, but they will have to wait for another post.

18th Century Italian chest restoration.

One of the most valuable (to me) skills that my furniture making course has taught me is the core fundamentals of furniture restoration and repair. Graham and Clare, who are both as great at teaching as they are at repair and restoration, have allowed me to look over their shoulders (and incessantly ask questions) as they have worked on pieces. I have also been able to work on some of them myself, which has not only been a great and challenging experience but has been extremely fun as well.

Graham and Clare have both been with the Chippendale International School of Furniture for more than 2 decades and are easy to talk to and wonderful to work with on these great pieces of furniture.

Recently, an Italian chest, much like this one I wrote about previously came into the school for some work.

The goal was to fill/replace the missing pieces and to make the repairs sympathetic to the age and blend them into the overall condition of the piece. If we decided to make the repairs perfectly flat and shiny with no gaps, then each repair would have stood out and looked out of place.

First thing was to lightly clean the areas that needed repair.

Each of these spaces was cleaned with scalpels, awls, and pretty much anything I could get my hands on that was small enough to get into the crevices and cracks. The bottoms of these spaces needed to be relatively smooth so when I fit the replacement pieces of wood in there they would sit flat and have a good stable glue surface.

More of the missing pieces.

The next step was to put tape over each of the empty spaces and lightly shade with a pencil to get the outline of the missing area.

After I had a good tracing of a missing piece, I put the tape on a piece of (in this case) walnut that I’d be using to patch with. I made sure to orient the grain with the existing veneer.

Anselm and Graham believe the table is from around 1760 and the veneer is several times thicker than any you can buy today, so the repair pieces were resawn on a bandsaw to be just a bit thicker than the old veneer. This way we could pare down the patches to the correct level.

Next, I cut out the pieces oversized and then fit them using small files, sandpaper, and scalpels.

This shows a couple of different stages. A couple of the spaces have been cleaned, one is ready to be traced, and one has a patch already fit (it still has tape on it).
Another area ready for patching.
And with some of the patches fit.

The next stages were to glue the pieces into their respective spots

Using a combination of tools to shave the patch down a bit.

Once the patches were in and the glue dried, I used a combination of water dies to get the patches to blend with the background. I then used coloured wax sticks and melted a mix of colours to fill and blend the repairs. (I don’t have pictures of these steps because once I got into it I was so engrossed that I forgot). Next was a light going over with some black wax, to blend all of the repairs with the rest of the table top.

As always, the repair and restoration is just a wonderful experience.

A closer look at the 18th-century Italian chest.

In the previous post, I was working on the top of the chest but didn’t show any of the rest of the piece, so here goes.

The first thing I noticed when the piece came into the shop was the back.

It initially looked, and felt, like thin cement covering the joints but Graham identified it as gesso. This makes more sense because workshops would have had gesso available for painting (and gilding?)

This next picture made me think that most of the carcass may have had a gesso coating. The drawer side looks like it could have been covered, and then through the years the majority just wore away.

But then the inside of the drawer again looks like the gesso was used to cover gaps in joints, smooth dents, and fill holes. So I don’t think the gesso was used to cover the entire carcass, but I do believe it was added at a later date to cover gaps that developed as the lumber dried and shrank.

Next, I looked at the drawers. This along with the back of the chest brings up an interesting point. The craftsperson (craftspeople) who worked on this were very efficient with their time and energy. Non-show surfaces were not smoothed or scraped.

And, unfortunately, this piece had been a meal or two for some woodworms. Unfinished surfaces were given woodworm treatment as soon as the piece came into the shop.

This next picture highlights a couple of points. First, I think it re-enforces the idea that the gesso was a later addition to cover up the gaps made by dried and shrunken wood. Second, the non-show surfaces again show the efficient use of their time. The only smooth surface in this drawer space is the bottom where the drawer sanded it smooth from hundreds of years of use.

I eventually started looking at the show surfaces.

This marquetry is very similar to the table that came in a while back.

A portion of the Italian table that came in for restoration a while back. I’ll post more on this one later.

One thing about the marquetry is that the lines for the detail are not carved like first thought. They are drawn.

I didn’t think much of this at first, but when Graham needed to do some work on the table he discussed how important this detail is. If you have to use meths (methylated spirits – denatured alcohol) to clean or take off the finish for any portion, it can also erase the detail work so you have to be careful where and how you use any chemicals to clean a piece.

One major difference between the table and the chest is that the table is all marquetry and veneer with a clear finish, whereas the chest is marquetry and a painted veneer.

Painted veneer.
Veneer with clear finish.

Graham thinks this means the two pieces were made in the same shop, but the chest was a project for an apprentice. That makes sense to me and I’m running with that theory.

Arts and Crafts style mirror with gilding.

One project that really took me by surprise while at the Chippendale school was a mirror that ended up requiring more brand new skills than I would have thought possible.

I already knew that I wanted to do letter carving and I knew which quote I would use. I first saw the quote “The lyf so short, the craft so long to lerne.” in a picture of a fireplace mantel in a craftsman style home of Gustav Stickley, who was one of the first, and most well known, US mission (arts and crafts) style furniture makers. I then did some research to find out that it is from a poem by Chaucer, called “Parliament of Fowls” which is about how love and life are crafts that take a lifetime to learn. It is also thought to be the origin of St. Valentine’s Day. That said, I only knew it as a quote about traditional crafts and still think of it that way.

It started out as a simple drawing. At this point, I was so focused on my other project that I didn’t put a lot of thought into the scale or proportion, but I knew I wanted an arts and crafts style mirror.

This plan lasted long enough to start dimensioning the lumber and then went through several modifications (in my head). Then, when we ordered the glass I realized I had designed the frame too large, so it went through another major modification.

I thunk and thunk and then thunk some more over the resizing and what shape the mirror should take but had already started laying out the letters since the letter size and font would tell me generally what shape the mirror would take. I knew from the beginning exactly which font I wanted to use on this as I’d seen it used quite often for arts and crafts lettering, but I just didn’t know what it was called. I searched several font websites and found it on https://www.dafont.com/dyer-arts-and-crafts.font and also on https://www.1001fonts.com/dyer-arts-and-crafts-font.html

This is a public domain font and is free for all kinds of usage.

Dyer Arts and Crafts font.

I didn’t want the letters too small as that would make the carving more difficult so when I settled on a size I printed them out, cut and spliced them into their lengths and lay them out on the lumber. Here I needed to make sure my kerning was consistent because I was splicing groups of letters together.

I was worried that as I started to outline the letters onto the wood with the gouges that the letters would move and I’d lose my place, so I also used graphite paper (carbon paper) to trace the outside lines of the letters. This turned out to be overkill and actually created more work for me because I then had to remove the tracing afterwards, which turned out to be more difficult and fiddly than I had planned.

You can see the result of the tracing paper in a few of the letters.

The letter carving itself was very enjoyable and cathartic. I would be so engrossed in my carving that hours would fly by and I’d have to force myself to take a break, stretch, grab a cuppa, chat with the other students, and then dive right back in.

Once I’d reached a point that my rough out of the letters was finished, I shellacked the letters. This was to exaggerate the roughness and show me where I needed to concentrate my efforts to smooth the sides and the outlines.

I’d shellacked the top row, but not the bottom yet.

The roughing out of the letters was the quick part. I spent more than twice as much time smoothing the sides and edges.

After the rough out of the letters. Next I’m on to the smoothing.
Getting there.

Once I’d finished the smoothing of the letters, I was ready to stain and then gild. I later found out that this was the wrong order and next time I’ll gild and then stain. The reason being that when I finished gilding I had to sand the surface in order to create the crisp edges, but doing that removed most of the stain. I then had to restain after I had finished sanding. Not a huge issue as the restain cost me a part of a day and I had to let it dry overnight before shellacking.

I also had to regild the letters as I initially didn’t follow the tutor’s instructions correctly. Richard Walker at http://watergild.com/ was the visiting tutor for our gilding instruction and was great to work with. He never cracked a joke and we always knew when he was being serious. 😉 After realizing my mistake and regilding the letters, I sanded then restained using my super secret mix of water dyes.

Some of the testing I did for the mirror frame. Not all, but some.

After letting the stain dry overnight, I shellacked the front side. This was so I could finish staining the edges without it bleeding into the front.

As I was doing all of this I also worked on the side pieces and created the mount in the back to hold the glass. I don’t have pictures of that, but may add some at a later date.

I also didn’t take pictures of the glass/water gilding on the glass, and I’m really kicking myself now. That process was incredibly interesting and I can’t wait to do another project like this. Again, Richard was excellent to learn from as he was able to walk me through the process several times (I kept getting sidetracked on other stuff and would come back and say, “uh, I can’t remember what you said to do here”). Very patient and a great teacher.

First, I laid out the background, which was white gold (I think it has an Italian name, but can’t remember). Then, I scratched out the outline of the roses. For each rose I started with red gold, then added white gold to the center. I then scratched out the leaves and used green gold. I finished by scratching out the stems and then painted over the back with black acrylic paints. I’ve really condensed the process here because I don’t have a photographic record of the steps, but even though there are a lot of steps here and I had to wait overnight for the water to dry before I could move on to the next portion, it went surprisingly quickly. I will post pictures of the process when I do my next glass gilding project.

And the finished product, with 7 coats of shellac. I’ll add more pictures later.

Repurposed Commode.

My wife and I were antiquing recently when I stumbled upon a piece of furniture that was familiar even though I don’t think I’d ever seen one in person before.

A piece of plywood replaced what was likely a wooden bottom with a hole cut in it to hold a pot.

I did remember where I’d seen a picture of one before so I hopped on Pegs and Tails, which is my go-to for antiques identification and restoration. I found this article that seems to support what I thought.

Very similar to the piece I was looking at.

So, it’s possible that the nice little “end table” with a hinged lid and storage inside, began its life as a Georgian Commode.

Campaign Style Furniture design, part 2: Patent (metamorphic) furniture.

This is continued from a post about Campaign Style Furniture I wrote a while back.

All photos in this post are from the Christopher Clarke Antiques website https://campaignfurniture.com

The first thing about Campaign Furniture that got me interested in the style was that many of the pieces broke down for travel or had hidden uses. Some of these designs seemed playful in that what looked like a chest of drawers turns into a desk, or when a small table breaks down into a briefcase-sized box with carrying handles.

A Campaign Secretaire Table. Circa 1790, in mahogany.

I find a piece like this just fantastic as it packs so much utility into such a small space.

Legs and stretchers are stored inside.
This is one of my favourite designs. The gallery and writing space are large enough to be useful and small enough to be mobile. The stretchers are very important as without them the legs would not last a day, especially on uneven ground or with the racking and twisting of use near a battlefield.

The chests that convert to secretaires or desks are beautiful pieces. There are several different methods of hiding the writing surface and gallery, like below where the top folds out and rests on lopers and the gallery pops up on springs.

Georgian Military Campaign Chest

The following is the most prevalent style though and is what I styled my campaign chest after (I’m still working on it and plan to have it finished sometime this millennium). My drawings (from my other post) show that I am using the quadrant stays like the following example, instead of lopers like the above example, to support the writing surface.

Chest Secretaire early 19th Century

One thing that I found while planning my campaign chest is that much consideration must be given to the height of the drawers so that the writing surface is comfortable to use. Once you get the writing surface at the correct height, you then have to look at the size of the drawers and if you want symmetry from top to bottom. In my case, I decided to go with a larger drawer at the bottom and top and then smaller drawers in the middle. This was also factoring in the height of the feet.

Patent furniture and campaign furniture are not the same. Patent furniture became an important part of a military officer’s inventory because of its great utility, but some campaign furniture is not patent furniture, but simply breaks down for travel or is made to be more durable (with brass strapwork and corner protection).

My next post on campaign furniture will be when I start working on my own piece again. Hopefully soon.

Oak Coffer Observations, Part Three

This post continues from my previous. One of the things about this piece that caught my eye was the newspaper lining. At first, I wasn’t sure what it was because I was mostly interested in the exterior carving, patina, damage, and hardware. But after we got it home (our place in March, Cambridgeshire) I was able to take a closer look at the interior and realized that my hunch was right, and the newspaper lining was probably old as well.

The first thing I did was try to find a date, which ended up being September 21, 1872. I found a couple of other pages with the same date, so it is probably all the same issue of the same newspaper.

I then started looking at the layout of the newspaper within the coffer and realized that it was used not only to protect the contents of the coffer from snagging on the wood but also as a bit of decoration. This coffer was already 200 years old when the owners decided to line it so it’s likely that splinters and ragged edges would have ruined any fabrics that were stored inside.

I also found where the newspaper was from. Norwich, in Norfolk.

We purchased the coffer near Bury St. Edmunds, which is about 40 miles as the crow flies from Norwich, so in its 300 plus history, it probably didn’t stray far from where it was made.

The coffer was likely made in the mid to late 1600s, although there is no provenance and the construction methods did not change significantly between the 1400s and the 1700s except to include other woods like walnut or pine.

In the next post I’ll talk more about how the coffer was built.