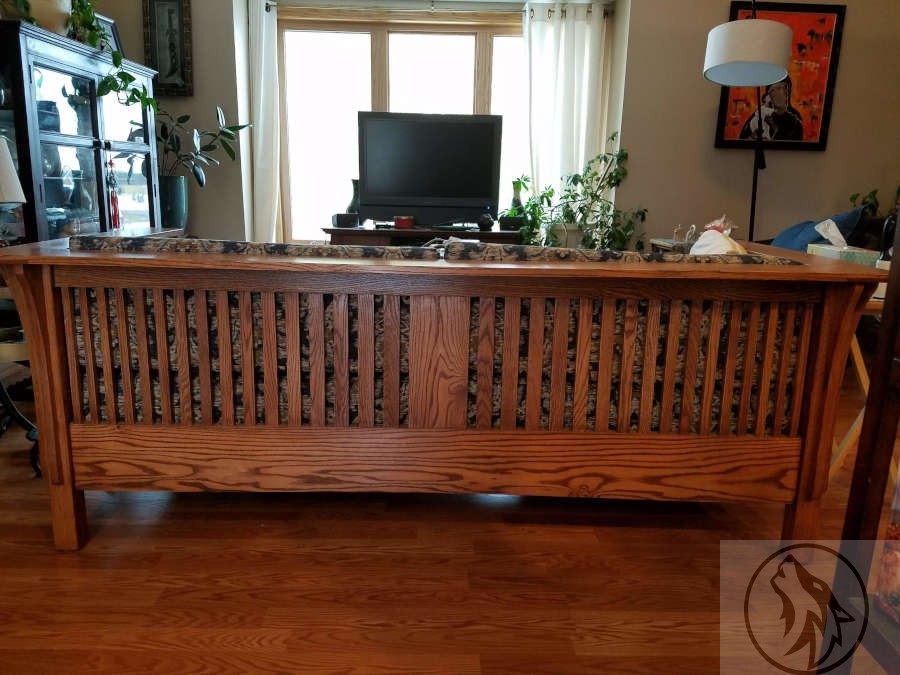
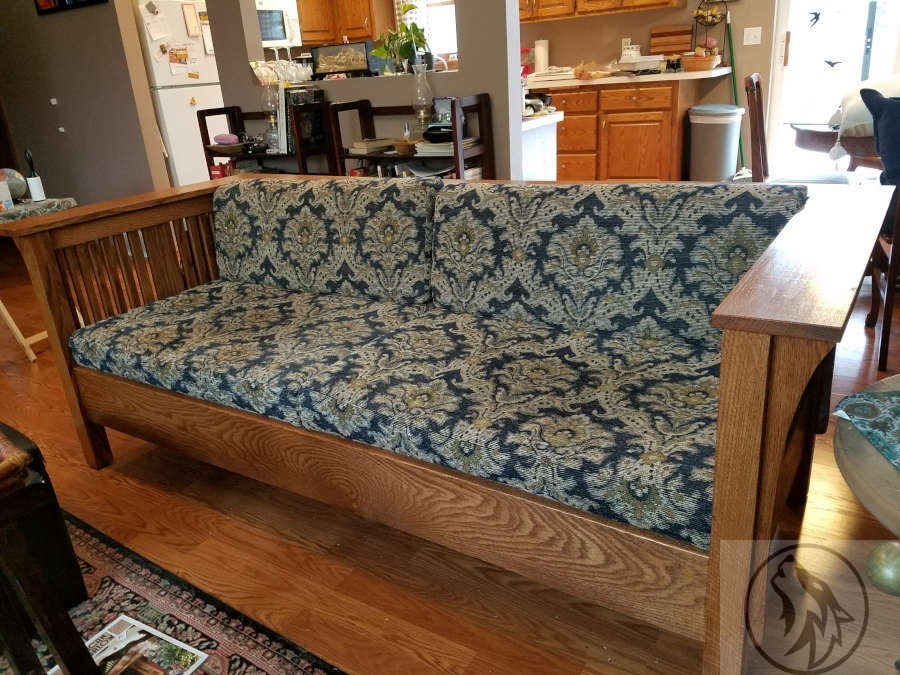
My first piece of furniture was a Mission (Arts and Crafts) style Prairie Settle that I started in 2014 and finished in 2016. I had been reading about the Stickleys and was drawn to the American Arts and Crafts so I wanted my first piece to be of that style.
I had been through the old Stickley catalogues online and did some searches for mission style plans. I waffled between chairs, bookcases, tables, and couches (settles). I thunk and thunk and thunk some more, then I talked to Holly incessantly until she said, “just do something and stop talking about it!” I took that as a mild suggestion that it might possibly be time to stop thinking about it and just make a command decision.
I ended up purchasing several sets of plans from Popular Woodworking, Wood Magazine, and one from a website dedicated to furniture plans. I then took bits from each plan and some bits and bobs from other plans I’d seen and
I didn’t want to spend the extra on White Oak, so I chose Red Oak. Even though it was good lumber, I didn’t like working with it nearly as much as the Ash I’d worked with earlier. A lot splinteryer than the Ash.
Finished product.
I started this before I had finished the rocking horse, so it began its life in the basement. One thing about choosing something this size was that I could not do any final glue up in the basement because then I would not be able to get it out, so it ended up being a good thing that it took 9 months to finish.
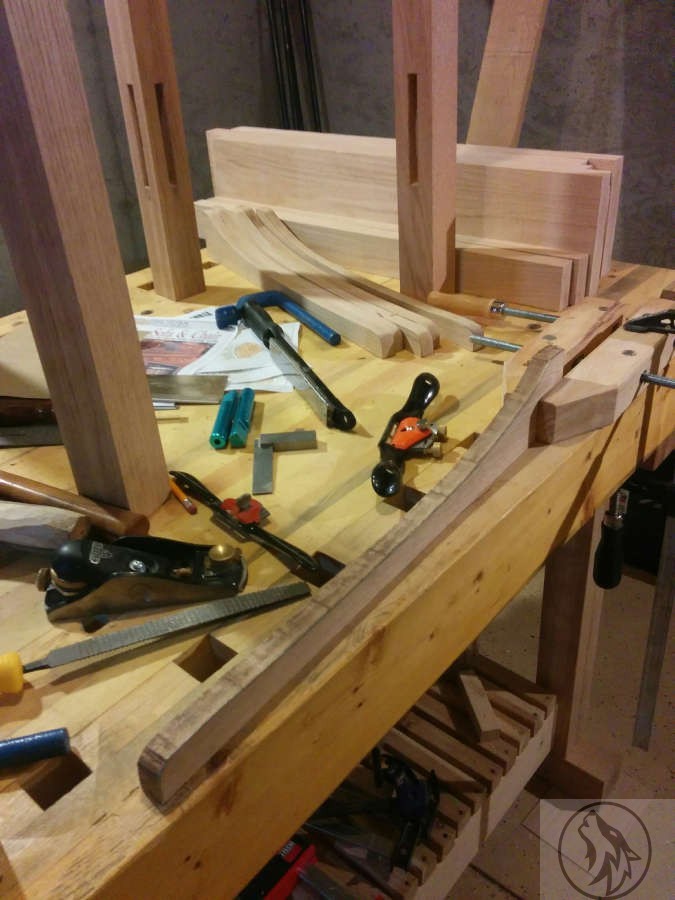
I started with my very favorite part of any project, prepping the lumber.

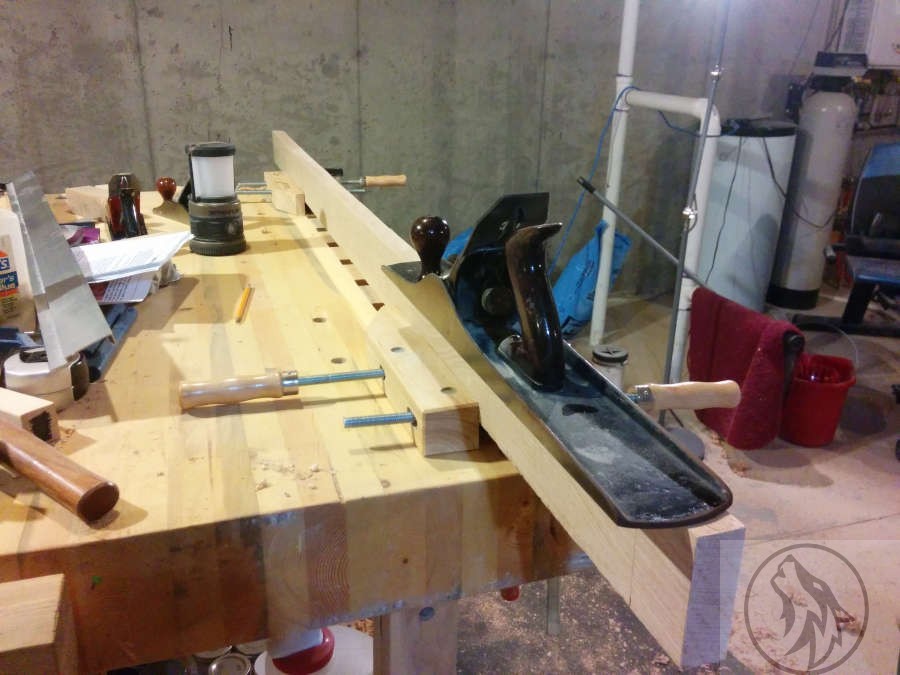
My Sargent joiner.

Since this was a piece of Stickley Mission Style furniture there were many, many mortise and tenon joints.

All were cut by hand since I had not purchased the mortiser yet.

Eventually, I did get a mortiser (a Steel City benchtop), and it did work great. Really nice quality for the price. I used it on a couple of small projects, but later on
when I started the chair project I still preferred to do my mortising by hand.

And the tenons. Lots of tenons. Little tenons, big tenons.


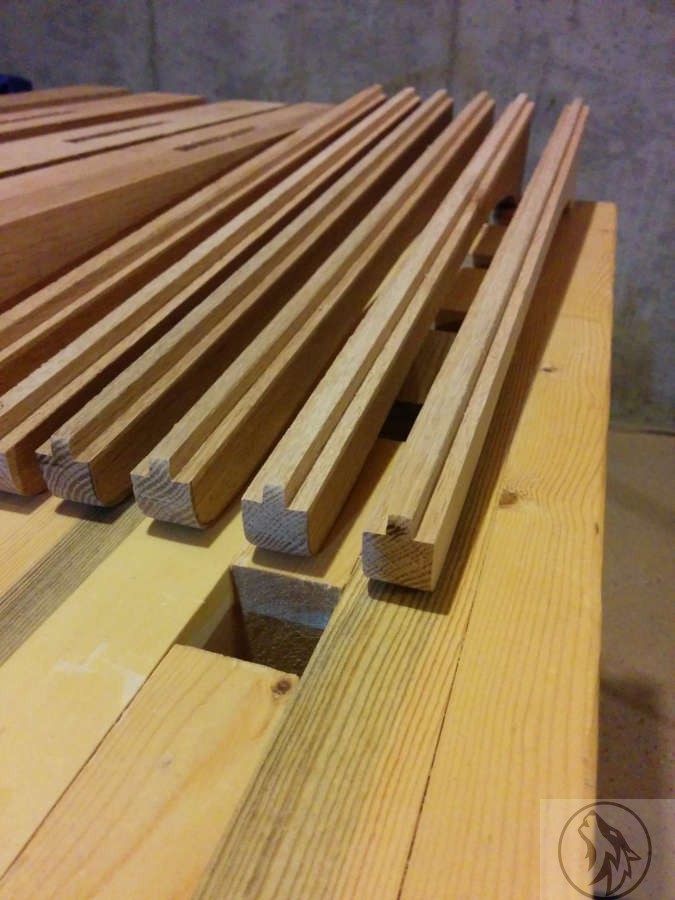
I also cut all of the grooves for the corbels and channels for the spindles by hand. Again, this was very therapeutic and cathartic. I’d spend days in the basement, mallet and chisel in hand. tap, tap, tap. Reposition my hands. tap, tap, tap Reposition. tap, tap, tap.
tap, tap, tap…
And then cleaned them out with the Stanley #71 router.
Next came the corbels. Cut on the bandsaw, then finished with hand tools.


The tongues were all done with the Anant rabbet plane.
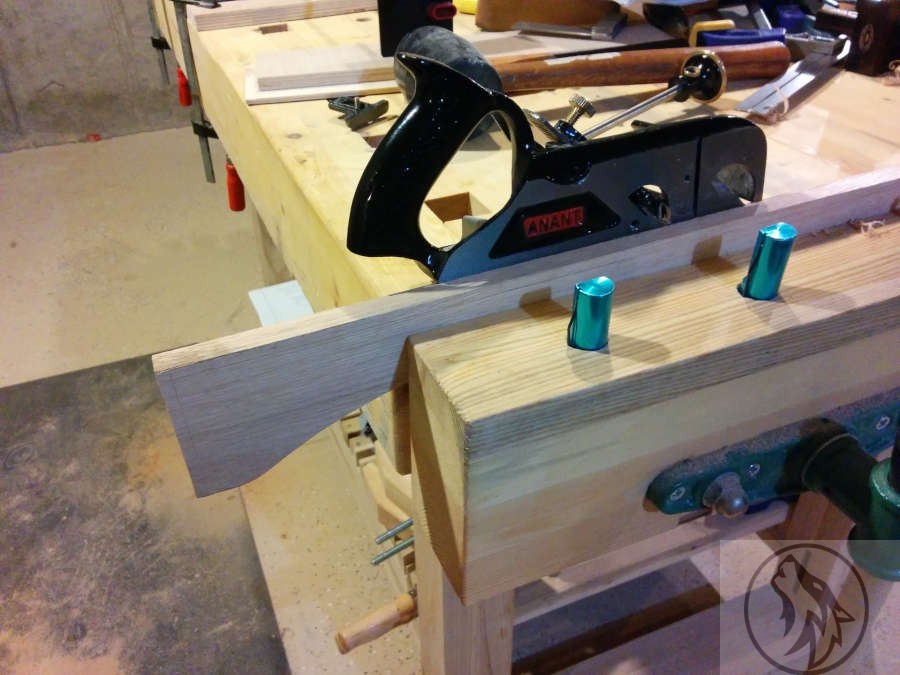
I had read a few bad reviews about Anant planes, but I was able to look at this one before buying it and couldn’t find anything extraordinarily wrong with it so I bought it. After using it for a while the threads for the fence started to get loose and blade cap screws and threads started to do the same. I used this plane through quite a bit of this project,
but eventually got an old Stanley #78 with both fences. I won’t be buying Anant tools anymore, but I wouldn’t have that knowledge or experience if I hadn’t made that mistake. You don’t really know what a tool is like until you’ve used it yourself. Online reviews are a great general guide, but they can’t make that decision for you.
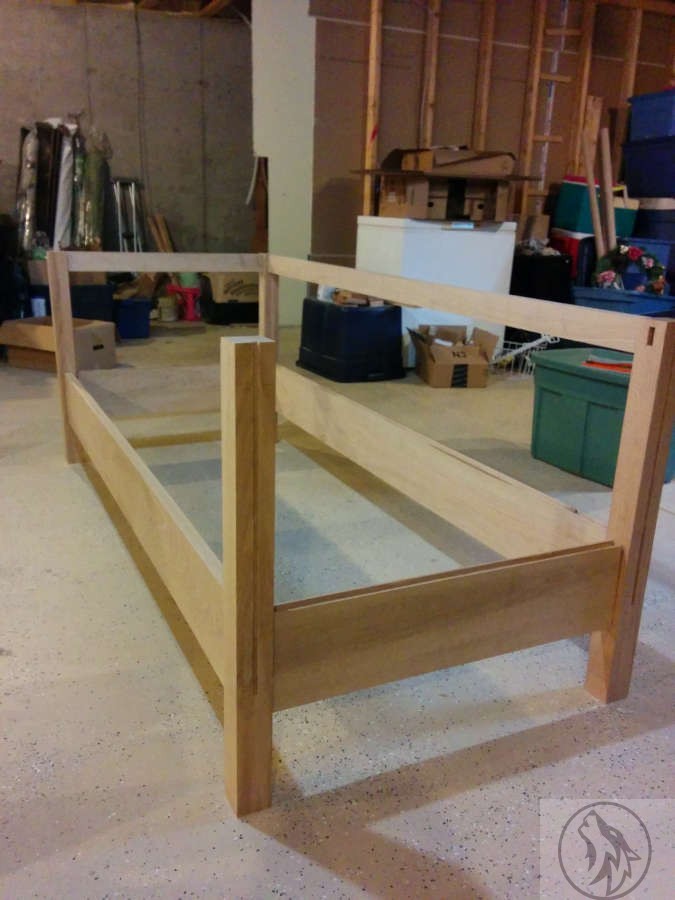
I started dry fitting in the basement, but knew right away that I’d have to move to the garage for the big glue up. I did, however, glue up the side panels in the basement.

What a monster. This is when I started realizing how big this couch was going to be.

Some more fitting and fiddling before I started with the spindles.
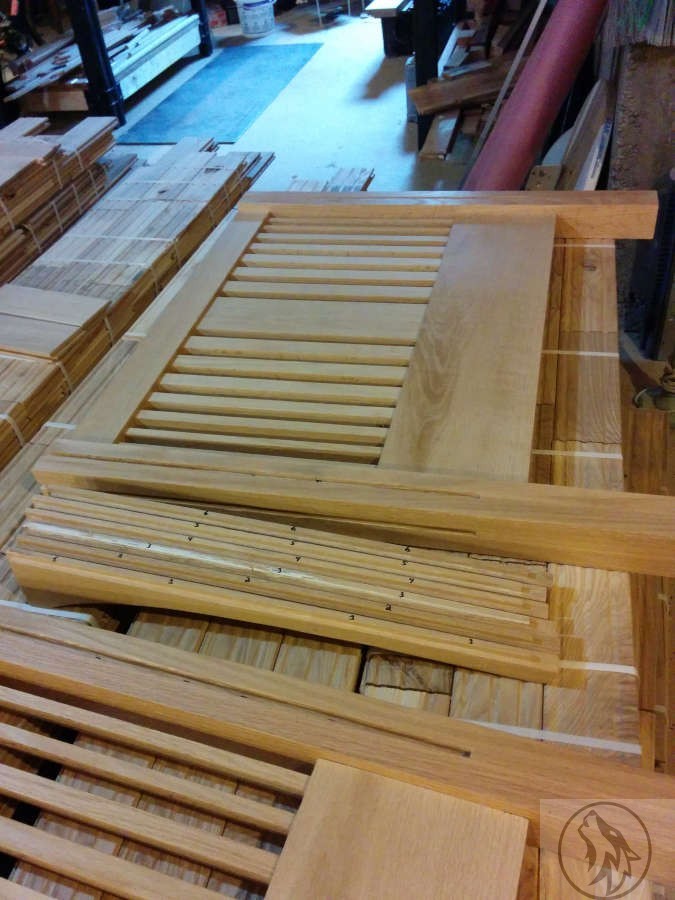
The flooring that these are laying on is for another project I have going on upstairs. We had already ripped up the carpeting from the entire top floor of the house and had been walking on plywood for almost a year. I eventually took some time off from work so I could get going on this. It was all cabin-grade ash (the lowest grade of flooring you can get) with a lot of color variation as well as some damaged pieces. But it turned out to be the best thing we could have done for the house. However, that story is for another post.

After fitting the spindles and spacers. This was a very fiddly process, since I was working with spindles that had to be symetrical as well as gradually increasing in width. I ended up with two thin ones on each side, then increasing the width by 1/8 inch for each of the others (I think). I messed around with this formula until I got something that looked right to me, so it probably wasn’t an 1/8 for each one.
I also had to keep in mind that each side had to be mirrored.
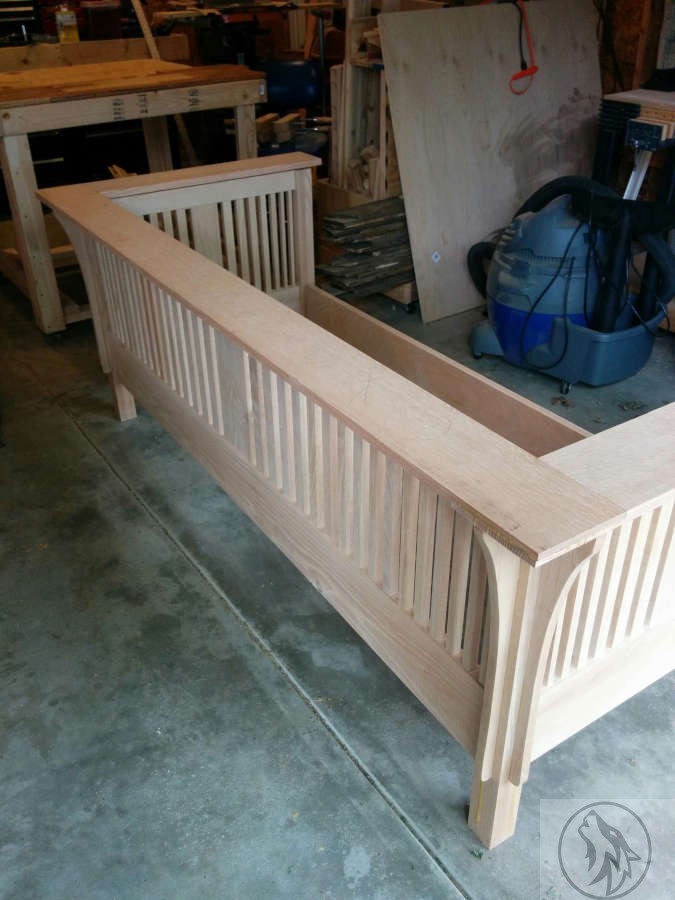
The pair of sides. Almost ready to take it to the garage.

And back in the garage. And you can see just a wee bit more of the fence (you can’t tell I’m proud of that dumb thing can you?).
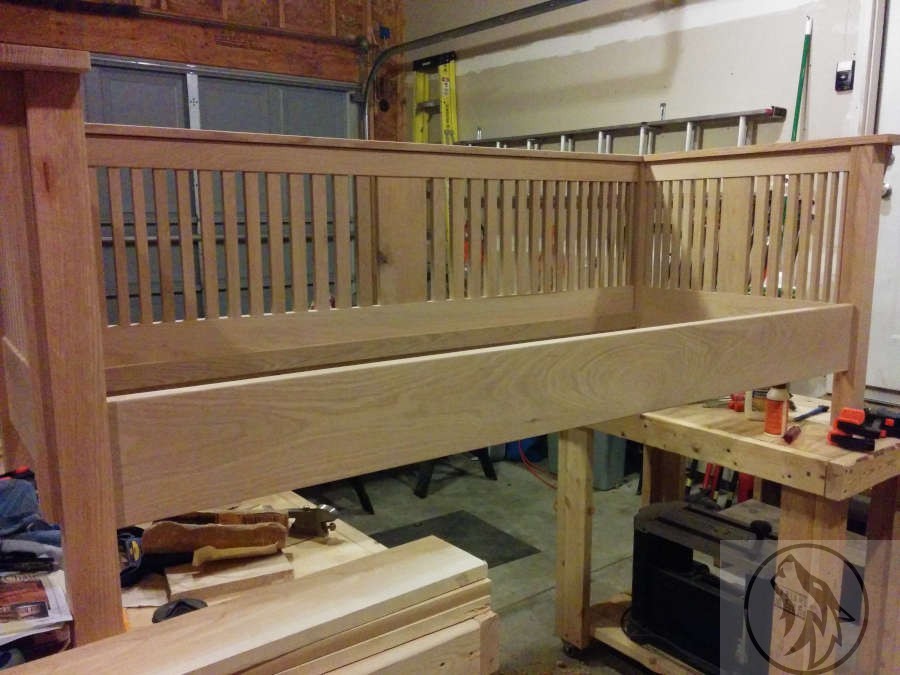
Now I’ve started measuring out the spindles for the back. This was just as fiddly as the sides, but with the number of spindles and the area to cover, I ended up increasing the size of the spindles after every second one.

I spent hours just looking at spindles. I had bunches of different widths to play with and would get them spaced, look at them, take them out, put different ones in and spaced, look at them, take them out… yadda, yadda, yadda, and I’m finished.
I like this look and will probably try a variation on this sometime in the future, when I make my next piece of Mission style furniture.

It’s starting to look like a couch. And Ruby was feeling a bit camera shy.
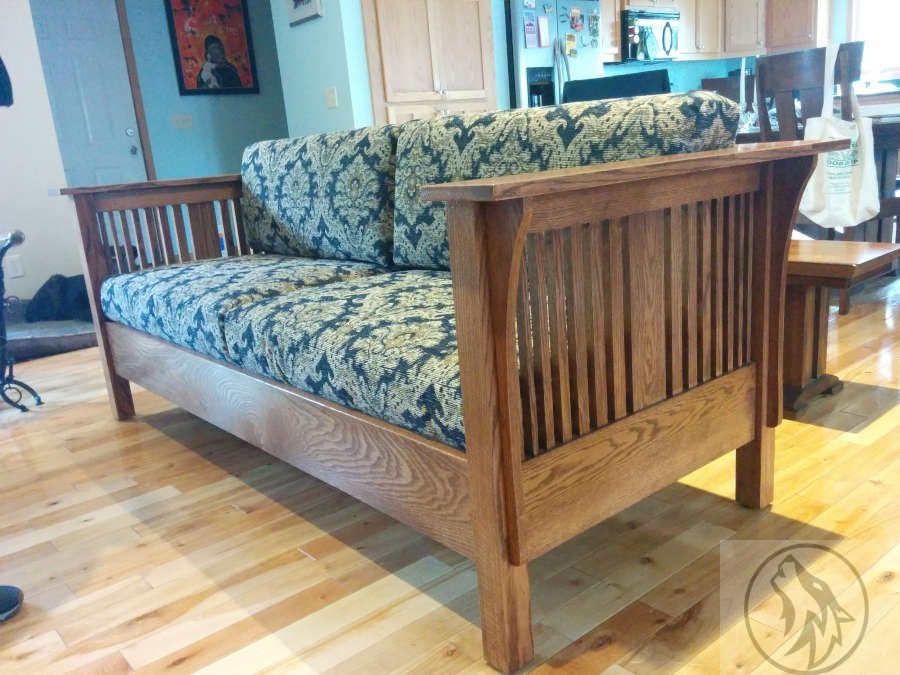
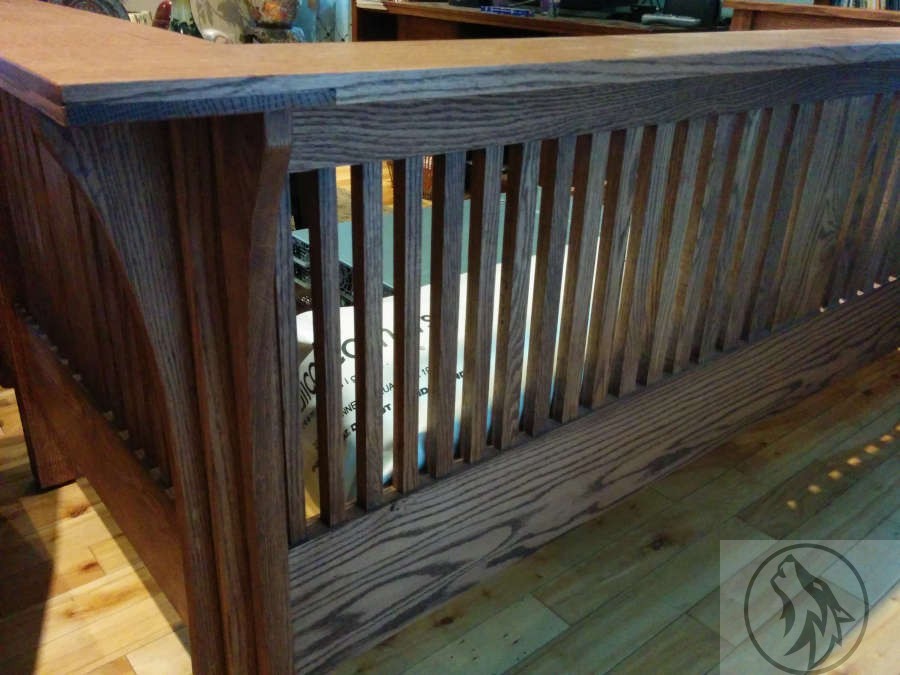
The 1/4 sawn Red Oak, looked beautiful. The medullary rays were the star of the show. The arm and back rest had not been glued on yet, I was still getting the grooves to line up. Rather than just do dowels between the top and the body, I made long tenons at the top of each corbel and then transferred those to the bottom of the arm and back rest. This was not easy, but it did make for a very sturdy construction.

The top has been fit and glued. You can see on the left that a splinter had snapped off. I filled and did my best to color it. Once the stain and shellac were put on, it was less visible. If only I’d had my training with Graham and Clare at Chippendale Furniture School then 😉
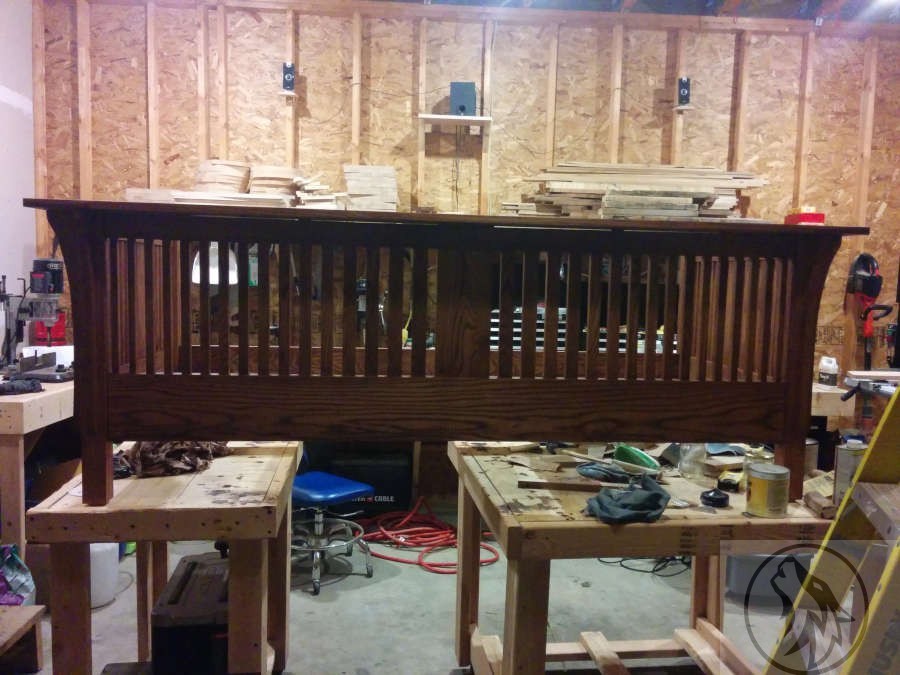
Here she is on some mismatched workbenches. Did I say I was spoiled? Got my jammin’ sound system on the wall so all I had to do was plug my phone in, start Pandora, and go to town on some Dropkick Murphys. Up above (you can see the ladder to the side) there was oodles of storage in the rafters. You can barely see my Steel City mortiser to the left, gathering dust before I sell her.
The color of the stain is called Provincial. We had looked at walnut, gunstock, light oak, dark oak, light walnut, and ebony, but settled on Provincial, which Holly and I really liked. I don’t have the shellac on yet, but it already looks nice.
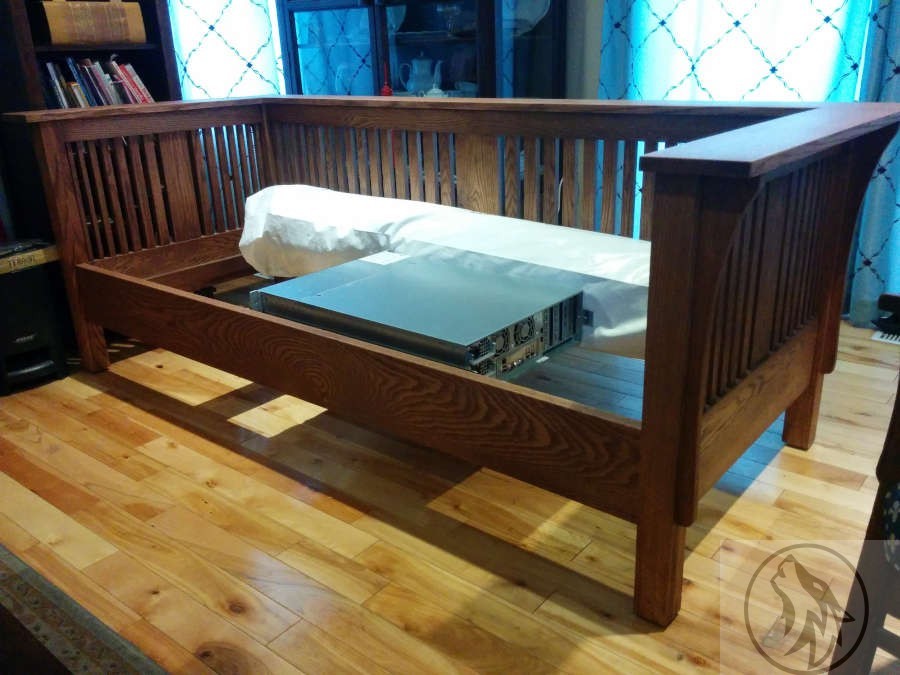
The roll at the back is the fabric we chose and of course the thing in front is a Dell Compellent Storage system that I was getting ready to install somewhere (I think).

I had read some articles on different alternatives for seat frames and I latched on to the woven seats like…like…well, like something that latches onto things.
I looked at some weaving techniques and decided that I would do a very simple weave for this. I also chose twisted sisal because I wanted something durable and natural. I didn’t want nylon or anything similar.
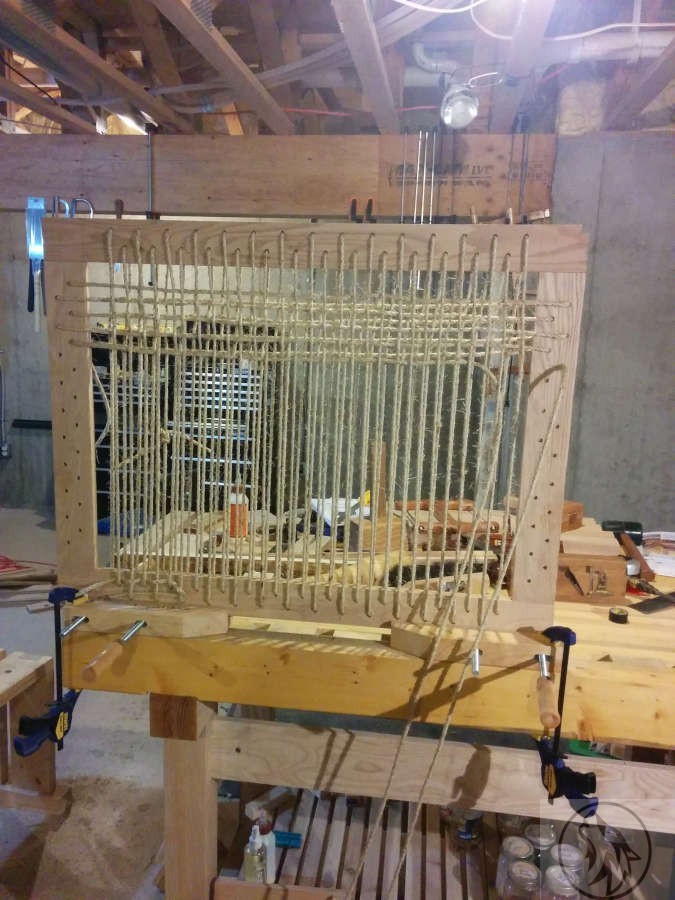
I did the warp first and then the weft. Pulled each row tight and then straightened and tightened more before moving on to the next row.

Here’s a corner showing how I have the ends. No tacks or nails. I just have them cinched under the neighboring warp and weft rows.
As for the durability of this kind of cinching. We had this couch for several years and not only did it hold up, but it didn’t start to sag or need tightening at any time. And this was even after moving twice.


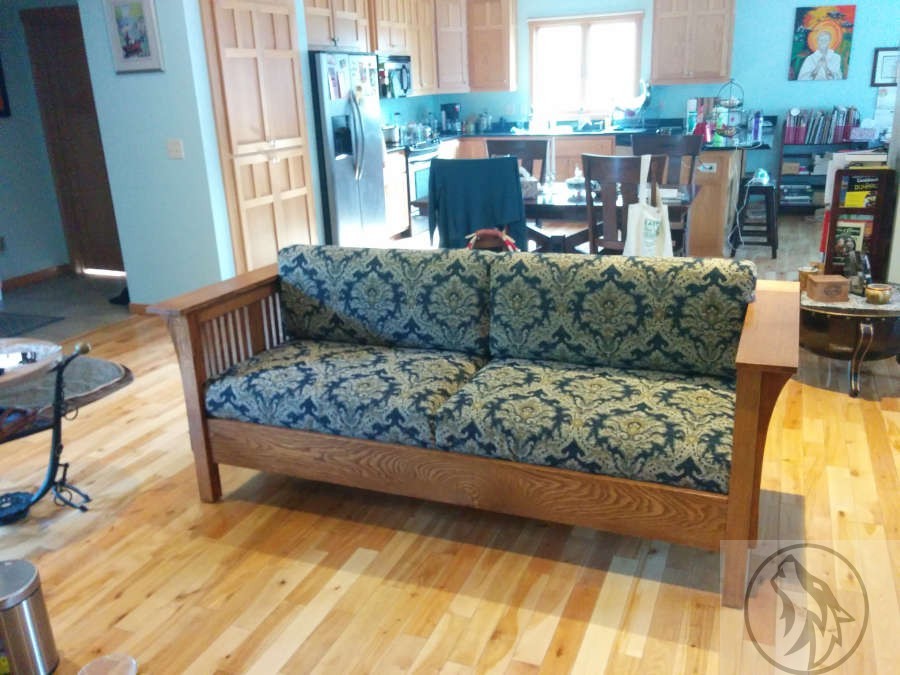
And after nearly a year, we finally have the most comfortable couch/sofa/settle we have ever owned.
Three coats of clear shellac and a couple of coats of beeswax and she was ready to rock and roll.