Visiting a Mid Century Modern home. *Patty, this one’s for you.

Our class at the Chippendale International School of Furniture recently visited the Woodcote House in Midlothian, Scotland. This was only one of several “field trips” that the class went on and was a wonderful and extremely valuable experience for me. I’m not a furniture designer, nor do I play one on TV, but I have designed (to some extent) all of the pieces I’ve made so far and am making now. The most interesting part of this though is that I’ve never really been attracted to the Mid Century Modern style, so it was a thoroughly pleasant and welcomed surprise for me to find that this visit was the most interesting and valuable to me of all of our field trips.

***Note*** That does not mean the other field trips were not each valuable. I found each of these visits to be eye-opening and wonderful with the up close and personal access to old and absolutely breathtaking pieces of furniture and art with the stories and history behind them.

Eleanor Morris of Woodcote, PhD, PCRTPI Scotland was our very gracious hostess and an invaluable wealth of knowledge of the furniture there. She gave us the history of each piece and its significance to Scotland, with some great personal stories behind many of them. Unfortunately, I do not have a great (or even good) memory and can’t remember even one of those stories…but they were great!

Probably the most iconic piece we saw was the Le Corbusier Chaise Longue a Reglage or the LC4 or, I think, the B306, which sounds like a military bomber jet.
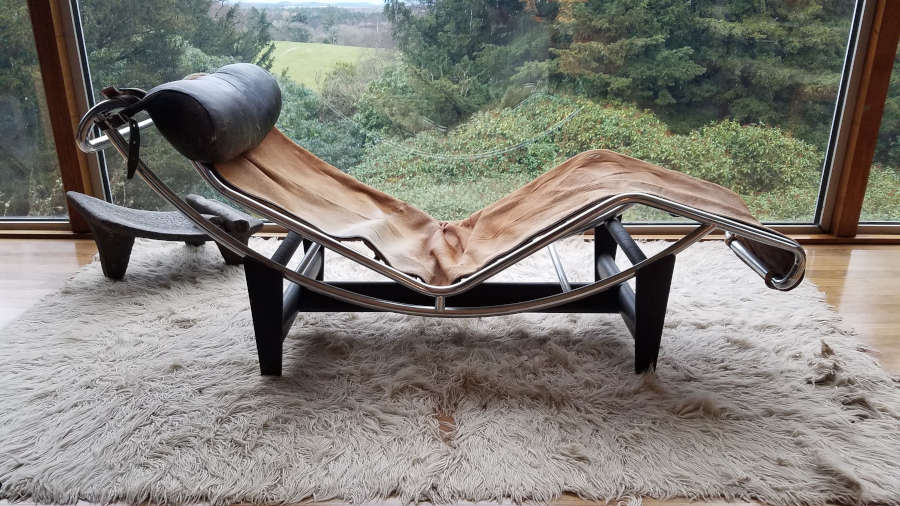
Le Corbusier Chaise Longue.

An early version of this had taller back legs. This one has a calfskin seat with chrome tubing and rubber guides so the seat frame doesn’t slip and slide while you are trying to sit down. It was designed by Le Corbusier, with Pierre Jeanneret and Charlotte Perriand. It has been in production since the 1930s, first made by Thonet and since the 1930s by Cassina.

There were also a pair of LC3 Grand Confort “Cushion Baskets” from about the same time in calfskin.

Le Corbusier LC3 Grand Confort (not a misspell) Cushion Baskets.

I sat in one of these for a bit, and even after 54 plus years (at least as old as I am) they are still very comfortable.

Next are some pieces by Mies van der Rohe. The Barcelona chairs and divan.
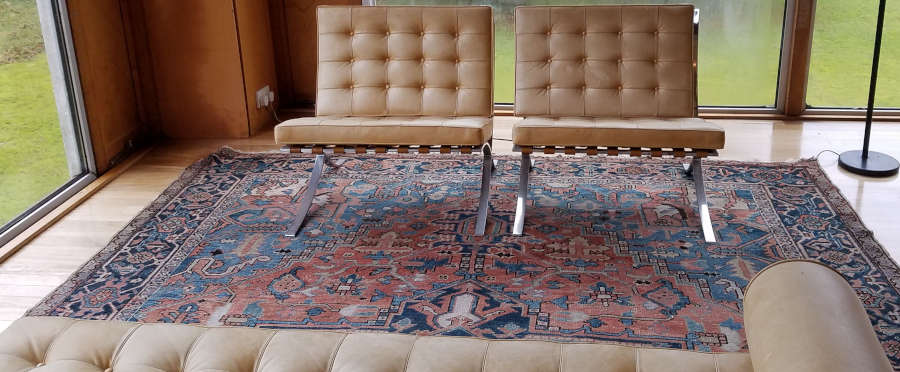
A pair of Barcelona chairs by Mies van der Rohe.
Barcelona divan (couch, daybed) in leather and possibly African Mahogany with a steel frame.

The couch was designed for a New York architect in the 1930s and became famous when it was shown in the Glass House, which was completed in 1949 in New Canaan, Connecticut.

Knoll took over production in 1964 and it wasn’t until 1987 that the divan was called the Barcelona (like the chair) because of its resemblance to the chair.
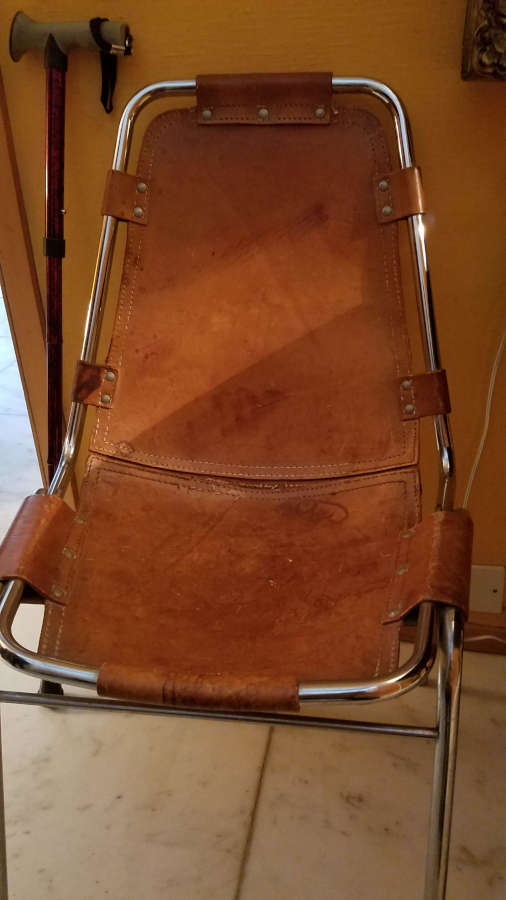
Les Arcs chair

The Les Arcs resort chair, by Charlotte Perriand (or Italian designer DalVera). I’ve seen some pictures of these with black steel tubing. They were designed for the Les Arcs ski resort in Savoie, France.
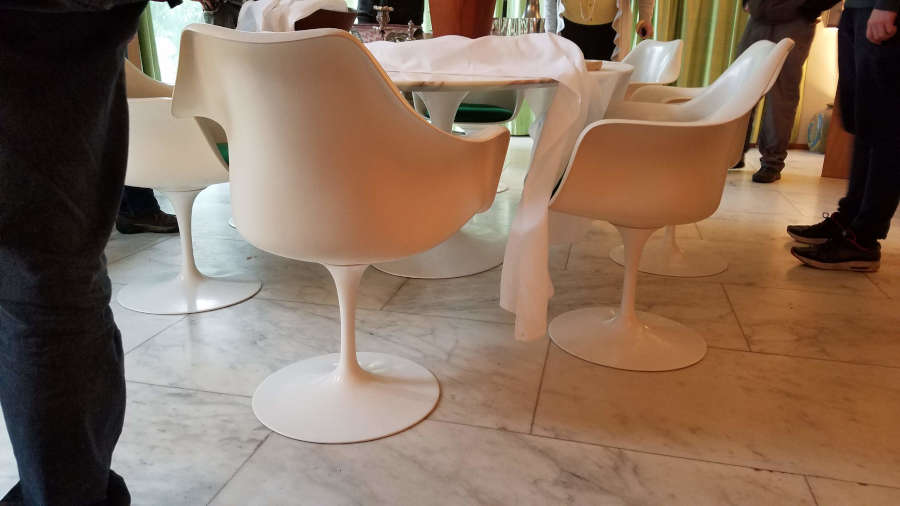
Tulip table and chairs.

The Tulip table and chairs by Eero Saarinen were the first pieces we saw when we entered the house. The chairs were surprisingly comfortable and sturdy, even for a heavier person as myself. The table caused a bit of a stir when it came to Scotland. Seems that for safety reasons it was supposed to have two bases. Even with a half dozen of us sitting at the table, it was never tippy or unstable.

Wassily chairs.

Marcel Bruer was influenced by the De Stijl movement while an apprentice at the Bauhaus and drew on the bicycle frame as inspiration for the Wassily chair in 1925.

Several of the other students sat in these chairs and said they were quite comfortable.

There were quite a few other very memorable pieces at the house, but they will have to wait for another post.

Campaign Style Furniture design, part 1: brass hardware, straps and corner mounts.

Campaign furniture spanned more than 200 years of English furniture periods from the Georgian through to the mid 20th century. Even though it was around for so long the campaign-style did not change much in those 200 years, which could be attributed to a couple of factors. First, since the furniture had to be mobile and sturdy for use on or near battlefields there are arguably a limited number of ways to build that furniture. Second, the clientele were military officers to begin with, who tended to be staid, conventional, and reserved in their tastes and styles.

I believe the first campaign furniture was made for British naval officers in the early Georgian period (the early 1700s). I’ve perused the Christopher Clarke Antiques Blog and Christopher Schwarz’s book and haven’t found anything definitive on this and will probably follow up with more posts on the history itself.

One feature of campaign furniture that tends to stand out (and is used heavily in contemporary interpretations) are brass coloured straps and hardware.

Brass coloured straps are a decorative element in modern furniture. You will likely find that on modern pieces the straps, corner mounts and related parts are not recessed and installed flush, but are proud of the surface. Another difference is that the straps and hardware will likely be fixed with tacks, pins, or small nails. You may also find the pieces glued to the carcass.

The utilitarian and mobile nature of Campaign furniture means that the brass hardware is functional as well as decorative. Brass straps and corner mounts protect edges and corners. Straps may also help to keep sides from bowing or flexing and creating gaps.

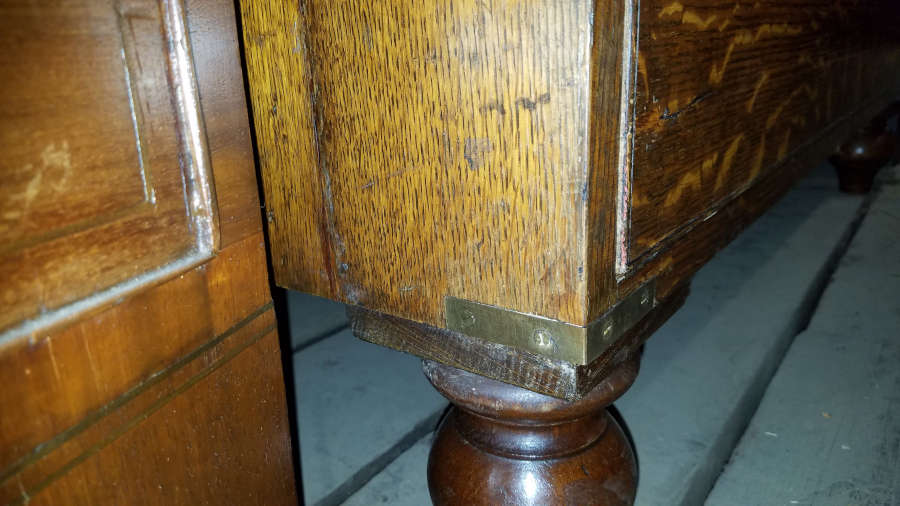
A corner mount.

Corner mounts will usually be flush with the wood, which requires time and effort and would be difficult to automate. The screws will be countersunk slotted screws and again flush so as not to catch on anything while moving it.

Brass straps.

The brass straps are also mounted flush and protect the edges and possibly keep the sides from bowing or flexing since they are of solid wood (mahogany, teak, or in this case, oak).

For part 2 I’ll talk about the drawer hardware.

18th Century Italian chest restoration.

One of the most valuable (to me) skills that my furniture making course has taught me is the core fundamentals of furniture restoration and repair. Graham and Clare, who are both as great at teaching as they are at repair and restoration, have allowed me to look over their shoulders (and incessantly ask questions) as they have worked on pieces. I have also been able to work on some of them myself, which has not only been a great and challenging experience but has been extremely fun as well.

Graham and Clare have both been with the Chippendale International School of Furniture for more than 2 decades and are easy to talk to and wonderful to work with on these great pieces of furniture.

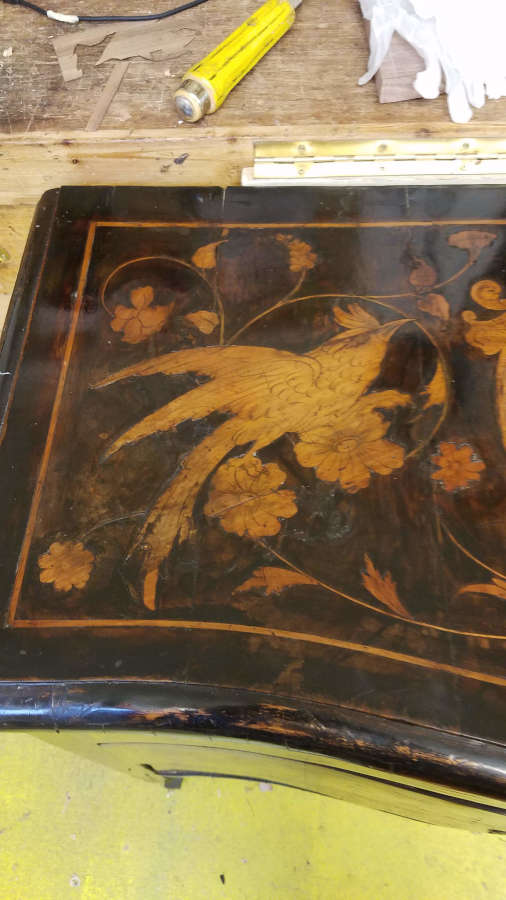
Recently, an Italian chest, much like this one I wrote about previously came into the school for some work.

The goal was to fill/replace the missing pieces and to make the repairs sympathetic to the age and blend them into the overall condition of the piece. If we decided to make the repairs perfectly flat and shiny with no gaps, then each repair would have stood out and looked out of place.

First thing was to lightly clean the areas that needed repair.

Each of these spaces was cleaned with scalpels, awls, and pretty much anything I could get my hands on that was small enough to get into the crevices and cracks. The bottoms of these spaces needed to be relatively smooth so when I fit the replacement pieces of wood in there they would sit flat and have a good stable glue surface.

More of the missing pieces.

The next step was to put tape over each of the empty spaces and lightly shade with a pencil to get the outline of the missing area.

After I had a good tracing of a missing piece, I put the tape on a piece of (in this case) walnut that I’d be using to patch with. I made sure to orient the grain with the existing veneer.

Anselm and Graham believe the table is from around 1760 and the veneer is several times thicker than any you can buy today, so the repair pieces were resawn on a bandsaw to be just a bit thicker than the old veneer. This way we could pare down the patches to the correct level.

Next, I cut out the pieces oversized and then fit them using small files, sandpaper, and scalpels.

This shows a couple of different stages. A couple of the spaces have been cleaned, one is ready to be traced, and one has a patch already fit (it still has tape on it).
Another area ready for patching.
And with some of the patches fit.

The next stages were to glue the pieces into their respective spots

Using a combination of tools to shave the patch down a bit.

Once the patches were in and the glue dried, I used a combination of water dies to get the patches to blend with the background. I then used coloured wax sticks and melted a mix of colours to fill and blend the repairs. (I don’t have pictures of these steps because once I got into it I was so engrossed that I forgot). Next was a light going over with some black wax, to blend all of the repairs with the rest of the table top.

As always, the repair and restoration is just a wonderful experience.