Quick interruption. I have set this website up in chronological order. If you’d rather jump to the latest posts, please use the archive links to the right.
My introduction to woodworking was watching Norm Abram on the New Yankee Workshop and Roy Underhill on the Woodwright Shop on my local public TV station. At the time I was also watching This Old House (when Bob Vila was still on). Even though I did grow up around construction (grandfather was a carpenter, father was an electrician), I went in a different direction until much later in life.
Like most everything else I’ve been curious about, I was very academic (read nerdy) in how I pursued woodworking. Before I purchased any tool or lumber, I read about furniture making and woodworking in general. I followed Norm, Bob, and Roy and then through them, I learned of other woodworkers and scoured the Internet for content. I picked up on Tom Fidgen, Paul Sellers, Elia Bizzarri, Curtis Buchanon and many others. I lurked on dozens of woodworking forums, watched videos and bought books until I was ready to start buying tools.
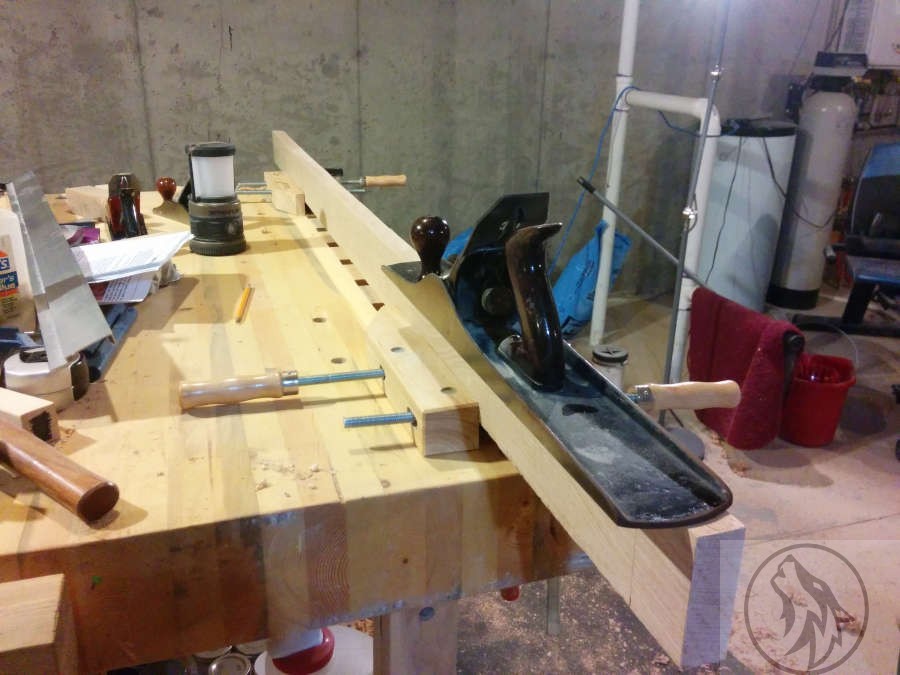
My favorite hand plane.
I loved my job in IT but knew I needed something to take the edge off after a tough day/week/month, so as I chose my first tools I already knew that I would be primarily unplugged as my intent was to have a quiet (as opposed to the loud datacenter) and relaxing introduction to my new hobby. That said, I did follow the recommendations of a few online and fitted my shop with a 14-inch bandsaw, a 12-inch planer (thicknesser) and a benchtop mortiser and drill press. Of those power tools, the only one I really ended up using on a regular basis was the bandsaw (and to a much lesser extent, the planer).
This blog is about the path I’ve taken as a woodworker. I’ll talk about projects, books, videos, pretty much anything related to woodworking.
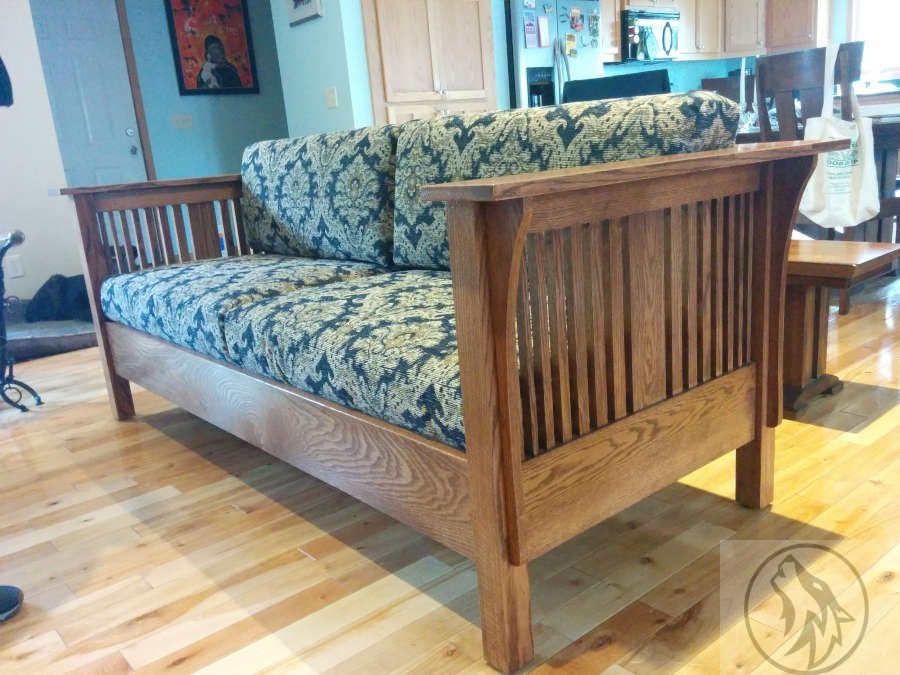
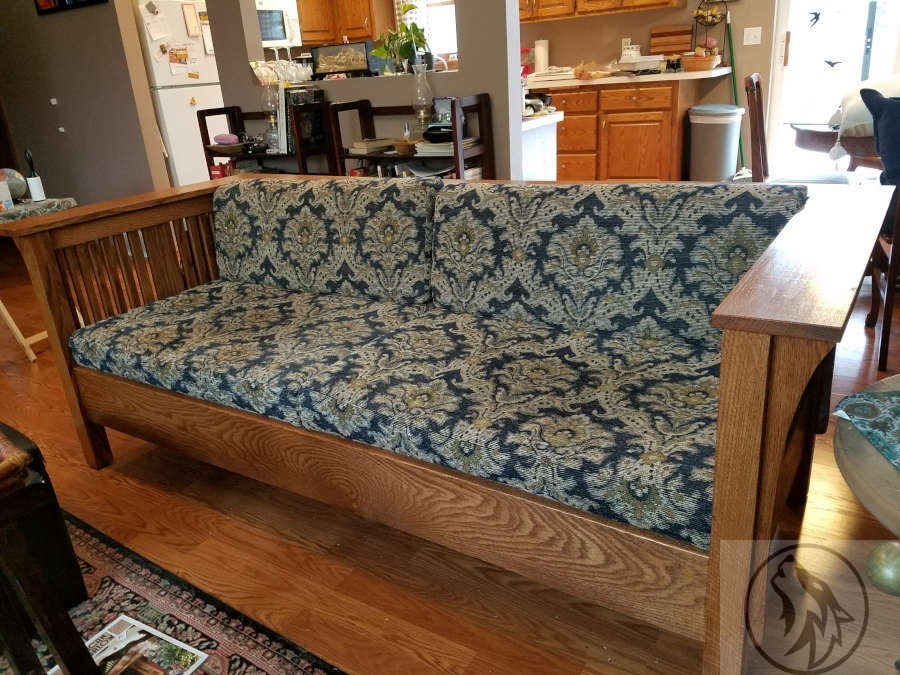
My first piece of furniture was a Mission (Arts and Crafts) style Prairie Settle that I started in 2014 and finished in 2016. I had been reading about the Stickleys and was drawn to the American Arts and Crafts so I wanted my first piece to be of that style.
I had been through the old Stickley catalogues online and did some searches for mission style plans. I waffled between chairs, bookcases, tables, and couches (settles). I thunk and thunk and thunk some more, then I talked to Holly incessantly until she said, “just do something and stop talking about it!” I took that as a mild suggestion that it might possibly be time to stop thinking about it and just make a command decision.
I ended up purchasing several sets of plans from Popular Woodworking, Wood Magazine, and one from a website dedicated to furniture plans. I then took bits from each plan and some bits and bobs from other plans I’d seen and came up with my plan. I didn’t want it to look like every other settle I’d seen, so I modified the spindles, length, and seat frame.
I didn’t want to spend the extra on White Oak, so I chose Red Oak. Even though it was good lumber, I didn’t like working with it nearly as much as the Ash I’d worked with earlier. A lot splinteryer than the Ash.
Finished product.
I started this before I had finished the rocking horse, so it began its life in the basement. One thing about choosing something this size was that I could not do any final glue up in the basement because then I would not be able to get it out, so it ended up being a good thing that it took 9 months to finish.
I started with my very favorite part of any project, prepping the lumber.
My Millers Falls plane in the background. My Sargent joiner.
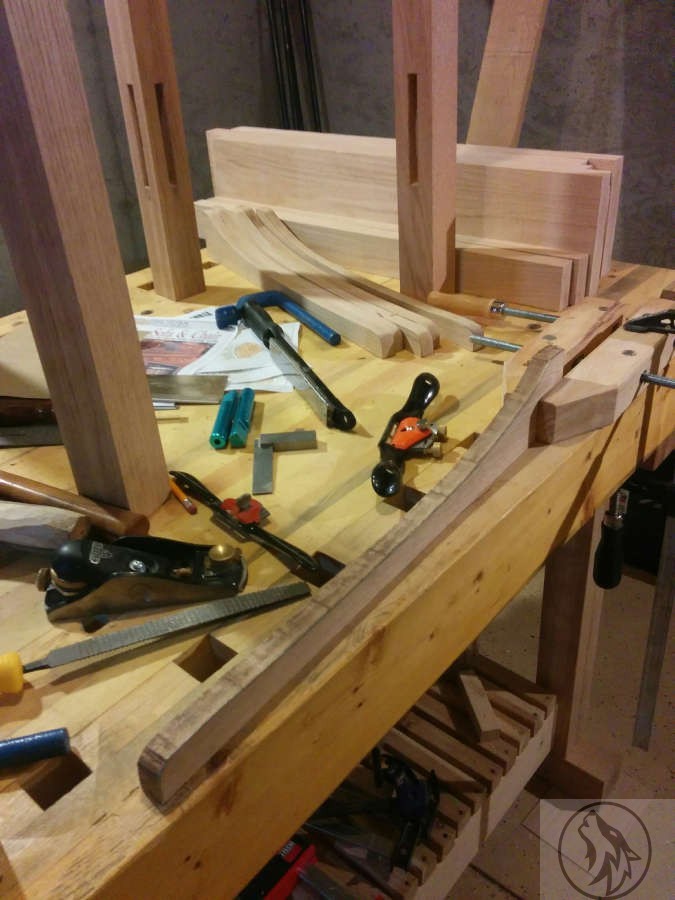
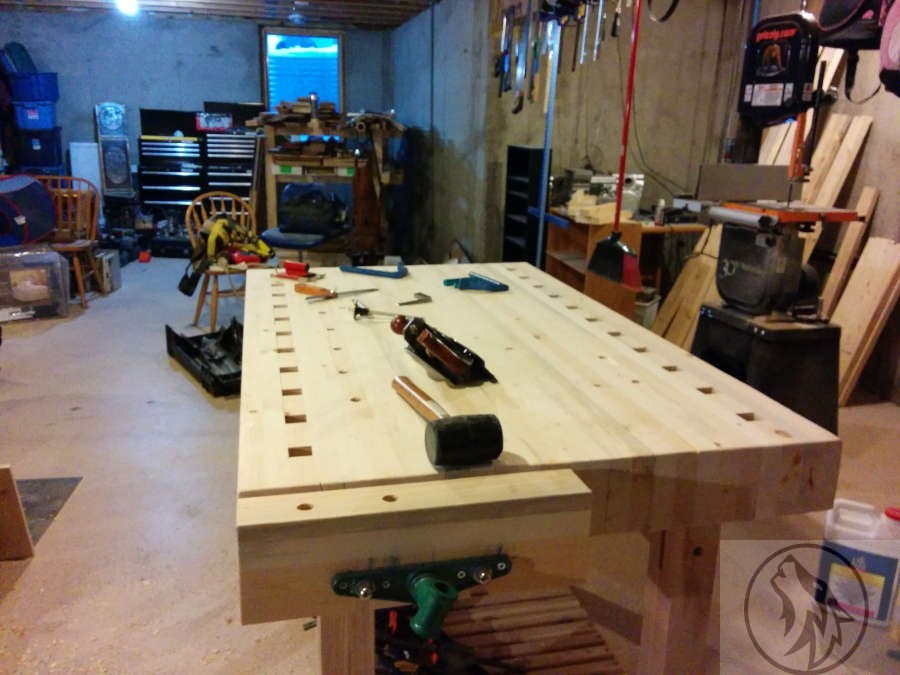
Since this was a piece of Stickley Mission Style furniture there were many, many mortise and tenon joints.
All were cut by hand since I had not purchased the mortiser yet. Eventually, I did get a mortiser (a Steel City benchtop), and it did work great. Really nice quality for the price. I used it on a couple of small projects, but later on when I started the chair project I still preferred to do my mortising by hand. And the tenons. Lots of tenons. Little tenons, big tenons. Mitred tenons. I also cut all of the grooves for the corbels and channels for the spindles by hand. Again, this was very therapeutic and cathartic. I’d spend days in the basement, mallet and chisel in hand. tap, tap, tap. Reposition my hands. tap, tap, tap Reposition. tap, tap, tap.
tap, tap, tap…
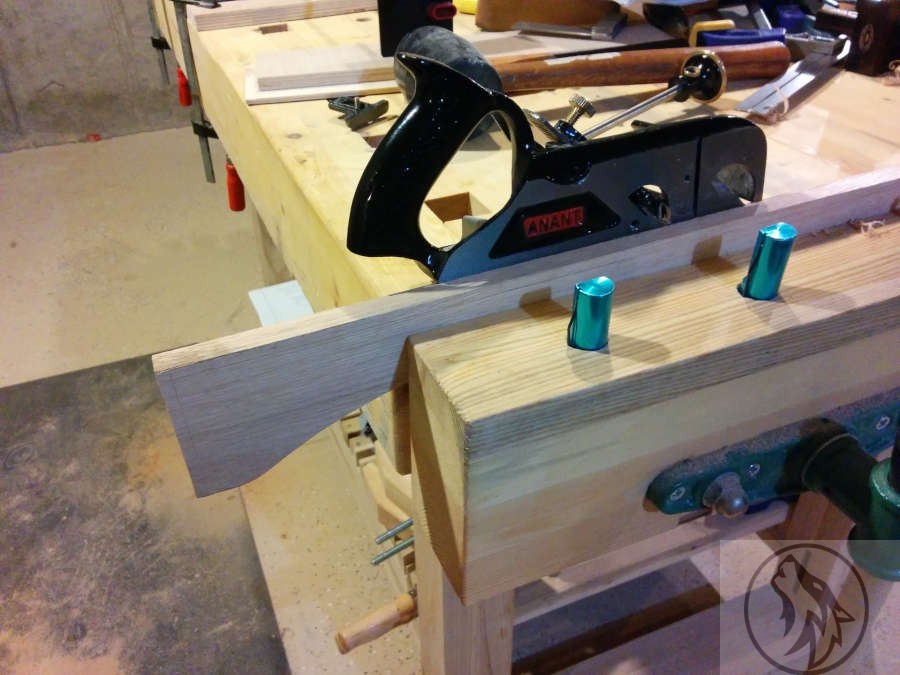
And then cleaned them out with the Stanley #71 router. Next came the corbels. Cut on the bandsaw, then finished with hand tools. The tongues were all done with the Anant rabbet plane. I had read a few bad reviews about Anant planes, but I was able to look at this one before buying it and couldn’t find anything extraordinarily wrong with it so I bought it. After using it for a while the threads for the fence started to get loose and blade cap screws and threads started to do the same. I used this plane through quite a bit of this project, but eventually got an old Stanley #78 with both fences. I won’t be buying Anant tools anymore, but I wouldn’t have that knowledge or experience if I hadn’t made that mistake. You don’t really know what a tool is like until you’ve used it yourself. Online reviews are a great general guide, but they can’t make that decision for you. I started dry fitting in the basement, but knew right away that I’d have to move to the garage for the big glue up. I did, however, glue up the side panels in the basement. What a monster. This is when I started realizing how big this couch was going to be. Some more fitting and fiddling before I started with the spindles.
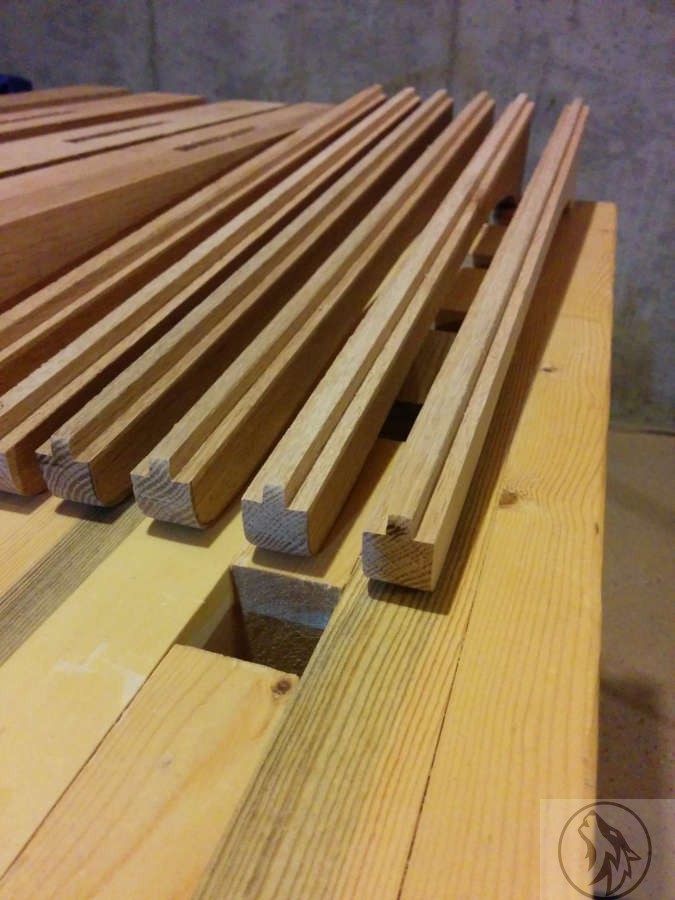
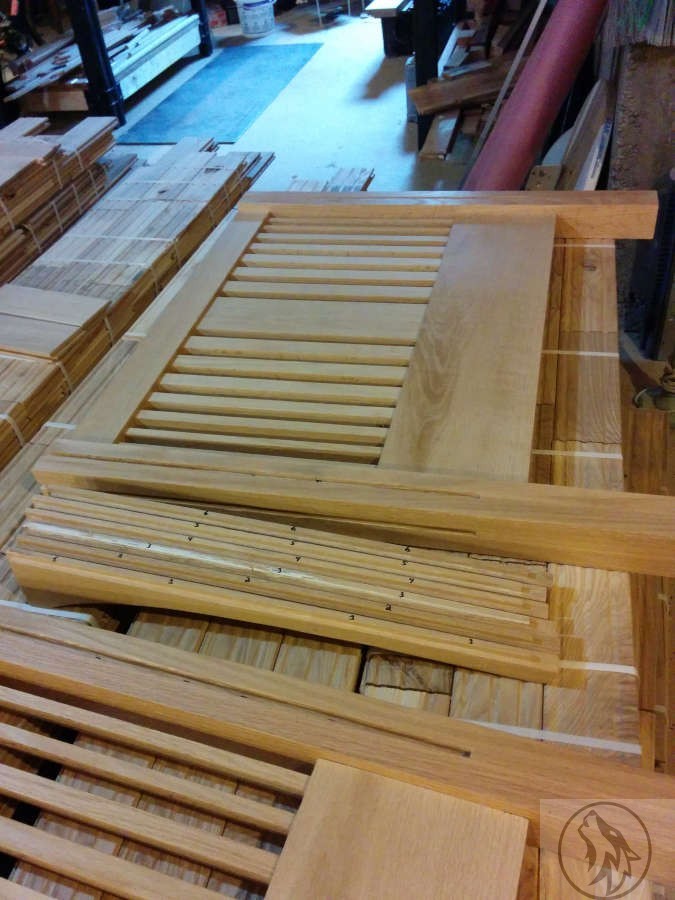
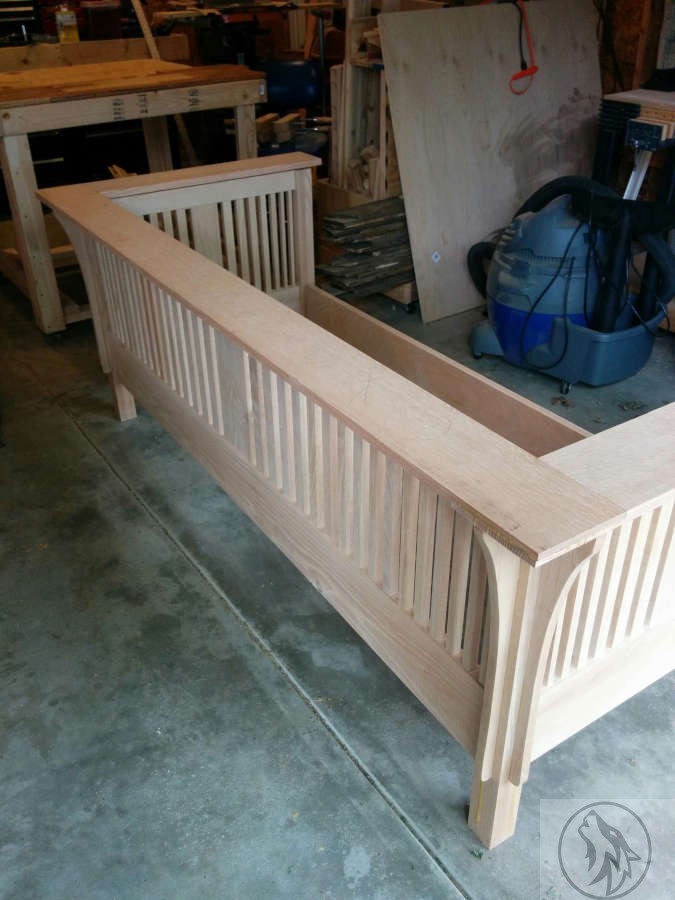
The flooring that these are laying on is for another project I have going on upstairs. We had already ripped up the carpeting from the entire top floor of the house and had been walking on plywood for almost a year. I eventually took some time off from work so I could get going on this. It was all cabin-grade ash (the lowest grade of flooring you can get) with a lot of color variation as well as some damaged pieces. But it turned out to be the best thing we could have done for the house. However, that story is for another post. After fitting the spindles and spacers. This was a very fiddly process, since I was working with spindles that had to be symetrical as well as gradually increasing in width. I ended up with two thin ones on each side, then increasing the width by 1/8 inch for each of the others (I think). I messed around with this formula until I got something that looked right to me, so it probably wasn’t an 1/8 for each one.
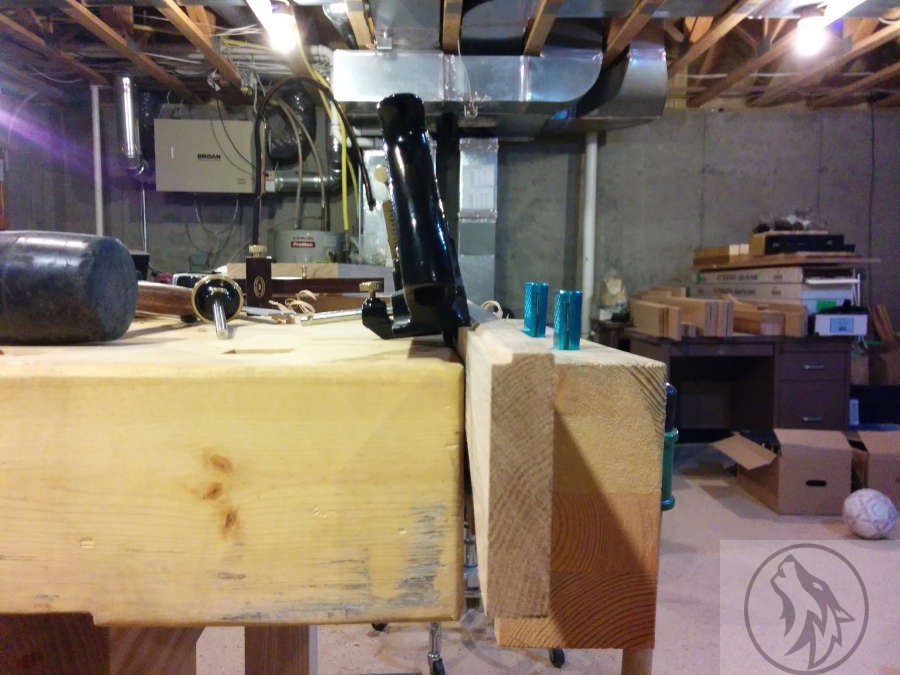
I also had to keep in mind that each side had to be mirrored. The pair of sides. Almost ready to take it to the garage. And back in the garage. And you can see just a wee bit more of the fence (you can’t tell I’m proud of that dumb thing can you?).
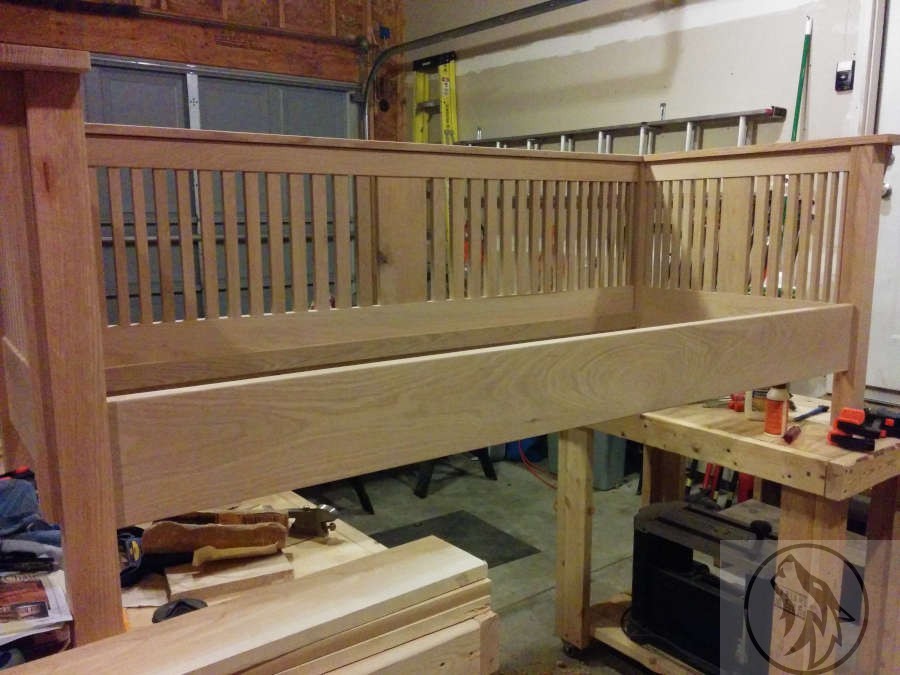
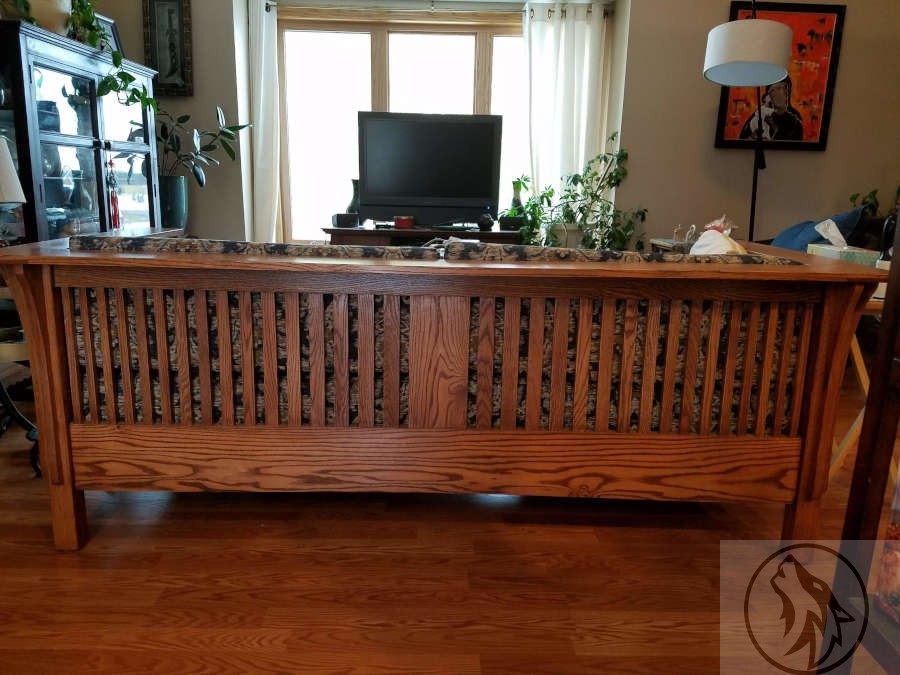
Now I’ve started measuring out the spindles for the back. This was just as fiddly as the sides, but with the number of spindles and the area to cover, I ended up increasing the size of the spindles after every second one. I spent hours just looking at spindles. I had bunches of different widths to play with and would get them spaced, look at them, take them out, put different ones in and spaced, look at them, take them out… yadda, yadda, yadda, and I’m finished.
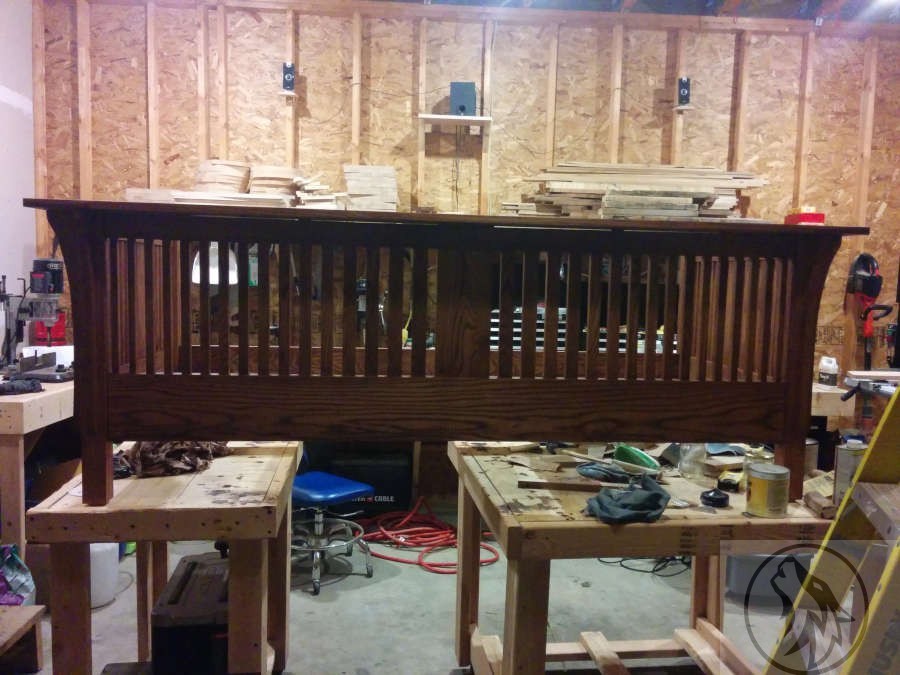
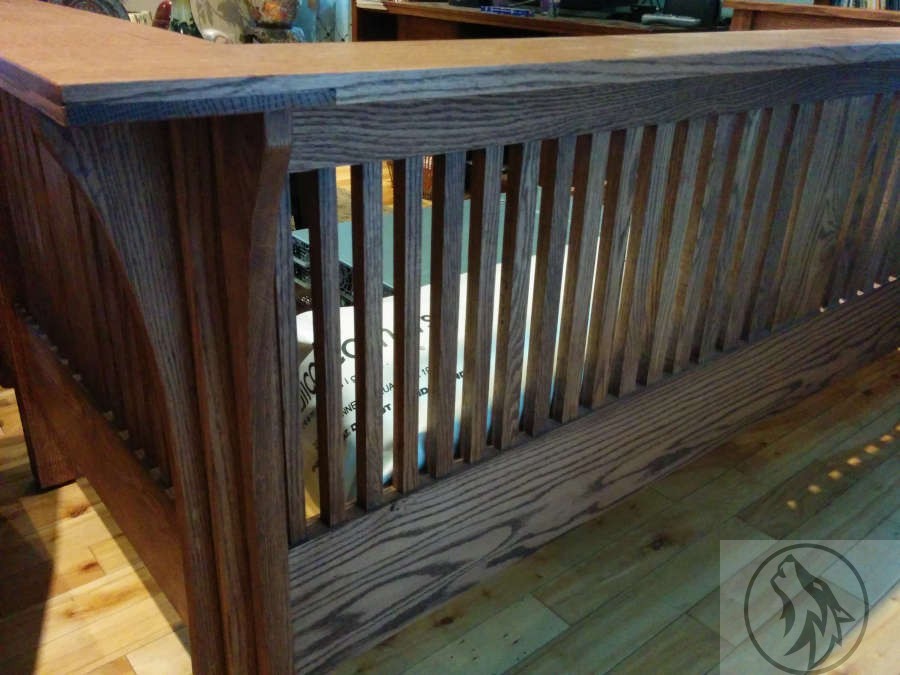
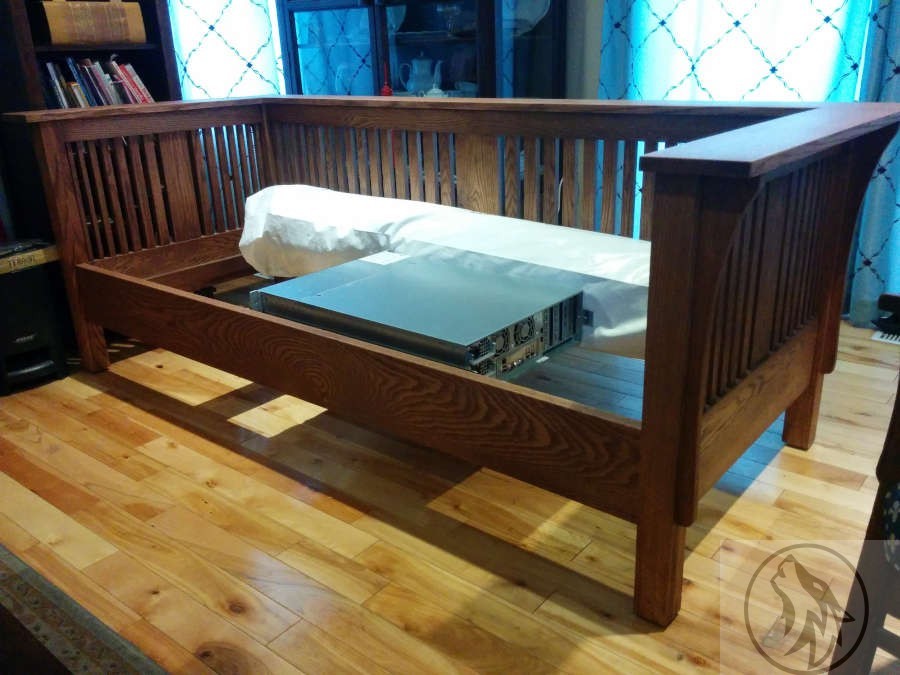
I like this look and will probably try a variation on this sometime in the future, when I make my next piece of Mission style furniture. It’s starting to look like a couch. And Ruby was feeling a bit camera shy. The 1/4 sawn Red Oak, looked beautiful. The medullary rays were the star of the show. The arm and back rest had not been glued on yet, I was still getting the grooves to line up. Rather than just do dowels between the top and the body, I made long tenons at the top of each corbel and then transferred those to the bottom of the arm and back rest. This was not easy, but it did make for a very sturdy construction. Showing the tops of the corbels and the tenons that went into the bottom of the arm and back rest. The top has been fit and glued. You can see on the left that a splinter had snapped off. I filled and did my best to color it. Once the stain and shellac were put on, it was less visible. If only I’d had my training with Graham and Clare at Chippendale Furniture School then 😉 Here she is on some mismatched workbenches. Did I say I was spoiled? Got my jammin’ sound system on the wall so all I had to do was plug my phone in, start Pandora, and go to town on some Dropkick Murphys. Up above (you can see the ladder to the side) there was oodles of storage in the rafters. You can barely see my Steel City mortiser to the left, gathering dust before I sell her. The color of the stain is called Provincial. We had looked at walnut, gunstock, light oak, dark oak, light walnut, and ebony, but settled on Provincial, which Holly and I really liked. I don’t have the shellac on yet, but it already looks nice. The roll at the back is the fabric we chose and of course the thing in front is a Dell Compellent Storage system that I was getting ready to install somewhere (I think). I had read some articles on different alternatives for seat frames and I latched on to the woven seats like…like…well, like something that latches onto things.
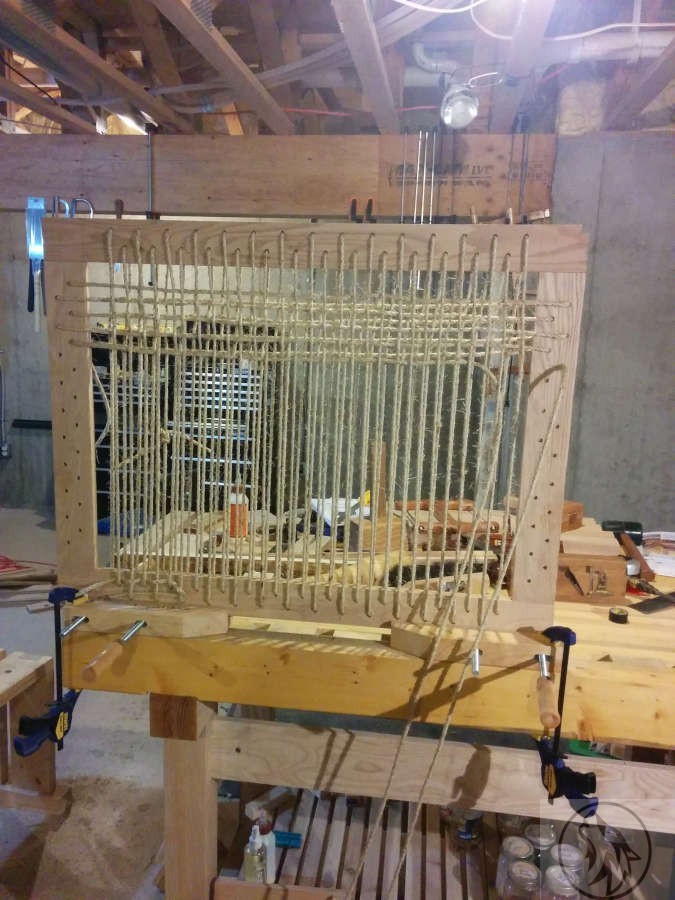
I looked at some weaving techniques and decided that I would do a very simple weave for this. I also chose twisted sisal because I wanted something durable and natural. I didn’t want nylon or anything similar. I did the warp first and then the weft. Pulled each row tight and then straightened and tightened more before moving on to the next row. Here’s a corner showing how I have the ends. No tacks or nails. I just have them cinched under the neighboring warp and weft rows.
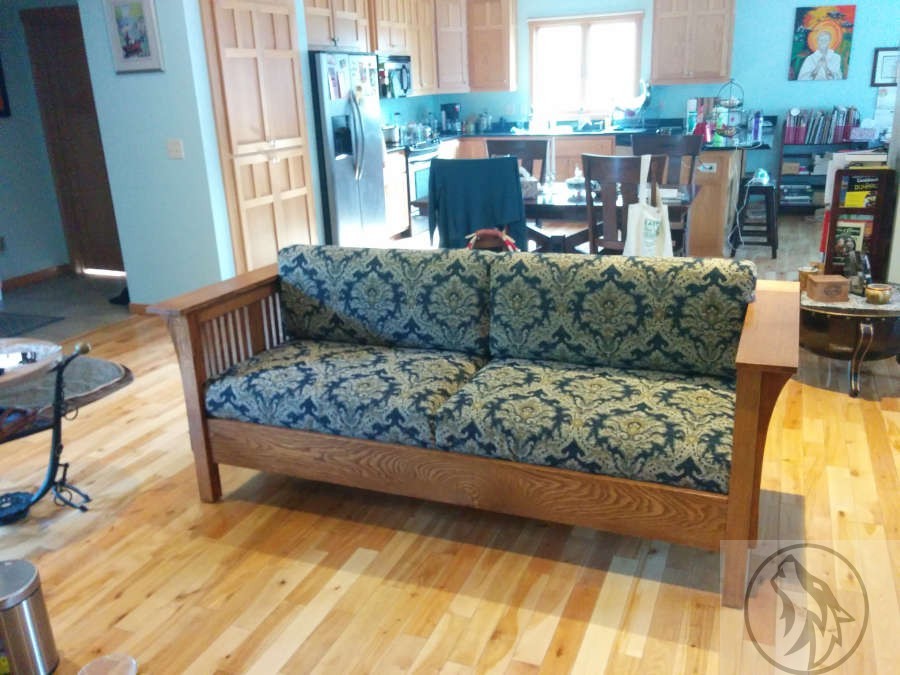
As for the durability of this kind of cinching. We had this couch for several years and not only did it hold up, but it didn’t start to sag or need tightening at any time. And this was even after moving twice. And after nearly a year, we finally have the most comfortable couch/sofa/settle we have ever owned. Three coats of clear shellac and a couple of coats of beeswax and she was ready to rock and roll.
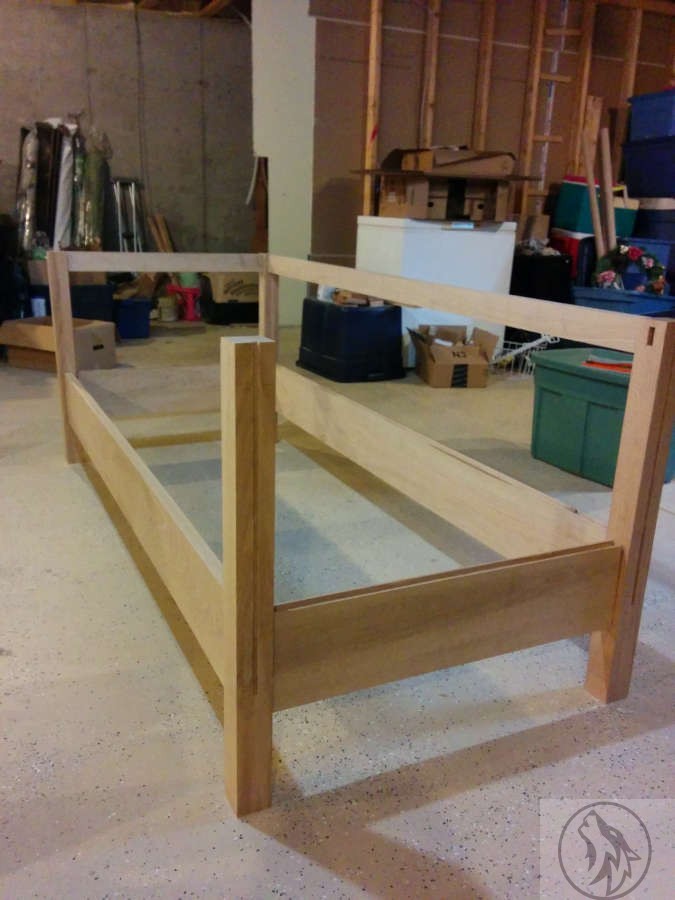
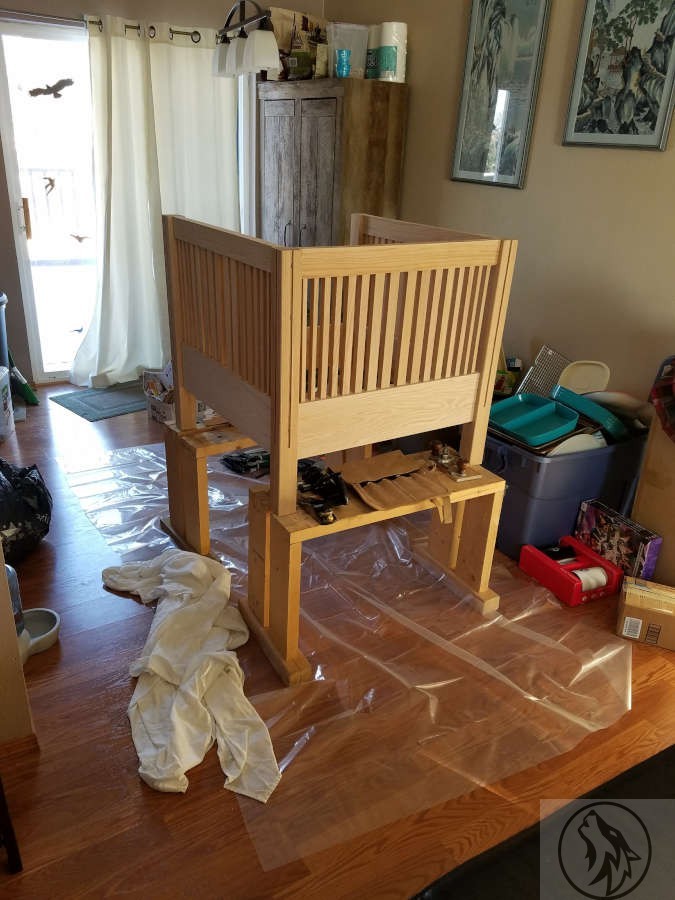
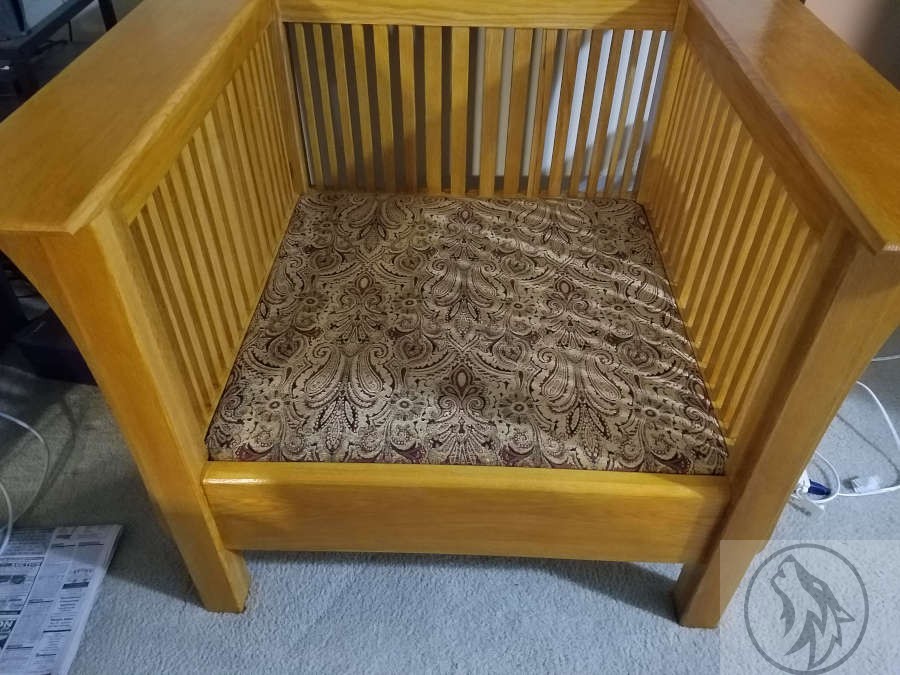
I had been planning to make a chair in the same style of the Prairie Settle because I wanted to fix a few mistakes I’d made with the couch and I just wanted the chair because it’s cool. I still went for the Red Oak because I’m a glutton for punishment. Actually, I don’t remember why I still went with Red Oak, but I’m sure I had a very good reason. There were some measurements for the chair that came with the original plans I’d bought for the Prairie Settle, so I basically made it as a very short version of the Settle.
The build process for this one was rather sporadic, as we moved twice while making it. I started out with the spacious and wonderful garage and basement combo that was a dream.
We then moved to a smaller place with no basement. This was not too much of an issue except in the winter. The garage was not insulated and we were not allowed to heat it (we were renting).
The oak log bench to the left is my bowl carving bench.Our Dining room as my winter workshop.
When the temperature drops below 10 degrees Fahrenheit for an extended period it is difficult to use iron or steel tools. That winter we had snow and cold snaps so I ended up bringing the chair into the house to work on. This introduced some interesting obstacles but also got me thinking about what woodworking and furniture making meant to me and how motivated and dedicated I might or might not be.
But that was not the last move in this build. Alas, we had one more move to go before I finished the chair.
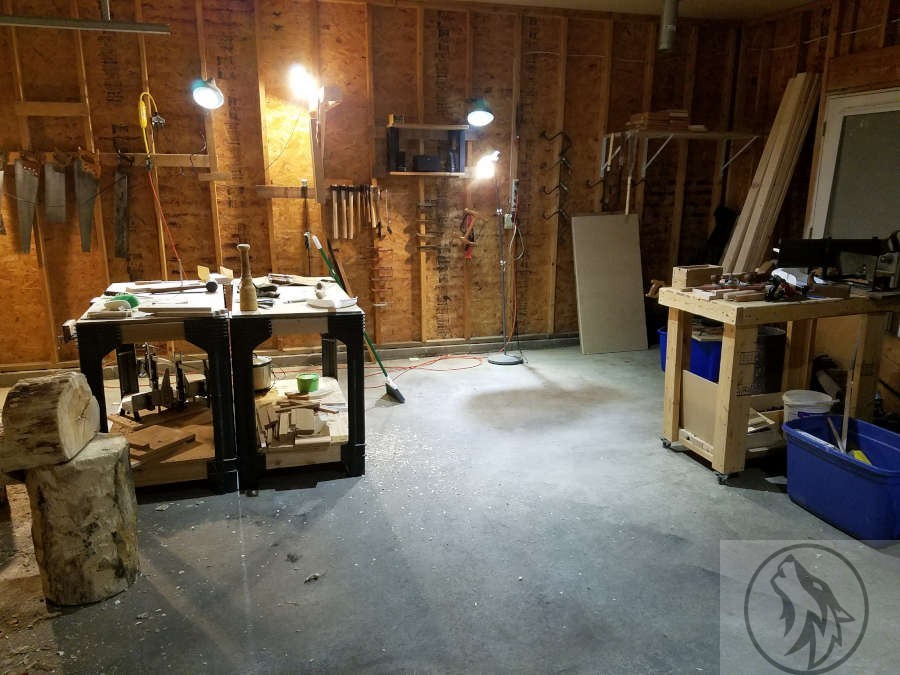
My cozy workshop.
Our final move before the chair was finished was into an apartment. This kind of downsizing introduced so many new challenges and compromises that I honestly think this is where I cemented my love of woodworking.
Our downsizing was all part of a grander scheme so it was all self-induced and not due to a personal crisis or anything.
You can see my fresh air workshop in the background. Working off the back of a pickup and using my carving bench very creatively was actually kind of fun.
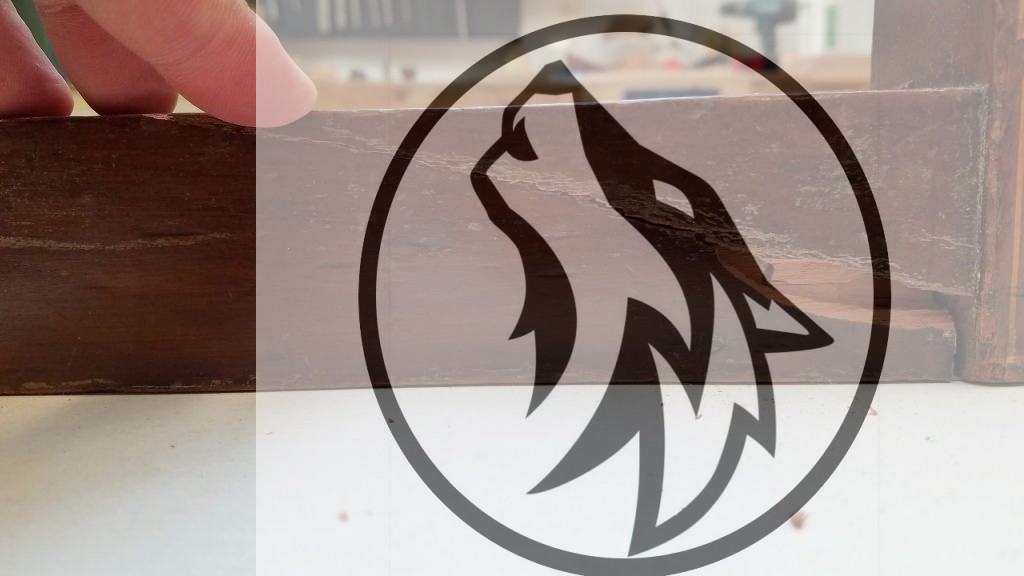
I’m going to use the constant moving as an excuse (not a legitimate reason, but an excuse) for some of the issues I had with the chair build. Lack of decent lighting was a constant obstacle and unfortunately, it reared its ugly head during the worst time possible, while I was sanding and finishing. I wanted to try something different and the plan was to use some amber shellac and then a brown wax to kill the orange. As you can already see, my plans went awry and my time limitations kept me from getting the wax on. This was one of those moments where I really questioned some of my life choices. In the badly lit apartment it looked very nearly like I wanted, but as soon as I got it outside and into some halfway decent light, I damn near cried.
But I get ahead of myself. The build itself was fairly uneventful.
Again, prepping and dimensioning the lumber by hand was the fun part. I cut the grooves and spindle channels with mallet and chisel, like the Settle project.
The cauls I’m using here are actually all that remained from a coffee table we got from World Market. A lot of their furniture is made of Rubberwood. When Rubberwood trees are finished providing latex, after 20 to 30 years, they used to be burned. Now they are being used in furniture, especially those in the plantations in Asia. What I saw of the wood in this furniture (that I destroyed and used for cauls) is that the colour could be interesting, but not necessarily pretty. It’s a fairly tight grain and not as splintery as Red Oak. It works easily with hand tools and sands well. Since the colour can be kind of offputting, it’s usually heavily stained.
Just as I was getting ready to start my dry fitting of the frame, the temperature dropped and I was forced indoors. This is where I had to be creative and compromise on some things that I would normally do. Without a large surface on which to rotate, flip, support, and clamp, I had to make sure that I had clearance whenever I wanted to move the chair because the clamps might bang into or damage something in the room. This meant that my clamping was not as aggressive as I would have liked and eventually required modification (fixing).
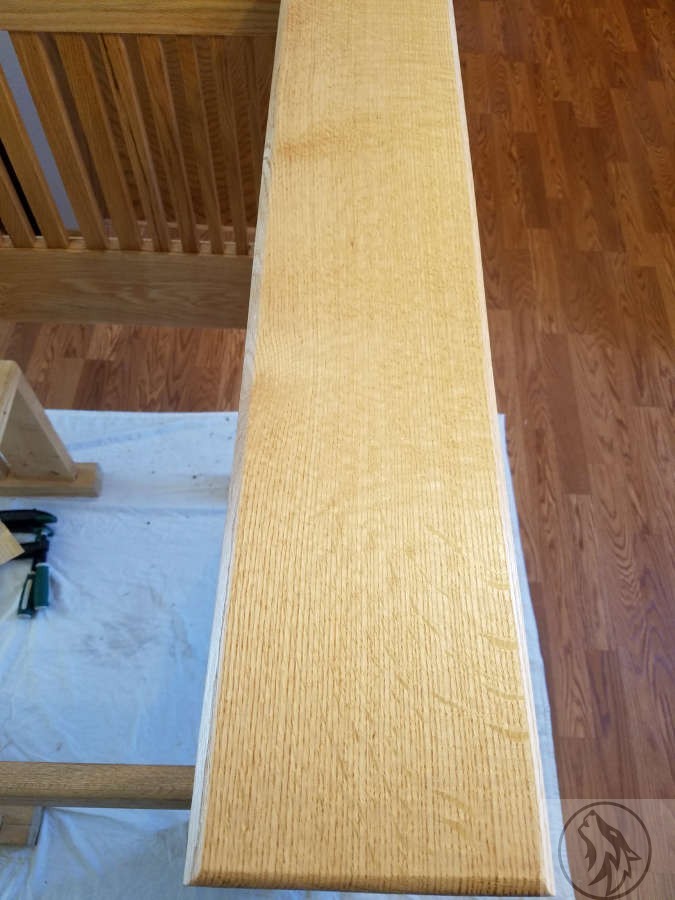
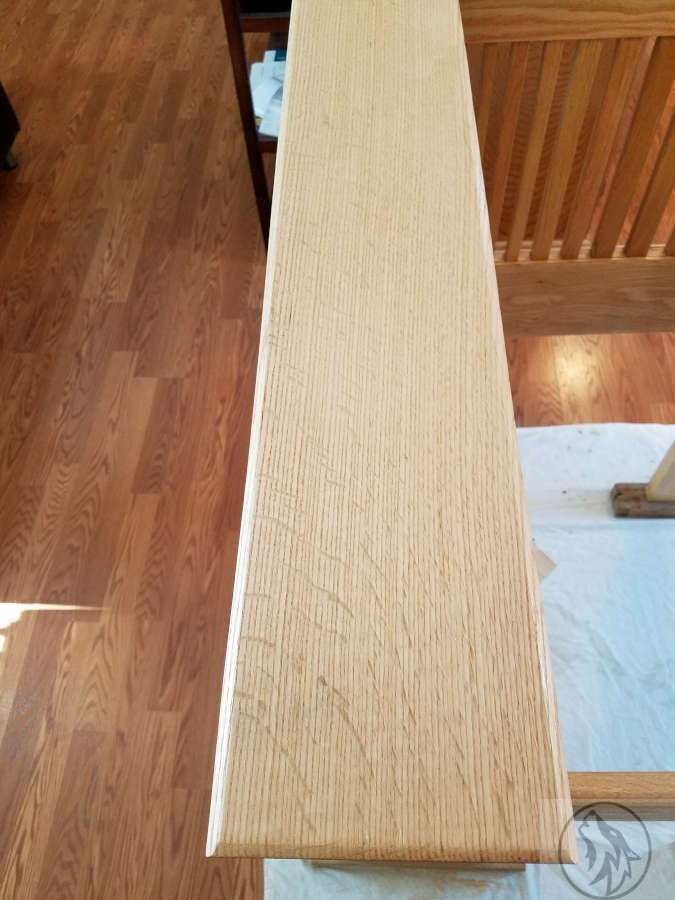
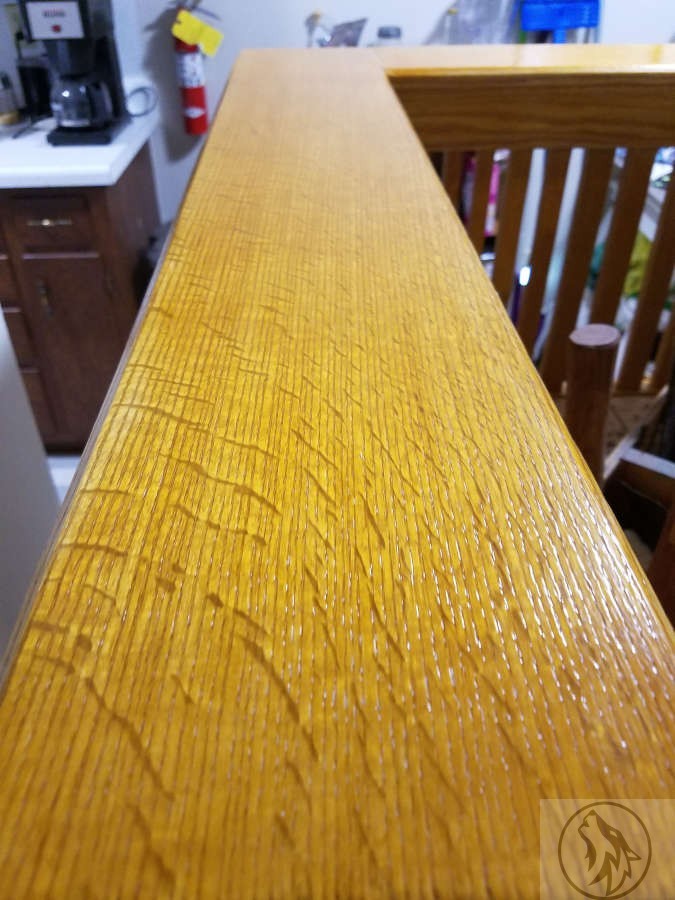
Once again, the 1/4 sawn Red Oak was beautiful.
I made sure to get the medullary rays to flow away from the chair on each arm. Kind of a nice effect.
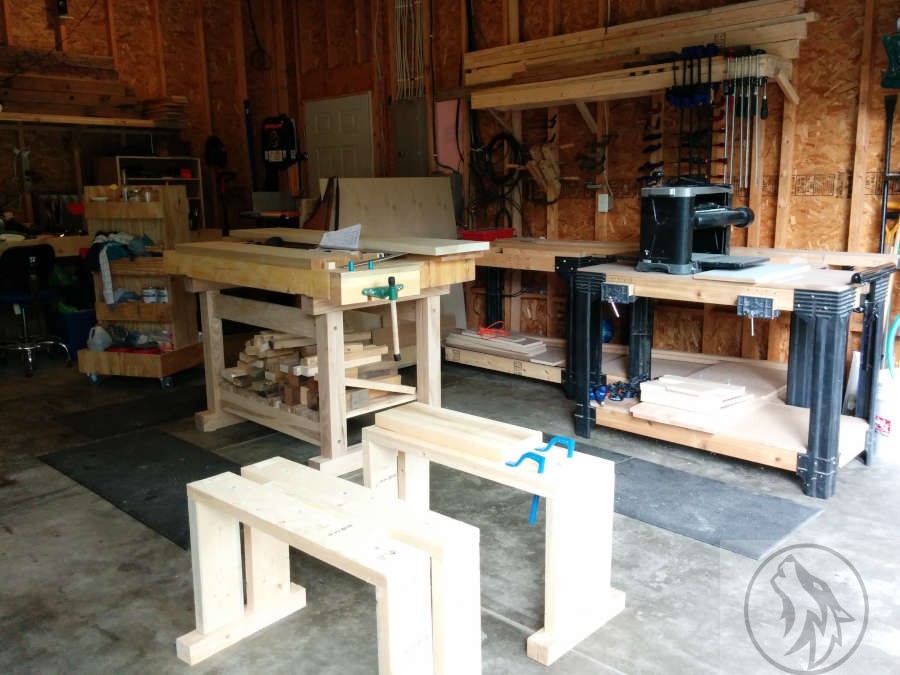
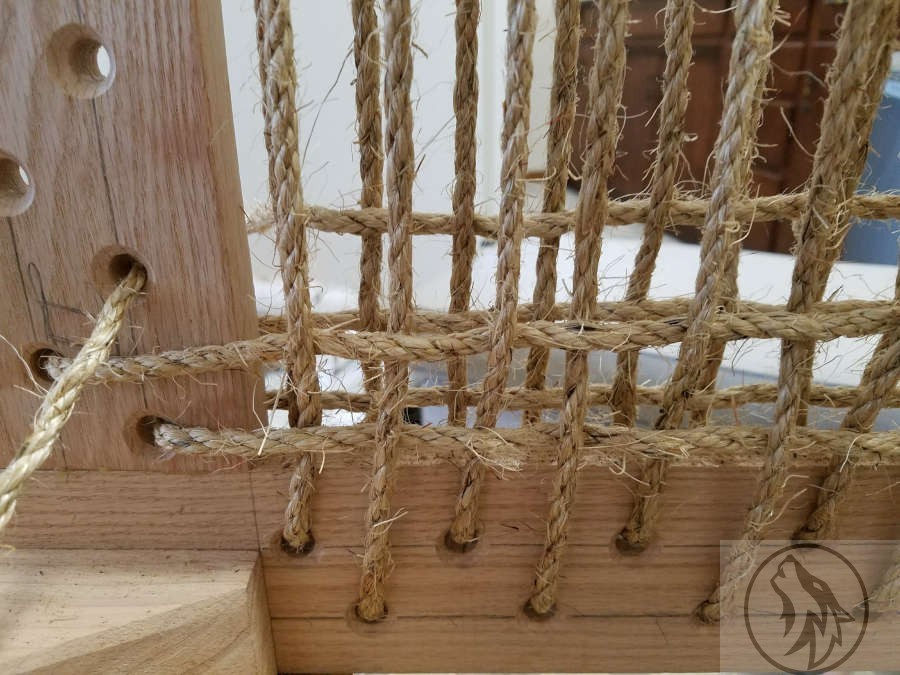
This is where we moved once again, so the next piece of the puzzle was done at the aparment. Here I started with the seat frame, doing the same weaving and materials as last time. If something works, go with it.
Using my saw benches to clamp the seat frame. This is most certainly not an optimal setup as the saw benches are not heavy enough to keep the frame still while weaving.
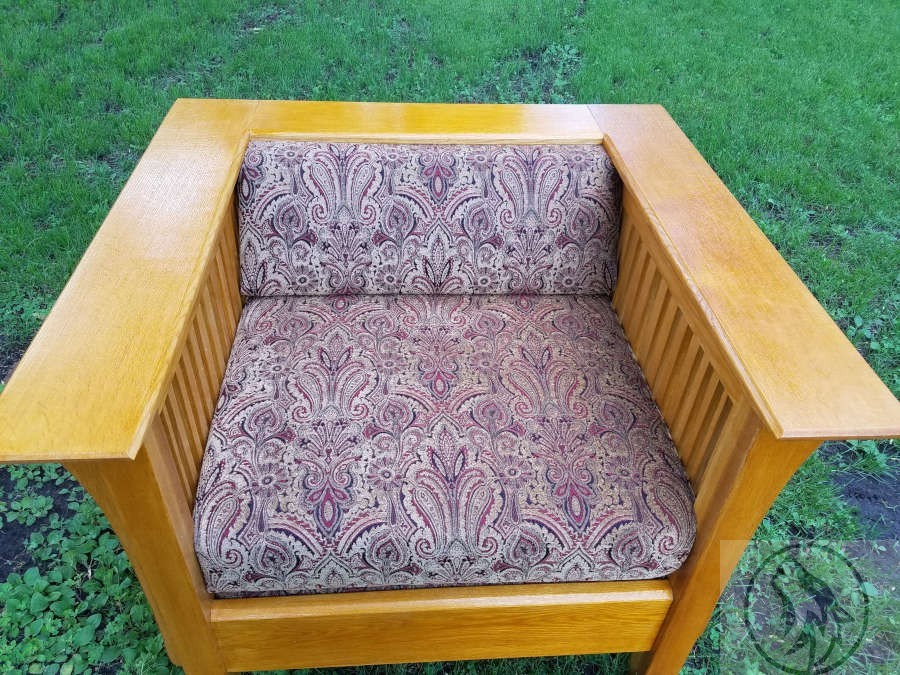
I really miss my workbench right now. A closer look at the weaving. I talk more about this on the Prairie Settle post, but I got the idea from one of the plans I purchased and then just modified it a bit for my situation. It’s a simple over under through the warp lines. I used the same twisted sisal that I had before as it is a natural fibre. I did not want to use nylon or anything similar. The only bad thing about working with this twine is that it’s rough on the hands and on the fabric. The upholsterer that we used for this piece came up with a wonderful solution that you will see later. This shows the clinching I used instead of tacks or nails. In this particular situation, the clinches work better than any tacks or nails. I will definitely use this again on future builds. I did the same on the Prairie Settle and the seat frames did not come loose or need tightening at any time over the years of heavy use. This shows the clinching for the warp line. The finished seat frame. We used Niola Furniture Upholstery in Bloomington, MN for this project. He did an awesome job and even wrapped the seat frame to protect the cushion from the sisal twine. With the cushions. And in the real light. The medullary rays do still pop.
We’re currently living near Edinburgh, Scotland where I am attending the Chippendale International School of Furniture, something that my wife and I had been planning for a while. This has been a dream come true for me and I’ve been drinking from the firehose since class started. I’m enrolled in the professional course that includes the following:
Timber identification & timber technology Tool and Machinery induction Sharpening 3D/Perspective drawing The fundamentals of joinery Woodturning Cabinet Making Carcass construction How to make a dovetailed drawer & hang a cabinet door Restoration/conservation of antique furniture Steam bending & Laminating Veneering techniques Fretwork Marquetry & Parquetry Oyster & Boulle work Inlaying (Brass, Ivory & Mother of Pearl) Woodcarving Gilding Windsor chair making Leatherwork Finishing techniques (Oil, Wax, Shellac, Spray lacquer, Staining & Colour matching) Business skills, pricing & customer care Branding, PR & Marketing, and website development & management Machinery maintenance How to set up a workshop
I didn’t realize it at the time, but furniture restoration and repair are the most challenging, fulfilling and enjoyable activities related to woodworking that I’ve found so far. That doesn’t mean I won’t find something else along the way but for now…
The school is also a working business that does restorations and repairs and I was given the opportunity to fix a chair that was brought in. At first, I was quite a bit nervous that I would screw something up that was irreparable but with Graham and Clare’s wonderful tutelage I was able to take this project on. Graham and Clare are the school’s repair and restoration experts and it is a very common sight to see them working on pieces. We all know that all we have to do is ask and we can take part in any repairs or restoration that comes in.
The chair is mahogany, 19th or early 20th century. with banding and inlay on the back splat.
The front leg had been broken from the frame. The seat had been removed before it was brought in to the school.A 13cm section had come away from the front frame and was still attached to the leg. The tenon from the front frame into the leg had snapped.I was going to remove the frame section from the leg. Tried getting meths into the joint, but it did not loosen. After talking to Graham, I decided to leave it.
First thing I did was to remove the front frame to enable easier access to the damage.
First, I removed the screws for the corner blocks going into the back of the front portion of the frame.
I was then able to use spreader clamps to slowly separate the front portion of the frame. Mild pressure with the clamps and a rocking motion allowed me to free the front leg from the tenon. I wasn’t at all sure I’d be able to do this, but as soon as I heard the tiny ‘snap‘ I knew that the tenon had separated from the leg. I wasn’t positive that it was a clean separation, though, until more of the tenon was exposed.
The next step was to create a mortise into the portion of the frame where the tenon snapped and then to remove the broken portion of the tenon from the leg.
I will create a mortise where the tenon snapped.I’ll remove the broken tenon from this mortise.New mortise created in the frame.Mortise cleared out in the leg.New loose tenon in the frame made from matching mahogany.Shows the tenon being fit into the leg (the top of the picture).Showing the loose tenon fit in the leg.
After the loose tenon had been glued and set overnight, I fit the front section to the rest of the frame to see how the break would come together.
I fiddled with the fit and tried to get all of the torn pieces to slide into their respective places, but the broken piece was still just a wee bit proud. Rather than remove any more material, I decided that once I had blended the pieces together you wouldn’t be able to tell.
The next step was to go ahead and glue this up and let it set overnight. I then took a bit of scrap mahogany and fit it to the opening.
This took a while.
Next, I began colouring the new patch with water-based dies and sanded (exposed) old material to help blend.
I used Yellow, Van Dyke Brown, and Walnut.
I then put 3 coats of shellac (dewaxed) on and blended with the french polish mouse (3 swipes with the mouse over the repair and into the old part of the frame).
The next day I roughed it up to take the shine off. Used some pigments with shellac and coloured wax to blend in and fill the smaller areas. Then White Wax over the repaired area and buff.
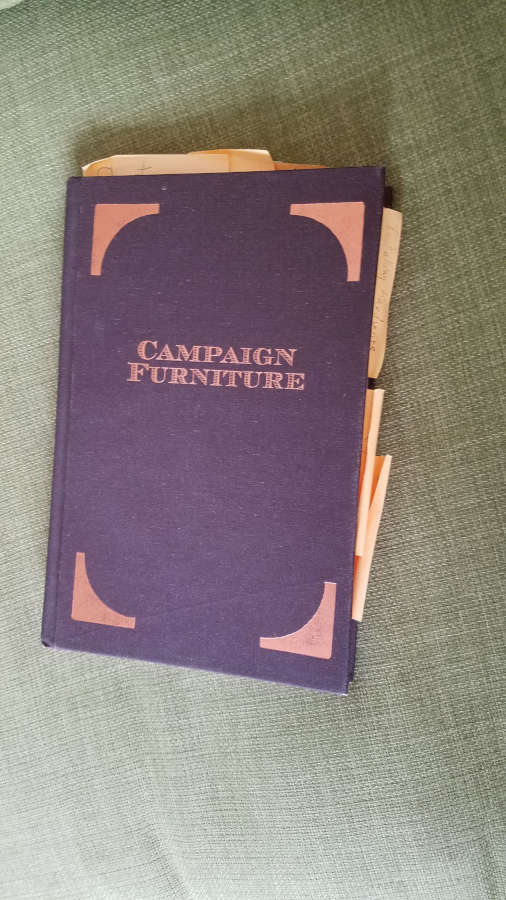
I’ve recently (within the past year) become interested in Military Campaign Furniture. This is something that could, and has, filled books. The one that I have is now very well worn as I have been using it almost every day for a project I’m working on. Campaign Furniture by Christopher Schwarz at Lost Art Press has been indispensable for most of my research on Military Campaign Furniture.
That said, I’ve also chatted with Simon Clarke at Christopher Clarke Antiques, who specialize in Military Campaign and Metamorphic furniture. They have a blog as well that I’ve used quite a bit, but more than that Simon has been very helpful in answering questions I’ve had about the furniture.
And I’ve also found that Pegs and Tails has quite a bit of valuable information on Campaign furniture as well. You’ll see that I refer to Pegs and Tails quite often as it has become my source for period furniture construction techniques and antique furniture identification more than any book or any other website.
So before I even knew what my Campaign piece would look like, I had already been researching the style and construction for a while. I knew I wanted to make something that I could take up and down narrow stairwells without too much trouble. I knew that I wanted to use brass hardware. And I knew that I wanted something very sturdy, which is what Campaign Furniture was designed for. After that, I had to figure out what it would look like.
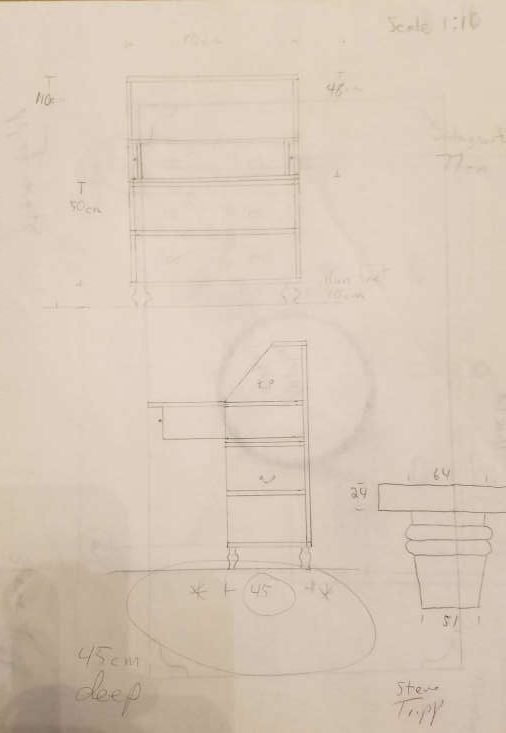
I started out with something closer to a side table. It was high enough to use as a writing surface, which started me thinking about a desk.
Figuring out proportions.
I then added a second chest, slant front, lopers and a gallery for my desk.
I was almost ready to start prepping the lumber.
But the slant front wasn’t doing it for me so I thunk, and thunk, and then thunk some more and decided on a pull out gallery. From this point I don’t have drawings as I had putzed away so much time up to now I had to get started.
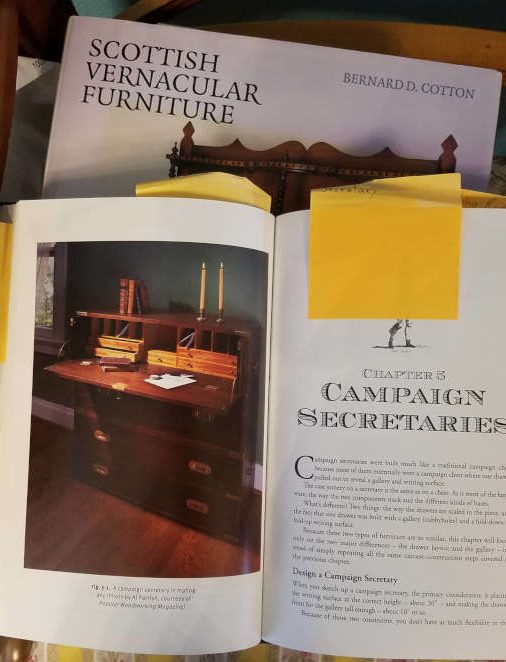
One of my other favourite books in the background, Scottish Vernacular Furniture by Bernard Cotton.This option would use quadrant stays instead of lopers to support the writing surface.
I had already figured out the gallery portion and knew the height and depth.
I then worked out the height of the desk, compared to the height of the chests and figured out the height of each drawer.
I was finally ready to start constuction. In my next post.
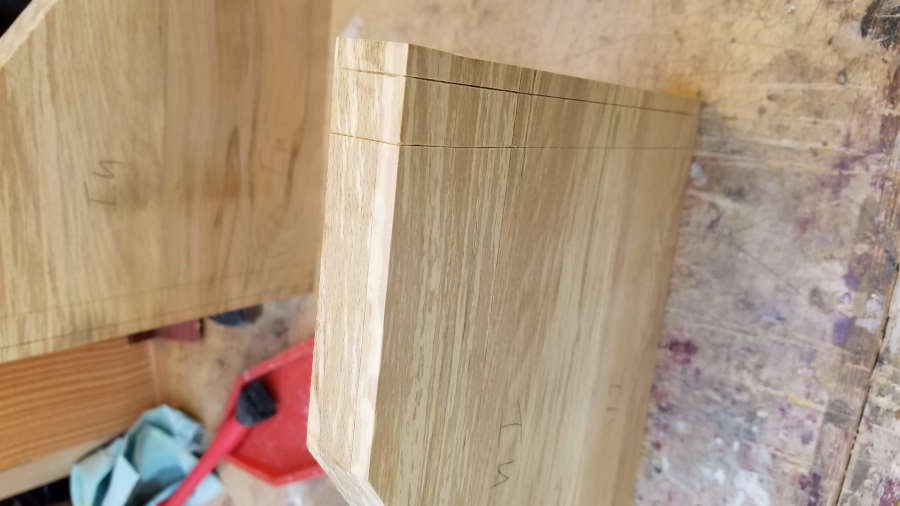
One thing about building Campaign Style chests is you gotta love the dovetail. Alot.
Hogged out the majority with an electric router.
The dovetails were easily the most intimidating part of the carcass build, so I wanted to practice before I started on the project. I had some scrap pieces of beech that I thicknessed to be the same as the chest would be. I found an excellent tutorial for full blind and secret mitre dovetails at http://www.mikes-woodwork.com
There are so very many videos and blogs that show and/or describe how to make standard through and half blind dovetails, but there are surprisingly few that show how to make full blind and secret mitred dovetails. Even so, I did find several to choose from and always came back to the mikes-woodwork site. His instruction really worked for me and I used it for all subsequent dovetails for the project.
The reason I was looking into the full blind and secret mitred dovetails is that they were used in period pieces, mostly for the top corners. I checked some pieces locally and found that some had half blind and some had full blind, but I haven’t found a secret mitred carcass yet.
And just a warning. I’ll use “half blind” and “half lap” dovetails interchangeably so if you see me change from one to the other in mid-thought I’m still talking about the same thing.
Laying out my lines.The three pieces with the rebate.Cut your pins first. It is easier to transfer the pins to the tails with this kind of joint.
Several years ago when I was just beginning to play with joinery, I learned to cut pins first. Not because I watched Frank Klaus or anything like that, but because I found it to be much easier to transfer the pins to the tails. At the time I thought I was cheating or doing it wrong, so I then learned to cut tails first. Since the question, Pins or tails first, has become such a volatile debate, I don’t usually say which way I think is best. That said, I haven’t made enough dovetail joints to even be considered a beginner.
With full blind dovetails you don’t have to worry as much about the proportions of your tails to pins, so make them both big.
I used a mitre jig to reference my chisel from the top and bottom. And for my first try it wasn’t too bad. Surprisingly little cursing and hardly any crying at all!
Even though my trial run on the hidden mitred dovetail went OK, I decided not to use them in the project. Instead, the two top corners are full blind dovetails (without the mitre). I didn’t take pictures of that procedure but will do so for my next Campaign piece. I did take a picture of the pins though.
Some of my scribbling.
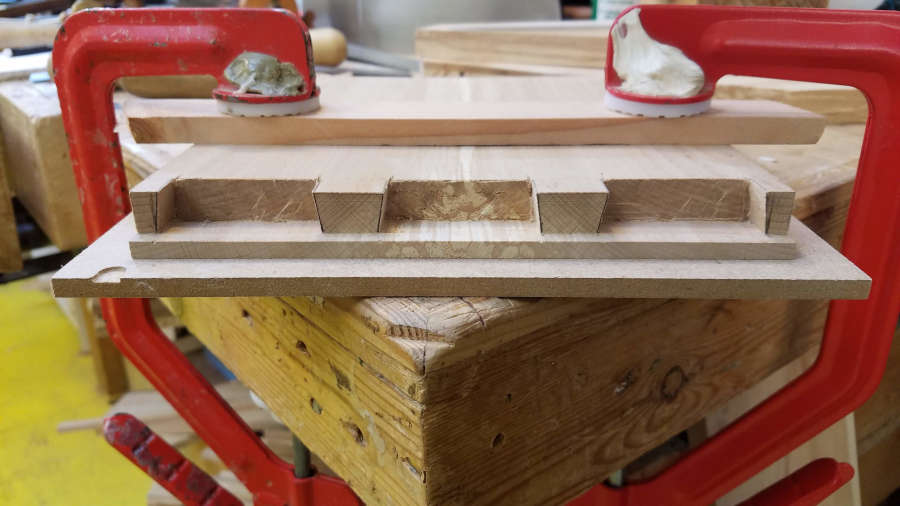
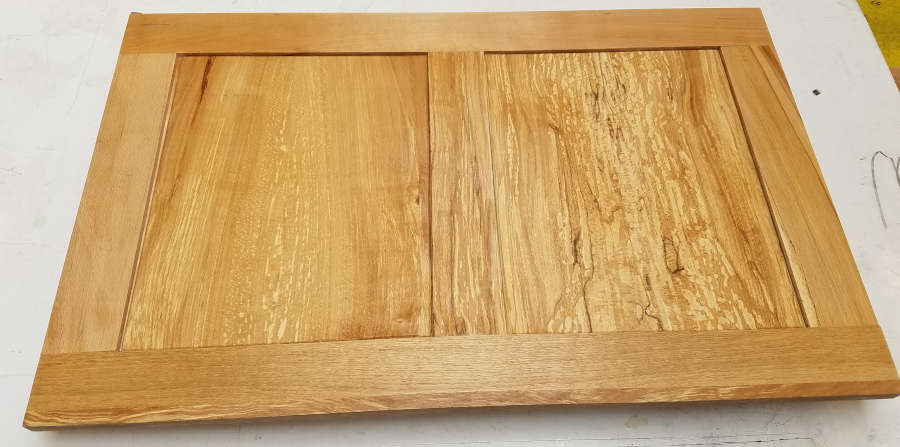
For the backs of these pieces (Chests and Secretaire) the norm was to use a simple boarded back that was screwed into the rebates in the carcass. Another method was a frame and panel. I chose a modified version of the frame and panel for mine. I used mostly offcuts for the frame and panel, but for the frame I needed non-spalted straight grain.
Frame and panel back for Campaign style chests.My frame and panel back.
The back frame is 12mm thick (about 1/2 inch). I used a half lap here since I didn’t want to fiddle with mortise and tenon that small. The panel is slightly thinner and goes into a 5mm groove in the frame.
Web frame (webbing) for between the drawers.
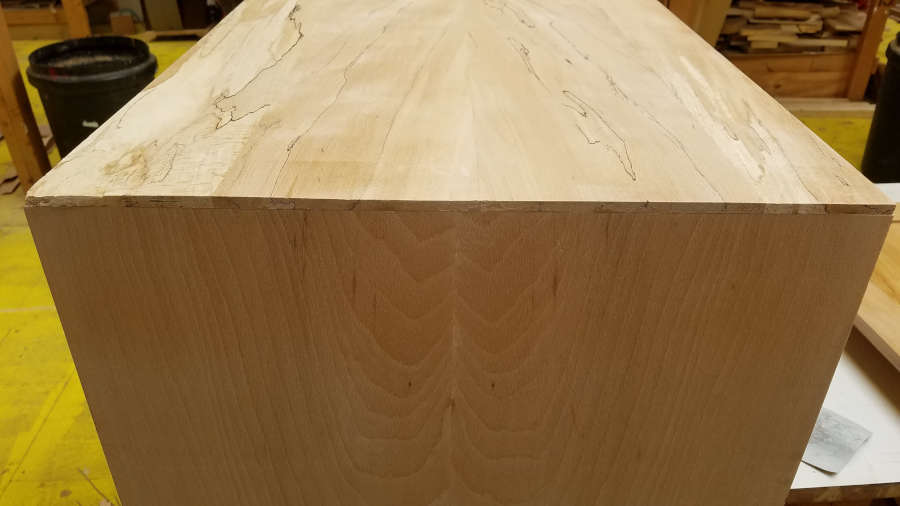
I had some leftover bookmatched flame beech but it wasn’t long enough to use for the backs, so they ended up in the webbing between the drawers. The web frame is the same thickness as the carcass or 18mm (about 3/4 inch). For this, I used mortise and tenon.
While searching for scrap beech I could use for the frames, I came across some oak that was the right length and thickness, so I laminated a piece of flame beech on the front and called it a day.
And I have a couple of boxes. Getting ready to build the drawers and gallery next.
The flame is beautiful, but I was not careful with this and damaged the soft wood on the left side.
One of the most valuable (to me) skills that my furniture making course has taught me is the core fundamentals of furniture restoration and repair. Graham and Clare, who are both as great at teaching as they are at repair and restoration, have allowed me to look over their shoulders (and incessantly ask questions) as they have worked on pieces. I have also been able to work on some of them myself, which has not only been a great and challenging experience but has been extremely fun as well.
Graham and Clare have both been with the Chippendale International School of Furniture for more than 2 decades and are easy to talk to and wonderful to work with on these great pieces of furniture.
The goal was to fill/replace the missing pieces and to make the repairs sympathetic to the age and blend them into the overall condition of the piece. If we decided to make the repairs perfectly flat and shiny with no gaps, then each repair would have stood out and looked out of place.
First thing was to lightly clean the areas that needed repair.
Each of these spaces was cleaned with scalpels, awls, and pretty much anything I could get my hands on that was small enough to get into the crevices and cracks. The bottoms of these spaces needed to be relatively smooth so when I fit the replacement pieces of wood in there they would sit flat and have a good stable glue surface.
More of the missing pieces.
The next step was to put tape over each of the empty spaces and lightly shade with a pencil to get the outline of the missing area.
After I had a good tracing of a missing piece, I put the tape on a piece of (in this case) walnut that I’d be using to patch with. I made sure to orient the grain with the existing veneer.
Anselm and Graham believe the table is from around 1760 and the veneer is several times thicker than any you can buy today, so the repair pieces were resawn on a bandsaw to be just a bit thicker than the old veneer. This way we could pare down the patches to the correct level.
Next, I cut out the pieces oversized and then fit them using small files, sandpaper, and scalpels.
This shows a couple of different stages. A couple of the spaces have been cleaned, one is ready to be traced, and one has a patch already fit (it still has tape on it).Another area ready for patching.And with some of the patches fit.
The next stages were to glue the pieces into their respective spots
Using a combination of tools to shave the patch down a bit.
Once the patches were in and the glue dried, I used a combination of water dies to get the patches to blend with the background. I then used coloured wax sticks and melted a mix of colours to fill and blend the repairs. (I don’t have pictures of these steps because once I got into it I was so engrossed that I forgot). Next was a light going over with some black wax, to blend all of the repairs with the rest of the table top.
As always, the repair and restoration is just a wonderful experience.