Chair caning project.

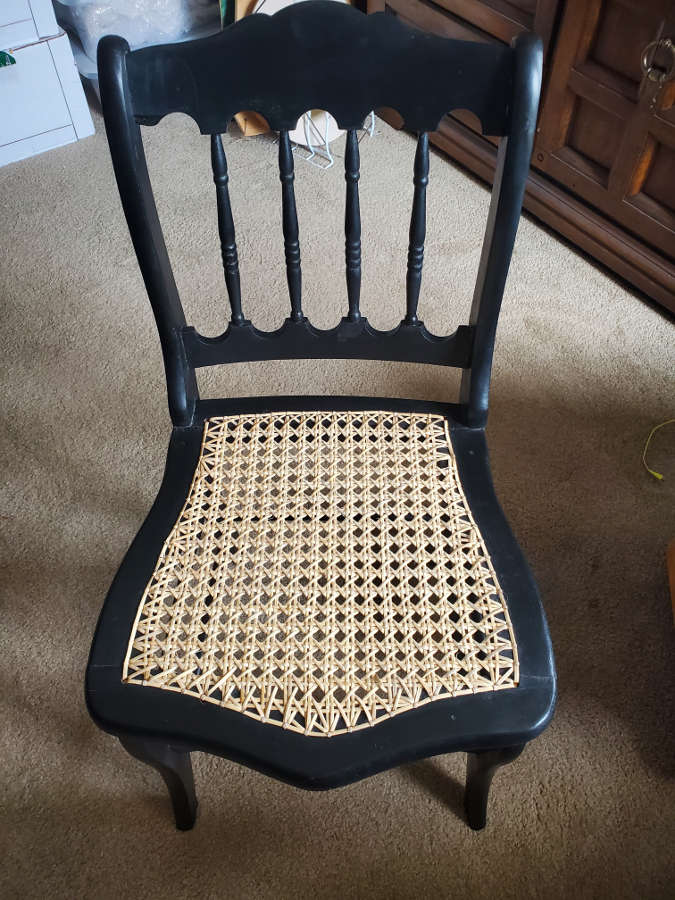
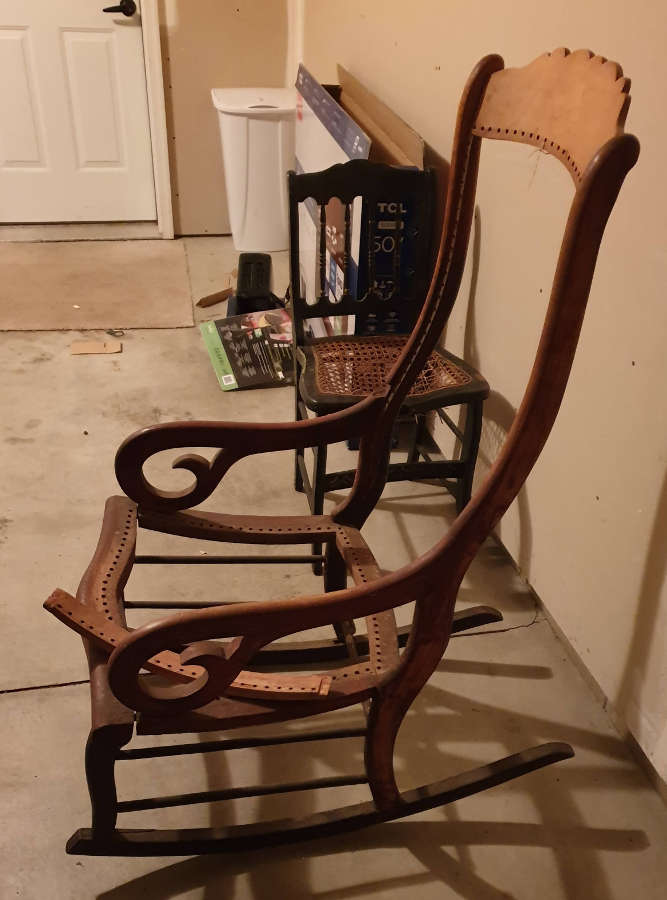
A few months ago, my wife and I picked up a couple of chairs that we wanted to work on. Both had caned seats and one (the Empire style rocker here ) also has a caned back.

Two projects we picked up several months ago.
Caning before removal.

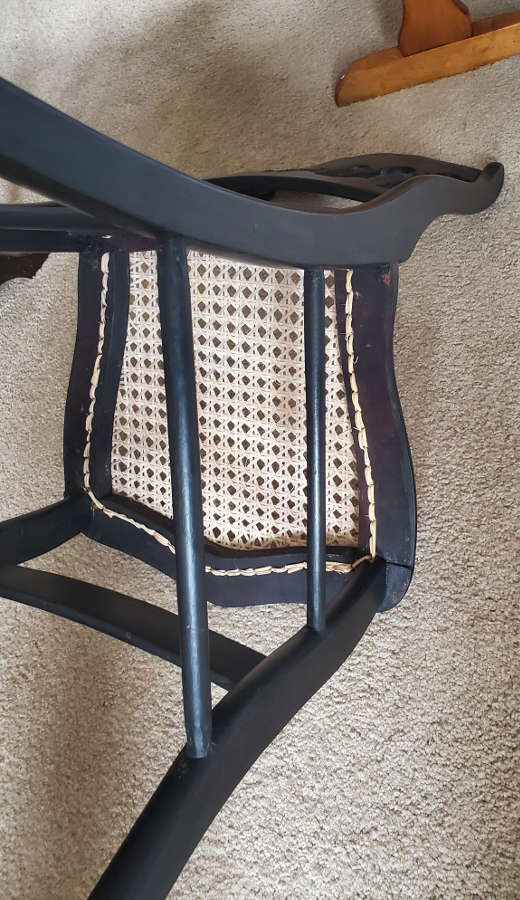
I’d been reading about seat caning for a while and have been following Ed Hammond and The Wicker Woman on YouTube. The book I got was “The Craft of Chair Seat Weaving, with Cane, Rush, Splint, and Rope” by George Sterns. The book is a very good starter and I referred to it quite often for the basics. The YouTube videos are much better for the details and to better be able to adjust for the curves and other fiddly stuff. I also used Ed Hammond and The Wicker Woman as guides for the “no knot” method for the underside.

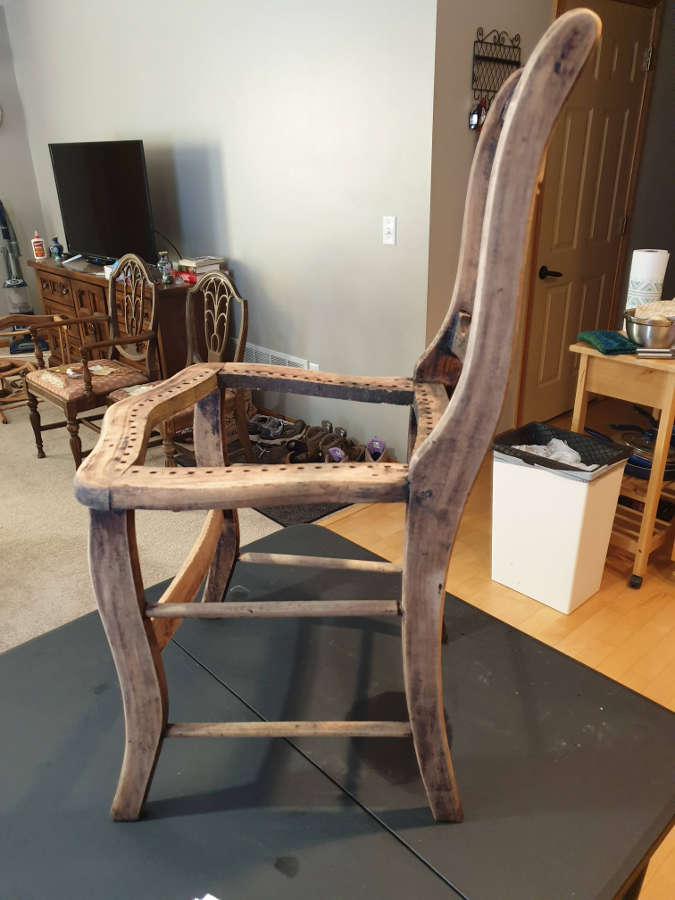
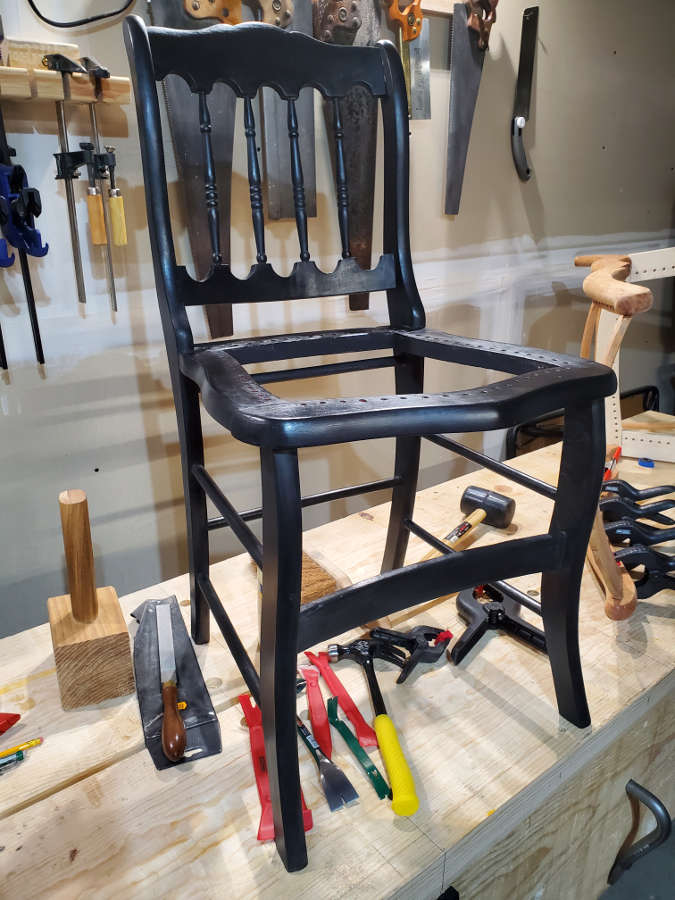
To start out, I stripped the chair and then prepped it for a new paint job. I went with milk paint and initially tried what I thought was Barn Red, but turned out to be closer to Hot Pink. Rather than remove this and start over I just painted Pitch Black over it. I did not want to distress this, but I figure that it will distress naturally very nicely with the red/pink underneath.

I stripped the chair and then had a good look at the joints to make sure everything was solid. The chair was in great shape so I didn’t need to redo any joints.
Not the colour I was looking for.
Much better! A few coats of Pitch Black and then a few coats of wax later and it’s ready for caning.

I had several false starts on the caning portion. As I got past the verticals and into the horizontals I had to unweave several sections and start over. It took quite a bit of thinking, doing, undoing, thinking, doing, undoing before I got the verticals and horizontals that I thought would work.

This was attempt 3 or 4. Can’t be sure.

Once I got into the diagonals I realized that there were still issues with spacing in the horizontals and verticals. I had to figure out how to either work around some of these obstacles or redo them. I ended up doing both.

I will probably redo this seat in the future, but once I get the border finished it will reside in our kitchen for a while.

Still need to add the border around the sides and front. This has been a huge learning experience, but I do feel better about getting started on the Empire Style Rocker, once my repairs are finished on that one.

Update 26 July 2020: I finally finished the last of the border and cleaned up the underside.

I ended up doing more of a hybrid ‘no knot’ with a couple of knots due to being unable to plan ahead or stage my cane ends well enough. I surprised myself with how strong these cane seats are: I’ve already sat in this chair a few times and I’m a rather large person.

I have a couple more caning projects coming up am ready to improve on this one.

Late 19th C Empire Style Rocker Restoration Part 2

In Part 1, I had finished stripping and disassembling the rocker and had decided to replace the rockers and the side pieces of the seat. After that, I also decided to replace the back of the seat. This because the sides had been connected to the back with dowels, but the way the dowels and the joints fit, they did not make a good joint. If you look at the picture below, you’ll see that at each end, a half a hole for a dowel. So one of the dowels on each side was not even embedded in the back piece.

I then looked at the way the sides connected to the front piece and decided that instead of a couple of dowels, I’d use a loose tenon. This would create more shear strength, across the grain, at this crucial point.

Unfortunately, I didn’t take any pictures of the loose tenon or any of the fitting process, but I do have pictures with layout lines and also where I filled in the original dowel holes.

My pencil mark shows where the loose tenon is.
This shows where I filled the dowel holes in order to remove the mortise for the loose tenons.

The following pictures show me cutting and shaping the back piece.

Making the replacement back piece.

I took the number of holes from the original and spaced them a little more evenly before drilling them out.

I countersunk the holes.

Using a bit from a roll that a wonderful friend and classmate from the Chippendale Furniture School gave me.

Thank you Gordon! @twintreedesign
Initial fitting of the back piece.

After quite a bit of dry fitting and tweaking the joints, I was ready to glue up the seat.

For most of my projects, I tend to use hide glue for the joints and PVA for the splits, cracks, and fills (like for filling the dowel holes). My thinking is that for most, if not all, repairs I can use PVA adhesives because the idea is that they should never need to be undone at all…ever. This is for repairs and restoration jobs, but not necessarily for conservation work. For the joints, I use hide glue because I want to be sympathetic to the piece and I want to make sure that the piece can be repaired / restored in the future and still be sympathetic to the piece if that future restorer wishes. If in the future, someone repairs the piece with whatever adhesive they have available, that’s fine because I won’t be around to see them muck it all up 😉

My ultra high tech hide glue melting pot. Plus if I ever need a bikini wax, I’m set.
Seat is fitted and the chair (except for the rockers) is ready for glue up.

For Part 3 I’ll remake the rockers and discuss the changes I made to the dimensions. I’ll also discuss the back frame and the broken pieces I had to replace for the caning.

Small maple table restoration

I’ve just started working on some projects for a customer and I figured I’d get started with a quick and straightforward restoration. Quick for me is a relative term as this “quick” project took me almost a month of weekends and evenings.

This one is a maple end table that has seen better days. It was not old, maybe vintage, but it needed some attention.

Thick layer of paint obscured some beautiful maple underneath.
I was a bit worried about the ink stains and the cigarette burns.

I started by taking it apart so I could evaluate the parts individually. There were a couple of screws that needed to be extracted the hard way and a couple that needed to be cut, but other than that it was in good shape. Drilled out the screws, filled the holes with dowel and then redrilled for new screws.

I’ve looked up the name (American Maple), but have not had much luck. They don’t seem to have been around very long.

This was constructed with slotted screws, but since it will be a user piece rather than a showpiece I replaced them with McFeely’s square drive screws.

After stripping the individual pieces I found some beautiful maple that really popped after a coat of tung oil. I love the chatoyance I got on almost every piece of the table. Unfortunately, much of it will not often be seen unless the person either picks up the table or lays down on the floor to look at it.

The table top had some pretty serious gaps from shrinkage, so I re-glued it.

I was very happily surprised that so much of the ink stain was just in the paint and didn’t go too deep. The tabletop had some very minor cupping and twisting, but the battens on the bottom and the gallery rails on top took it all out.

This table cleaned up very nicely.

After a light sanding, I started with 3 or 4 coats of Dark Half (1/2 dark tung oil and 1/2 citrus solvent) from Real Milkpaint. After letting it cure, I then added a couple of coats of garnet shellac and then a couple of coats of blonde shellac.

After some tung oil.
After one or two coats of shellac.
After the garnet and blonde shellac.
The chatoyance along with the bit of damage left on the top allow the table to keep its character and still be beautiful.

All that’s left for this piece is to give it a few coats of wax (maybe a dark wax) and then find it a new home. It’s already been conscripted as a work table in our livingroom. I’m using it to hold my caning tools and supplies as I work on some chairs.

Campaign Style Furniture design, part 2: Patent (metamorphic) furniture.

This is continued from a post about Campaign Style Furniture I wrote a while back.

All photos in this post are from the Christopher Clarke Antiques website https://campaignfurniture.com

The first thing about Campaign Furniture that got me interested in the style was that many of the pieces broke down for travel or had hidden uses. Some of these designs seemed playful in that what looked like a chest of drawers turns into a desk, or when a small table breaks down into a briefcase-sized box with carrying handles.

A Campaign Secretaire Table. Circa 1790, in mahogany.

I find a piece like this just fantastic as it packs so much utility into such a small space.

Legs and stretchers are stored inside.
This is one of my favourite designs. The gallery and writing space are large enough to be useful and small enough to be mobile. The stretchers are very important as without them the legs would not last a day, especially on uneven ground or with the racking and twisting of use near a battlefield.

The chests that convert to secretaires or desks are beautiful pieces. There are several different methods of hiding the writing surface and gallery, like below where the top folds out and rests on lopers and the gallery pops up on springs.

Georgian Military Campaign Chest

The following is the most prevalent style though and is what I styled my campaign chest after (I’m still working on it and plan to have it finished sometime this millennium). My drawings (from my other post) show that I am using the quadrant stays like the following example, instead of lopers like the above example, to support the writing surface.

Chest Secretaire early 19th Century

One thing that I found while planning my campaign chest is that much consideration must be given to the height of the drawers so that the writing surface is comfortable to use. Once you get the writing surface at the correct height, you then have to look at the size of the drawers and if you want symmetry from top to bottom. In my case, I decided to go with a larger drawer at the bottom and top and then smaller drawers in the middle. This was also factoring in the height of the feet.

Patent furniture and campaign furniture are not the same. Patent furniture became an important part of a military officer’s inventory because of its great utility, but some campaign furniture is not patent furniture, but simply breaks down for travel or is made to be more durable (with brass strapwork and corner protection).

My next post on campaign furniture will be when I start working on my own piece again. Hopefully soon.