
So, my glacial progress on these first restoration and repair projects has been a bit disheartening, to say the least, but I’m within spitting distance of finishing the small oak dresser, so here we go.
This is the 2nd project in a group of about a dozen that I’ll be working on in between my day job and getting my workshop insulated (which I will write about in another post). It is an oak dresser that originally came with a mirror. The mirror may be in the group of mirrors that I received with these projects, but I have not tried pairing them yet. The dresser is likely early 1900s or, less likely, late 1800s. The drawer fronts and top are solid oak and the interior is in good shape. The casters are original wood wheel and brass and the drawer hardware appears to be original as well.


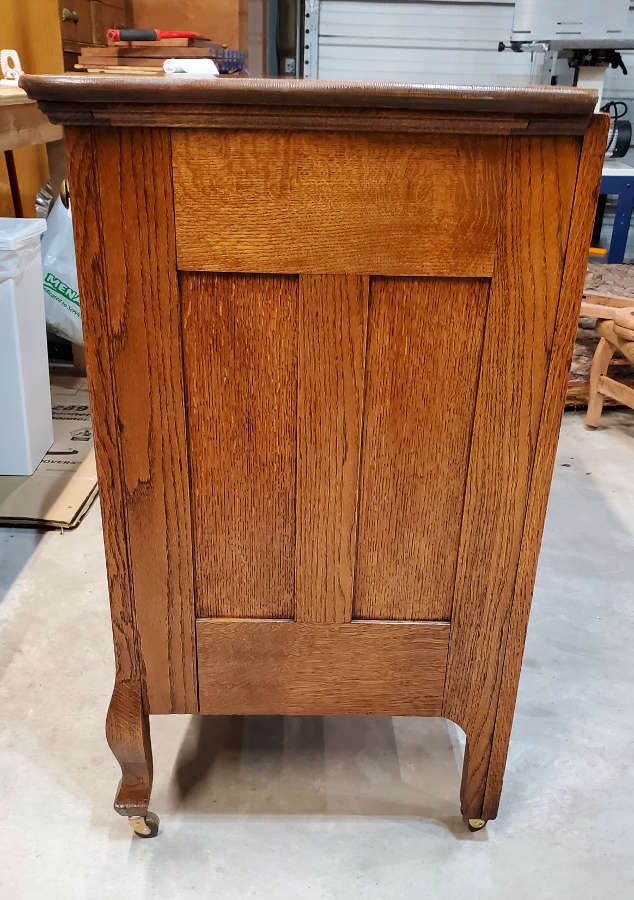
The dresser was not in bad shape but required some work done to the damaged top, so I got out the card scrapers to remove the burns, then filled the shallow divots with shellac which I coloured to match the rest of the top. Some alcohol and a scrubber got out most of the rest. I then put a few coats of shellac and then some dark wax (Kingdom Restorations). Clare, a tutor at the Chippendale International School of Furniture used to say, “Dark wax can hide a plethora of sins.” In this case, it helps even the tone across the top.
I also needed to replace a damaged runner. This was the only “woodworking” needed for the project.

I then cleaned out the corners of the panels of the frame and panel sides. This may seem like a nit-picky thing, but in this case, I wasn’t going for a heavily patinated look. Getting rid of the black gunk in the corners just sharpened the edges and “youngened” it up a bit.

I replaced the old casters with reproduction casters from Van Dykes Restorations. The new casters are beautifully made and all I needed to do was plug the old holes, then drill new holes for the new casters.


While I was working on the casters I noticed that when they were making this dresser, they used a table saw or similar to cut the mortises for the side rails.


After this I noticed that the stiles for the side panels were starting to separate so I cleaned the old hide glue out and cooked up a few ounces to re glue.
The hardware was not in horrible shape but a few of the bail pulls were either missing rosettes or the rosettes were damaged so I searched E-Bay and found some nice ones and also found some that I liked at Van Dyke’s Restorers. Even though I found some knobs there as well, I decided to keep the original.


One thing I didn’t replace (yet) is the missing escutcheons for the two top drawers. Why, I can’t even begin to say, except that brain farts are real.
I just have a few fiddly bits to finish up like the escutcheons and runner blocks for the drawers to keep them from jamming, but other than that this has turned out to be a very pretty and usable piece of furniture.


I’ll probably take a look at some brighter, shinier hardware for this one, but I doubt that I’ll go with it. I like the darker hardware on this. I will probably post some pictures with the brighter stuff though, just for comparison.