Slant top secretaire restoration, Part 3

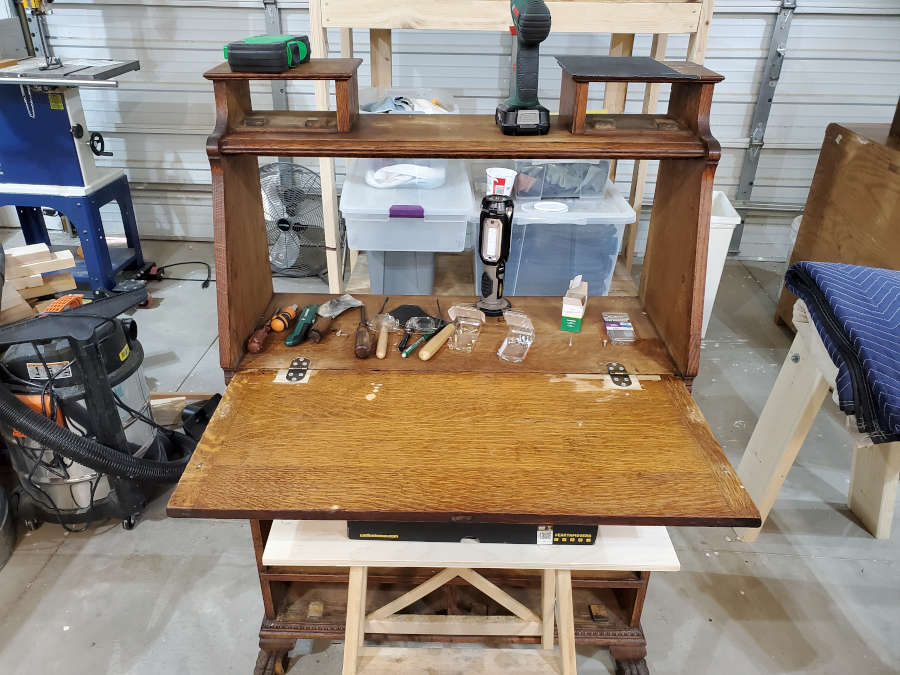
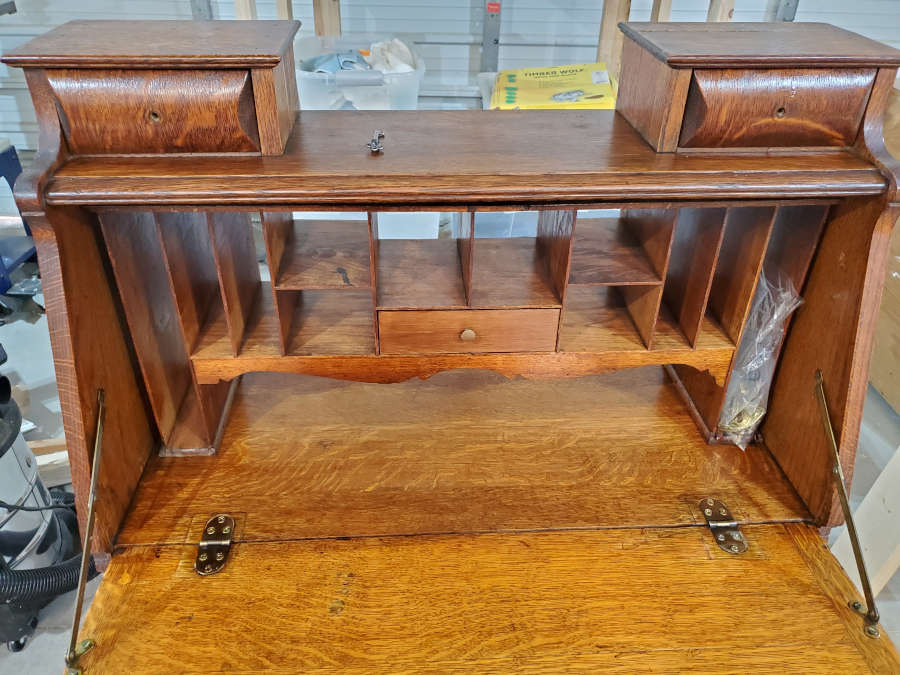
I mentioned in my previous post that the hinges for the slant top portion of the desk would be the most involved part of the restoration. The hinges had been replaced a few times and the hinge shape had changed as well. This not only left random holes but large shapes carved into the shelf and the lid.

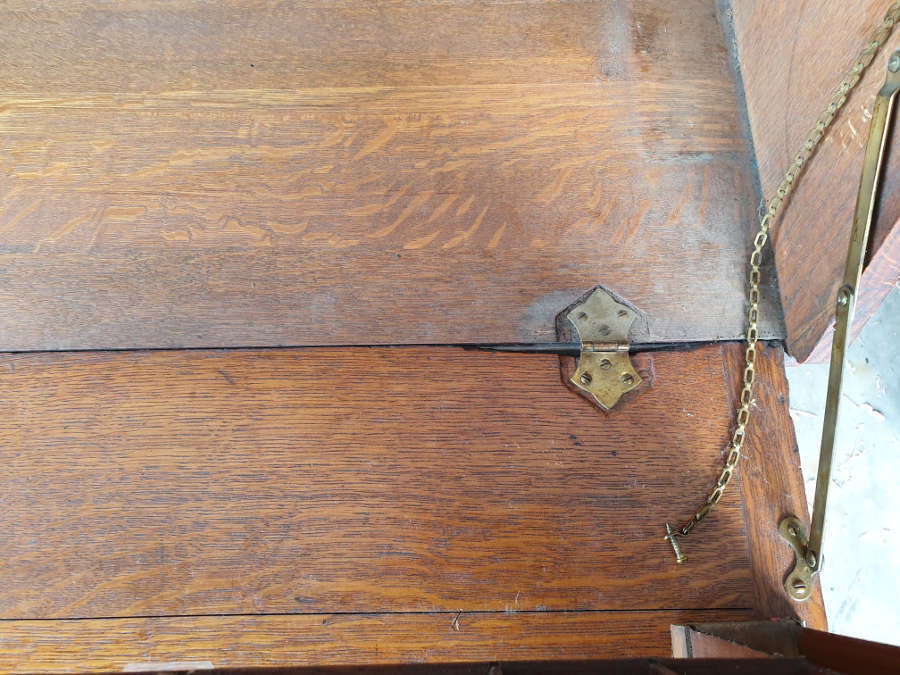
It looks like these replacement hinges were a bit of a rush job. The mortise that the hinges are set in is too large for the hinge and the person doing the restoration may have used one chisel to remove the material. It also looks like the hinge may have been installed incorrectly, which then caused a portion of the lid to break off when the lid was opened. This is all speculation, but I like to put myself in their shoes and see if I can find explanations for the things I find.

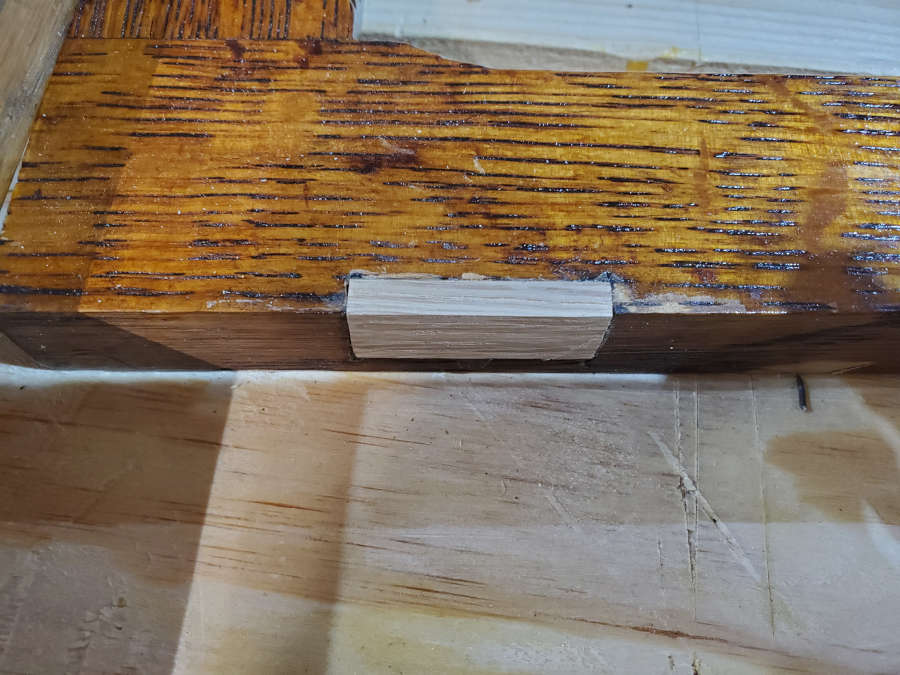
As you can see there are a couple of different sizes carved into this piece and that along with the damage done to the edge of the lid told me that I need to repair these and not just put new hinges in there.

This is where the project gets challenging because I have to remove material and then splice in new material to make the piece stronger. In this case, I need to remove a section where the lid broke and also remove the material around the old hinge mortise. I then splice in the new material. When I cut these pieces I have to pay attention to grain direction, grain orientation, grain consistency (is it clear straight grain or curvy). In the case of the broken lid portion, I saw that the edge showed the flat sawn side and the flat top showed the quarter sawn. For the hinge pieces, I looked at how the quarter sawn grain ran and oriented the new pieces to mimic that.

Here you can see the flat sawn “cathedral” grain along the edge. This picture was taken after I had shaped the new material with a block plane, spokeshave, chisels, rasps and sandpaper.

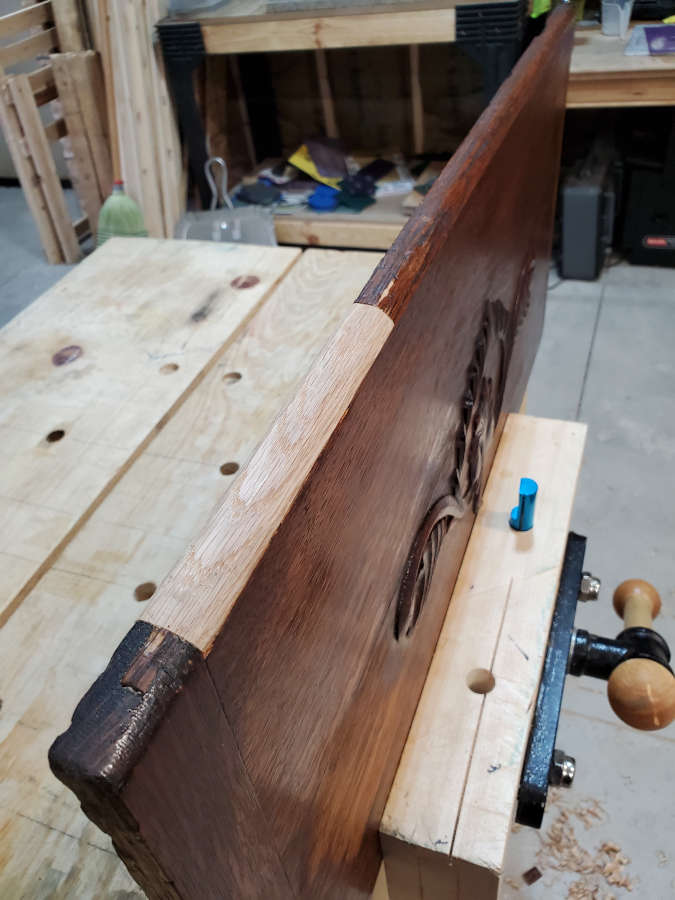
In the picture above, you can see that I cut the mortise along the grain and oriented the patch so that the grain followed the surrounding grain. Once the piece was glued I then used a block plane and then sandpaper to bring the material down to level.

In my next post I’ll show the rest of the process of cutting in the new hinges and coloring and blending the repairs.

Slant top secretaire restoration, Part 4

This is continued from part 3. I’ve made good progress on the secretaire, and I was going to say that it doesn’t look like it, but after going through my previous posts, I take that back.

With her new bling, but still a broken toe.

I’ve made progress on several fronts (and backs). The back frame and panel is finished. I used some 3/4 inch pine for the frame and 1/4 inch plywood for the panel. I cut the pine into 2 1/2 inch rails and stiles and then got out one of my plough planes with a 1/4 iron.

The plough plane (and 1/4 inch iron) I used to cut the channel for the plywood.

A couple of fun facts about the planes to the right in the picture above. The one with the wormholes I got while on a project (my day job) in Georgia. A co-worker and I were driving to the project site when we saw an antique store and had to stop. I found this toothing plane and even though it’s pretty holy, the blade is in great shape. I’ve used it once (I do not collect tools, I use them. That’s my story and I’m sticking to it.) but I don’t work with thick veneers – yet – so I haven’t had a chance to really put it to use. Next to it are a pair of match planes from Sweden, made in the 1880s. I had been drooling over them at Allen Snyder’s booth at Midtown Antiques in Stillwater for a while, but then forgot about them when they weren’t there any more. Holly had got them for my birthday present.

Back on topic. The frame and panel for the back was pretty straightforward, so I was able to knock it out in a day. The coloring took another couple of days.

Trimming it down to size.
The water based colors that I use. I learned how to use these while at school and have been playing with colors since.
The back-facing side is almost ready. I just realized that I didn’t take any pictures of the front-facing side.
Ignore the shiny fasteners. I haven’t dulled them yet.

I made the back-facing side darker, to match the back that was on here. The front-facing side, I matched to the color and tone of the case.

I also finished the hinges for the slant front and the damaged portion of the lid.

Splicing in the repairs.
The gaps along each side match.
You can see that I haven’t colored the repair here yet.
Edge view of the damaged area.

The next thing I’ve started on is the front doors. You can see the beautiful bevelled glass that I got from my local glazier, Tom Huisman https://www.huismanglass.com/

During my first fitting of the front doors. I’ll have better pictures of the glass later.

I’ll have more pictures of the glass in the doors in a later post. Right now I’m making repairs and replacing the hinges. There had been several repairs of the doors which ended up with a large mortise cut into both doors.

Deep mortises had been cut into both doors for previous repairs.
Damage as well as the deep mortise.

Because of the deep mortises that had been cut into both doors there was nearly an inch gap between the doors when they closed, so the lock could not reach the other door.

Original (non functioning) lock.

I cleaned out the mortises and spliced in some oak.

I then shaved it down with a block plane, spokeshave, and sandpaper.

Next steps will be to fit the new hinges and color the repairs.

I’m really getting close to finishing this piece, and I’m very excited. Once the front doors are done, I’ll finish my touch-ups of the slant top, as it has become something of a distraction. I’ll have better pictures of the hardware in my next post and talk about where I got it.

Oak Coffer Observations, Part Three

This post continues from my previous. One of the things about this piece that caught my eye was the newspaper lining. At first, I wasn’t sure what it was because I was mostly interested in the exterior carving, patina, damage, and hardware. But after we got it home (our place in March, Cambridgeshire) I was able to take a closer look at the interior and realized that my hunch was right, and the newspaper lining was probably old as well.

The first thing I did was try to find a date, which ended up being September 21, 1872. I found a couple of other pages with the same date, so it is probably all the same issue of the same newspaper.

I then started looking at the layout of the newspaper within the coffer and realized that it was used not only to protect the contents of the coffer from snagging on the wood but also as a bit of decoration. This coffer was already 200 years old when the owners decided to line it so it’s likely that splinters and ragged edges would have ruined any fabrics that were stored inside.

I also found where the newspaper was from. Norwich, in Norfolk.

We purchased the coffer near Bury St. Edmunds, which is about 40 miles as the crow flies from Norwich, so in its 300 plus history, it probably didn’t stray far from where it was made.

The coffer was likely made in the mid to late 1600s, although there is no provenance and the construction methods did not change significantly between the 1400s and the 1700s except to include other woods like walnut or pine.

In the next post I’ll talk more about how the coffer was built.