
This is continued from part 3. I’ve made good progress on the secretaire, and I was going to say that it doesn’t look like it, but after going through my previous posts, I take that back.

I’ve made progress on several fronts (and backs). The back frame and panel is finished. I used some 3/4 inch pine for the frame and 1/4 inch plywood for the panel. I cut the pine into 2 1/2 inch rails and stiles and then got out one of my plough planes with a 1/4 iron.

A couple of fun facts about the planes to the right in the picture above. The one with the wormholes I got while on a project (my day job) in Georgia. A co-worker and I were driving to the project site when we saw an antique store and had to stop. I found this toothing plane and even though it’s pretty holy, the blade is in great shape. I’ve used it once (I do not collect tools, I use them. That’s my story and I’m sticking to it.) but I don’t work with thick veneers – yet – so I haven’t had a chance to really put it to use. Next to it are a pair of match planes from Sweden, made in the 1880s. I had been drooling over them at Allen Snyder’s booth at Midtown Antiques in Stillwater for a while, but then forgot about them when they weren’t there any more. Holly had got them for my birthday present.
Back on topic. The frame and panel for the back was pretty straightforward, so I was able to knock it out in a day. The coloring took another couple of days.


I made the back-facing side darker, to match the back that was on here. The front-facing side, I matched to the color and tone of the case.
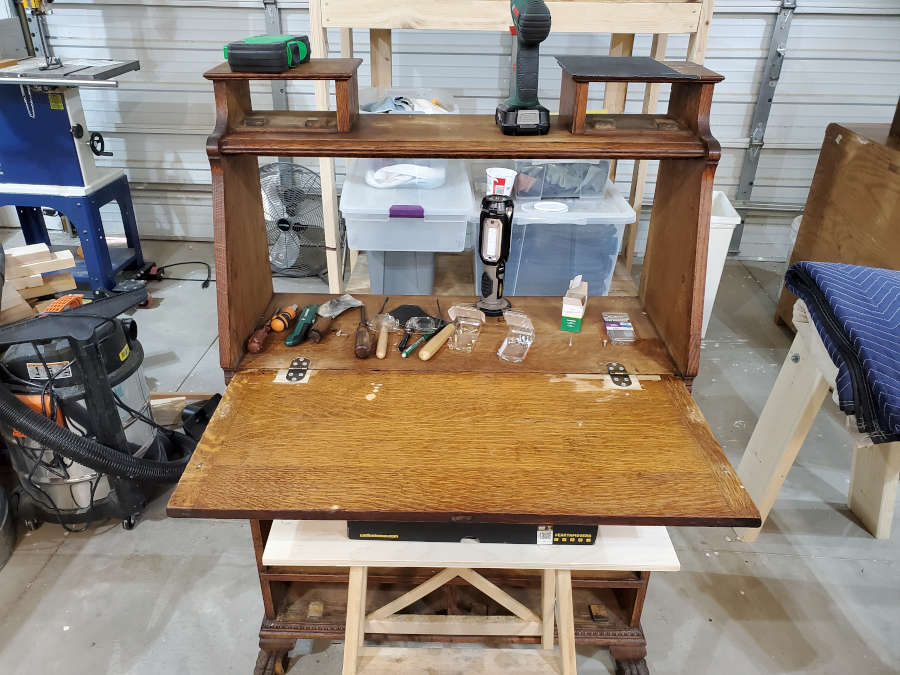
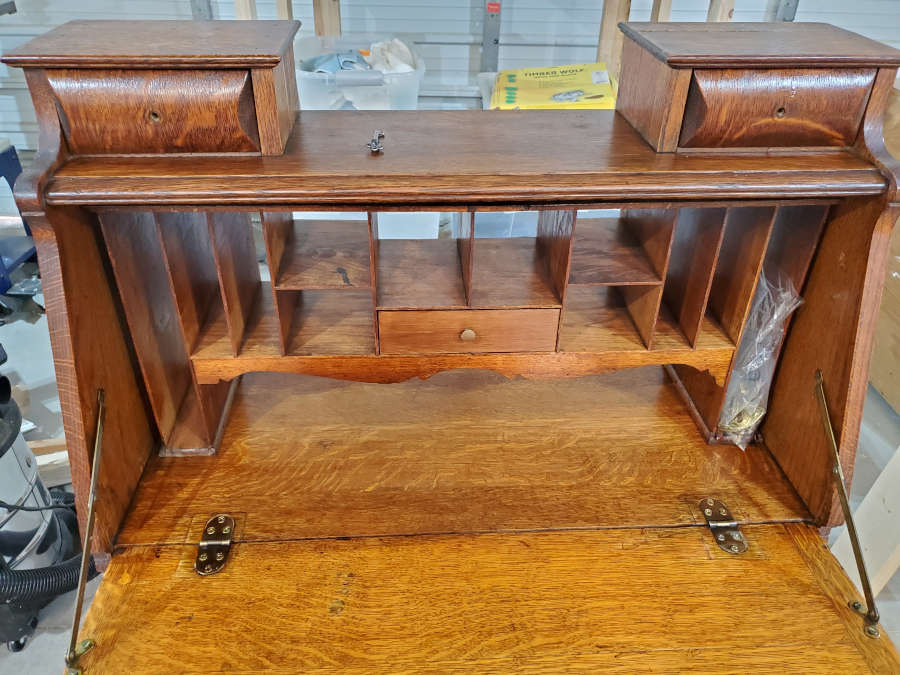
I also finished the hinges for the slant front and the damaged portion of the lid.


The next thing I’ve started on is the front doors. You can see the beautiful bevelled glass that I got from my local glazier, Tom Huisman https://www.huismanglass.com/

I’ll have more pictures of the glass in the doors in a later post. Right now I’m making repairs and replacing the hinges. There had been several repairs of the doors which ended up with a large mortise cut into both doors.


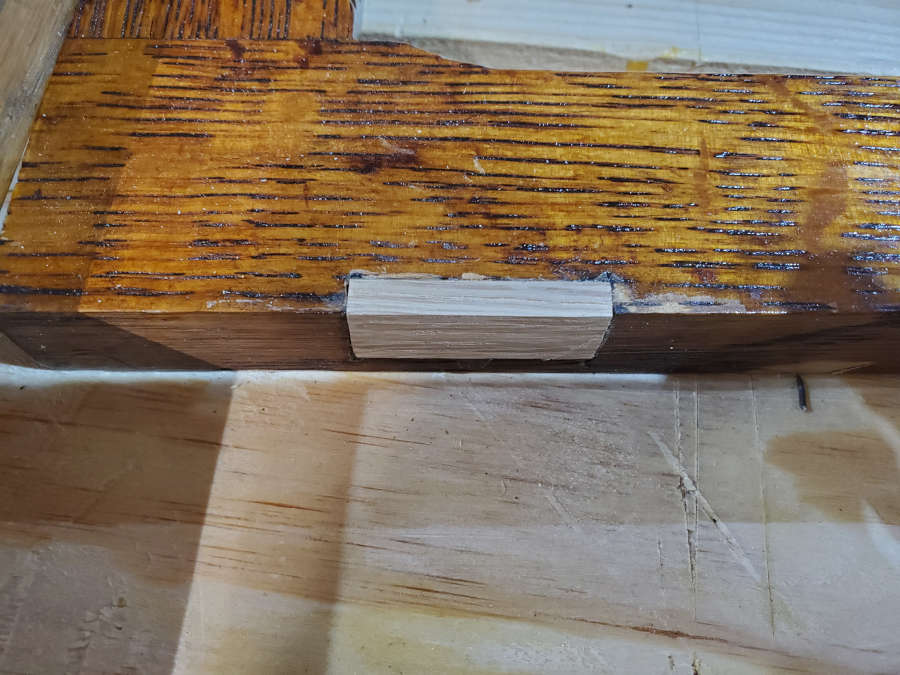
Because of the deep mortises that had been cut into both doors there was nearly an inch gap between the doors when they closed, so the lock could not reach the other door.

I cleaned out the mortises and spliced in some oak.


I then shaved it down with a block plane, spokeshave, and sandpaper.

Next steps will be to fit the new hinges and color the repairs.
I’m really getting close to finishing this piece, and I’m very excited. Once the front doors are done, I’ll finish my touch-ups of the slant top, as it has become something of a distraction. I’ll have better pictures of the hardware in my next post and talk about where I got it.