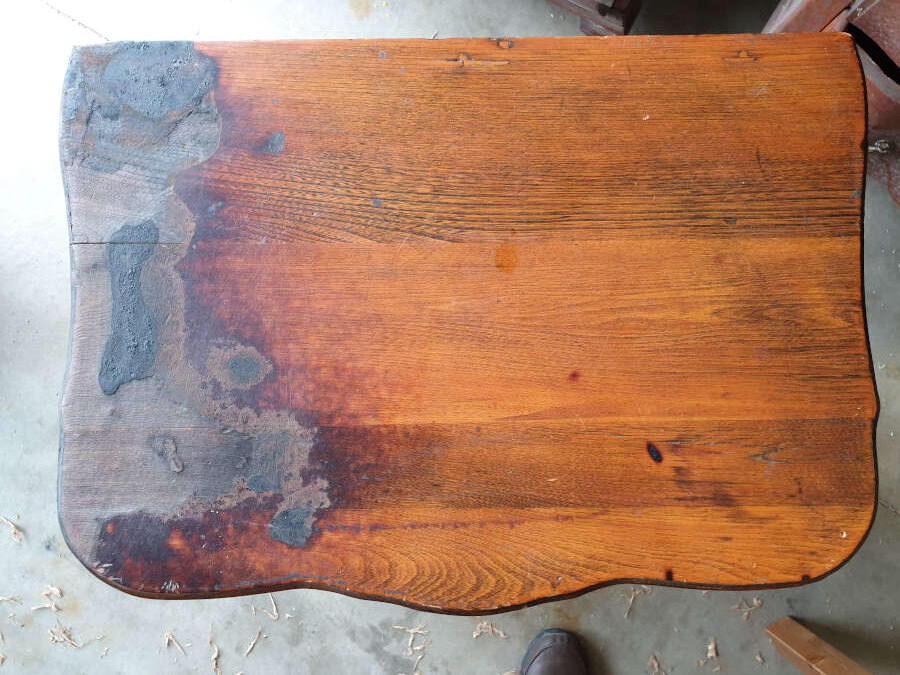
I’ve started my next restoration projects so I’ll begin here by introducing you all to the one that’s in the worst shape. The elm stand as a whole is not in terrible shape, but the top has substantial fire damage. I’m not yet sure if the top can be repaired or if it will have to be replaced. I’m hoping I can save it.
My first project of 2022. A nice little elm bedside stand.Significant fire damage to the top. Can this be repaired? Tune in next week, same Bat Time, same Bat Channel!Can’t really see it from here, but the panels are severely warped. They are solid elm.
It will get new hinges, pulls and knobs. I’ll also be replacing the casters, which are missing, with good brass and wood-wheeled casters.
The bottom is pine and is heavily warped. I doubt that I’ll put much effort into this part and will probably just replace it.
Is the bottom worth keeping?
There will be some minor repairs to the feet and legs, but nothing to write home about. My next posts will cover the repairs in detail.
Even though I didn’t start working on the top first, I’m going to talk about it here first because the biggest decisions I had to make about the restoration were related to the top.
First, a couple more pictures of the damage.
A few observations I made right away were that the damage was deep. I wasn’t sure how deep, but I would soon find out. The second was that the boards that make up the top were very different and there was no attempt to arrange them in a way that blended the grain. That is just a lost opportunity with something as beautiful as elm. The feathery grain is distinctive and makes it one of the most beautiful of all the woods.
The feathery grain is what makes elm so distinctive and beautiful.
I did also notice that the sides of the piece also showed the lost opportunity as the boards were not arranged for either side. I’m pretty sure this piece was made in an automated shop. Either that or the assembly line that the workers were on didn’t allow them the time to make these types of decisions.
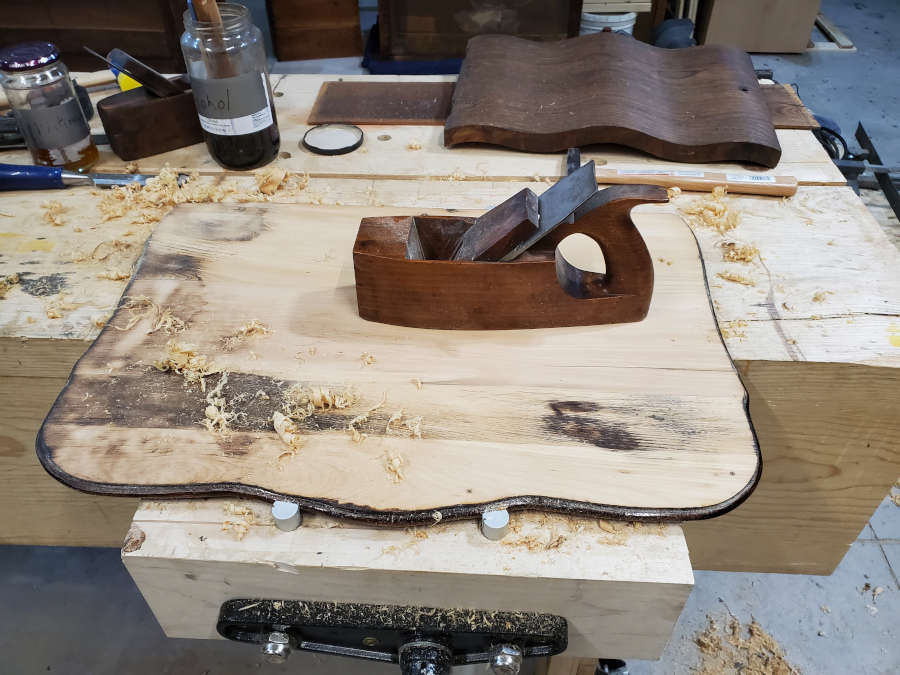
As I looked at the fire damage, I had a couple of options running around in my head. If it was too deep I could take enough material off of the top to make it flat and then laminate some new elm on top. I could also take out material just from the portion of the top that was damaged (the left 1/3 of the top) and then laminate new material in. I dismissed this last one right away because that would have left a long line down the top where the new and old wood meet. I decided that I just did not want to introduce any new material to the top if I could help it, so I got out my hand plane and my scrapers and got to work.
At this point I was really worried that the damage had gone too deep.Put some alcohol down to see what the grain would look like after finishing. Still a long way to go.
After working on the top for a while, I really started to worry that the damage had simply gone too deep and that I would have to laminate material on to the top. But I did actually reach a point where I felt that the damage was not the first thing you would see.
The damage to the left side meant that the edge was more rounded over than the undamaged side, so I just rounded over the undamaged side and called it a day. When I run my fingertips over both sides, it is not distracting, and you can’t really see that the edge is not as sharp as it could be.
I don’t have a lot of pictures of the colouring process, because it was more of a matter of colour matching the different boards than it was to match the top to the rest of the piece. But eventually, I got to a point where I could leave it alone and work on the rest of the piece.
Leaving it alone for now.Using the door to match the colour to.Before and after.
I’m happy with how it’s turned out so far, and any further tweaks I feel need to be made can be done with wax.
I’ve made some progress on the bedside stand since last we met. I’ve taken the piece apart to clean the joints and make them stronger.
Doesn’t look like much now.
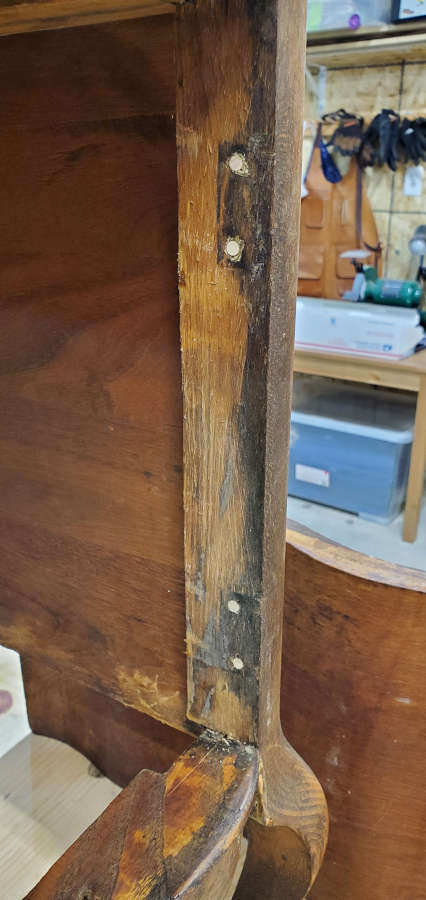
This stand is actually a great example of an older piece that has some pretty interesting “quirks”. Many of the joints were pretty loose and I could see that in a couple of spots the glue was used to fill the significant gaps between the tenon and the mortise. I also noticed that the bottom had been replaced and the new bottom could not be fit into the slots made for it, so a small piece of wood was scabbed onto the front so the bottom just sat on it.
There are also some mortises that are not in the same place on the matching stiles (crooked). That said, this piece has lasted a lot longer than some of the modern “disposable” furniture, and once I am finished with it, it will live on much longer again.
The fire damage was not just to the top but also damaged the leg.
I have scraped away much of the fire damage here and have filled the split. I’m not sure if I will do anything else to it or not as it’s barely noticeable.
One of the more fiddly bits with this piece has been fitting the door. This because the sides are not square and the bottom apron is quite loose and will need to be squared to the bottom of the door. When I removed the door I knew I would not be reusing the screw holes from the previous hinges, so I plugged them with dowels and drilled new holes for the new hinges (nice brass hinges).
After fitting the door and replacing the hinges and knob. The bottom apron still needs to be adjusted.
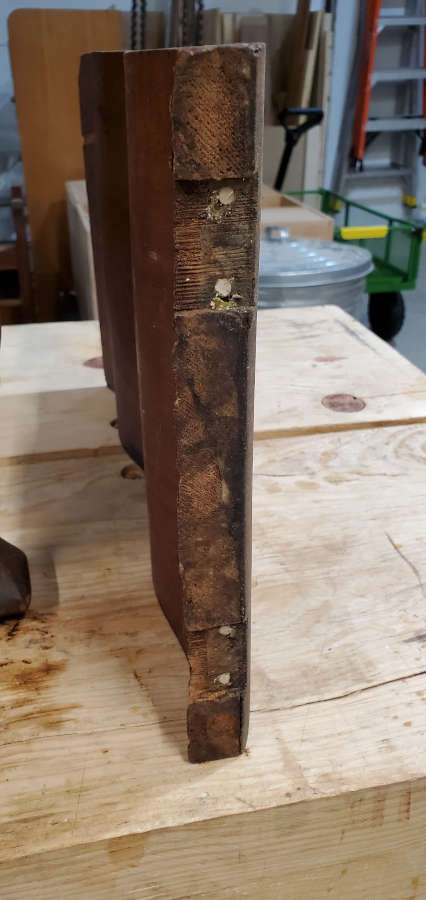
Now onto the back of the stand. The original panels were extremely warped and split so I replaced them. As I was getting into this, I noticed that the top rail was also very warped and twisted so I replaced them all.
One of the two back panels.This was taken after I had tried flattening it under some weights for a week. I was going to try oiling it to make it more flexible but decided to replace it rather than put any more time into it.
Making a replacement rail was very straightforward. I used the original as a template and got out my plough plane to cut the groove.
With the new panels and top rail. I will work on the color later.
I have everything back together and after I adjust the bottom apron, I’ll be ready to start coloring.
Getting there.
My next post will likely be after I get started on the coloring and finish.
It’s been a while since I posted anything and so I’ve decided that this post will be about ongoing projects, new projects, as well as why I’ve left Facebook, Instagram, and Twitter and where I’ve gone (if anywhere).
One of the main reasons that I’ve not been making progress on my furniture restoration projects is that we’ve been remodeling our house. I’ll probably have some before and after pictures up here eventually.
First, the Small Elm Stand. This one is foremost on my mind because I’m so close to finishing. It’s in good shape right now and I just need to finish the glue up, start coloring, and shellac and wax.
So close to being finished!
I have eight or nine projects waiting in the wings that I’ll talk about individually as I get closer to starting them. They include three Art Deco pieces that I think will be amazing and two oak dressers.
Aside from the upcoming projects, I am letting anyone know who stumbles on the website that I’m not on Facebook, Instagram, or Twitter. This is not for my privacy or security, but for the privacy and security of anyone who uses this website. I don’t use SEO or any tracking tools apart from my website security, and having any links or plugins related to Facebook, Instagram, or Twitter would negate that privacy. I do not assist Facebook, Instagram, Twitter, Google, or Apple (or any other corporate entity) in their tracking of any visitors to my website.
That said, I am using Mastodon and will be posting about my projects, as well as my wife’s projects, on there and linking back here. If you are interested in following me or my wife there our handles are:
@blaidddrwg@realsocial.life
@spoonsforever@realsocial.life
We are both getting started with Mastodon, so our feeds are not very interesting yet, but as we get further into it we will have some content there that is not here.
That’s it for now. My next post will likely be project related.
Ok, so it’s been a while since I’ve made any progress on the stand, but I have a very good excuse…and that’s a bald-faced lie. I have been working on our home remodel, but I’ve also started a few other projects so I’ve just been pretty distracted.
I decided to replace the bottom because the previous bottom (which was also a replacement) was too warped to fix.
This is the previous bottom, which was also a replacement. It was a nice thick piece of pine, but it twisted and warped so badly that I wasn’t even tempted to try to fix or straighten it.
I had some nice pine that I’m using for another project. The pieces were too narrow so I joined them and cut them to length.
The new piece was too thick so I got the scrub plane out and took off about 3mm (1/8th inch) from the face, then flattened and smoothed the face.
Using my scrub plane.And following up to smooth the face.
I dry fit the bottom into the grooves in the legs and clamped it up to make sure the bottom was not too wide or deep.
After some tweaking. Shaved down the edges and sides so it fits snuggly but has room to expand. In this case the bottom will expand to the sides.
I’m pretty happy with the bottom and I’m ready to start glueing up the carcase. That will be in the next post.