In the previous post, I was working on the top of the chest but didn’t show any of the rest of the piece, so here goes.
The first thing I noticed when the piece came into the shop was the back.
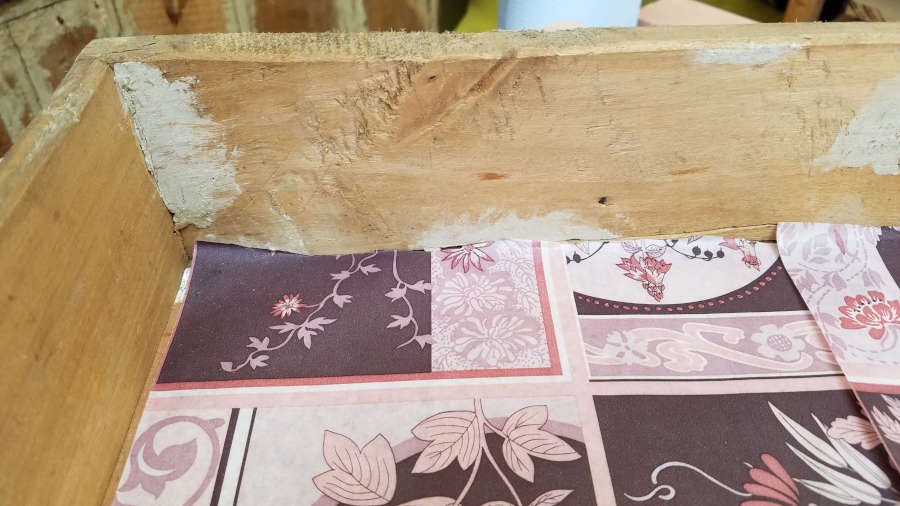
It initially looked, and felt, like thin cement covering the joints but Graham identified it as gesso. This makes more sense because workshops would have had gesso available for painting (and gilding?)
This next picture made me think that most of the carcass may have had a gesso coating. The drawer side looks like it could have been covered, and then through the years the majority just wore away.
But then the inside of the drawer again looks like the gesso was used to cover gaps in joints, smooth dents, and fill holes. So I don’t think the gesso was used to cover the entire carcass, but I do believe it was added at a later date to cover gaps that developed as the lumber dried and shrank.
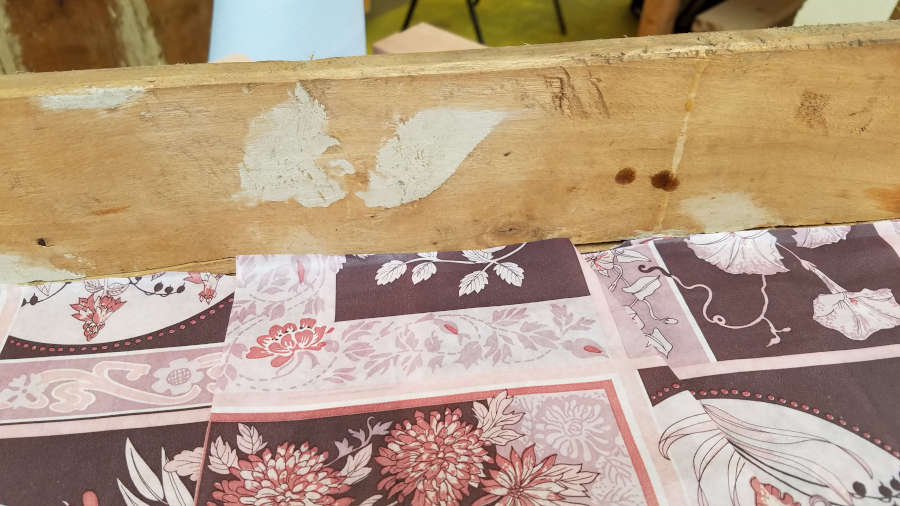
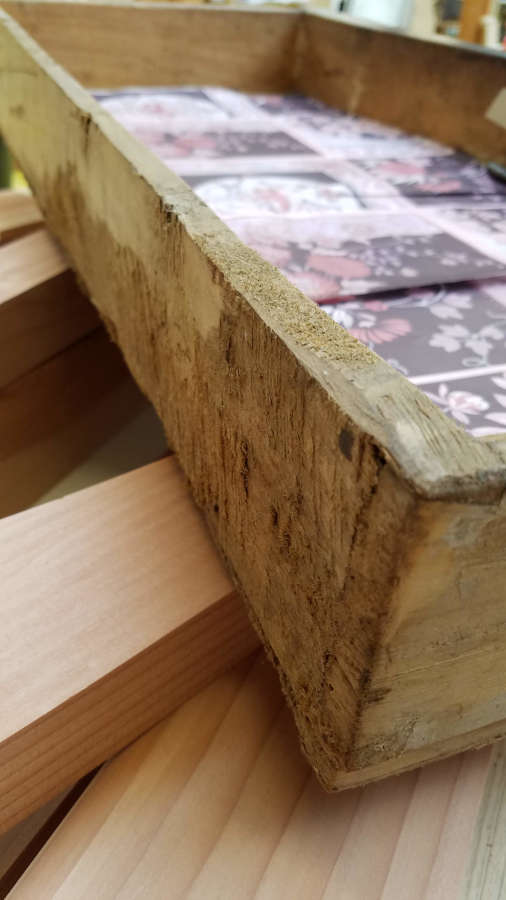
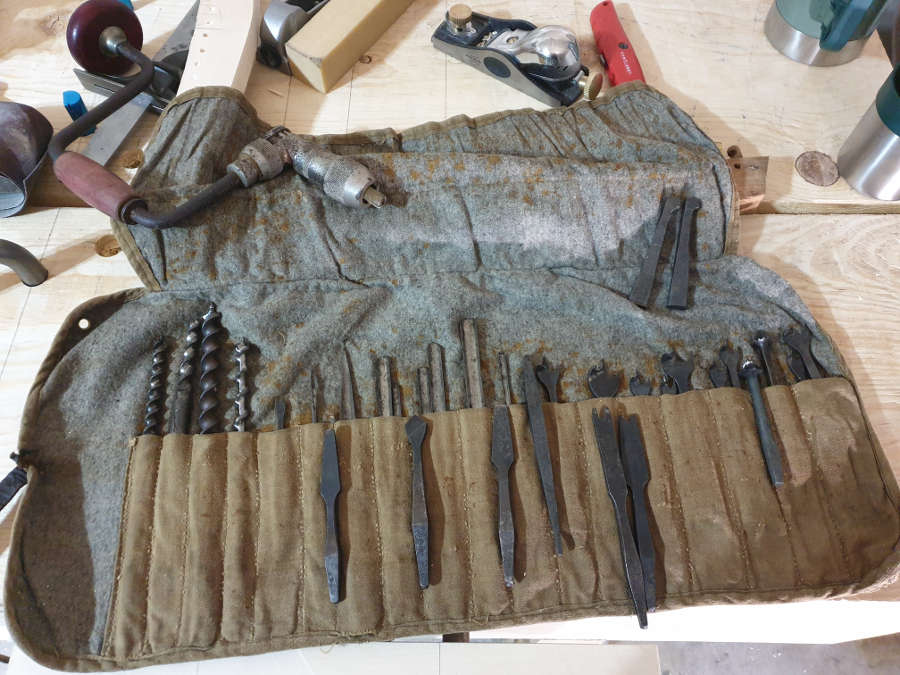
Next, I looked at the drawers. This along with the back of the chest brings up an interesting point. The craftsperson (craftspeople) who worked on this were very efficient with their time and energy. Non-show surfaces were not smoothed or scraped.
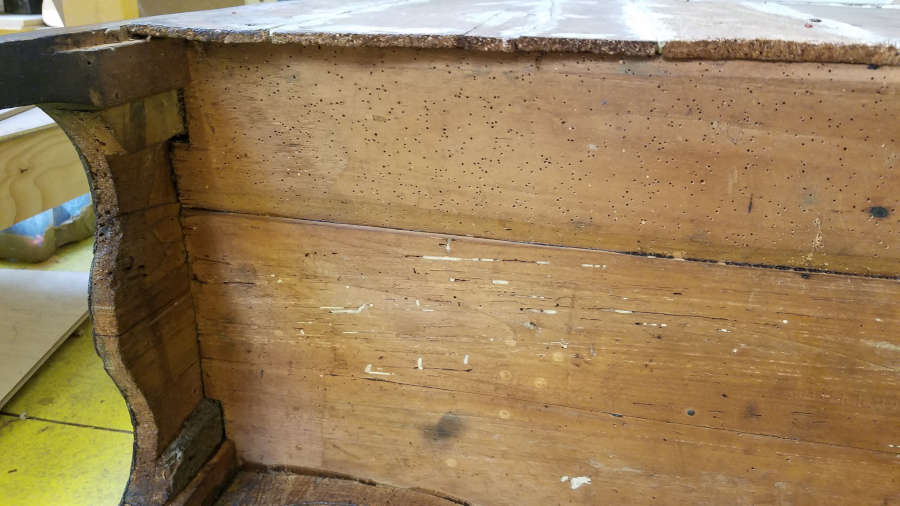
And, unfortunately, this piece had been a meal or two for some woodworms. Unfinished surfaces were given woodworm treatment as soon as the piece came into the shop.
This next picture highlights a couple of points. First, I think it re-enforces the idea that the gesso was a later addition to cover up the gaps made by dried and shrunken wood. Second, the non-show surfaces again show the efficient use of their time. The only smooth surface in this drawer space is the bottom where the drawer sanded it smooth from hundreds of years of use.
I eventually started looking at the show surfaces.
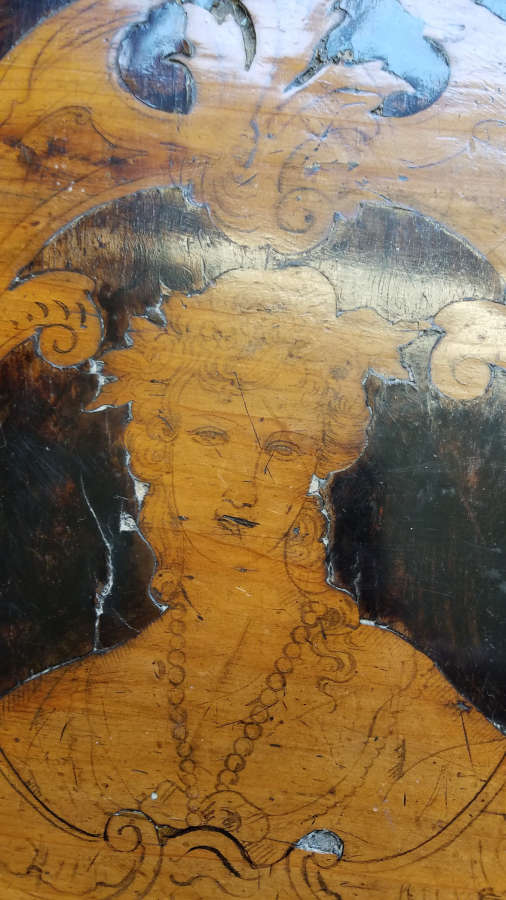
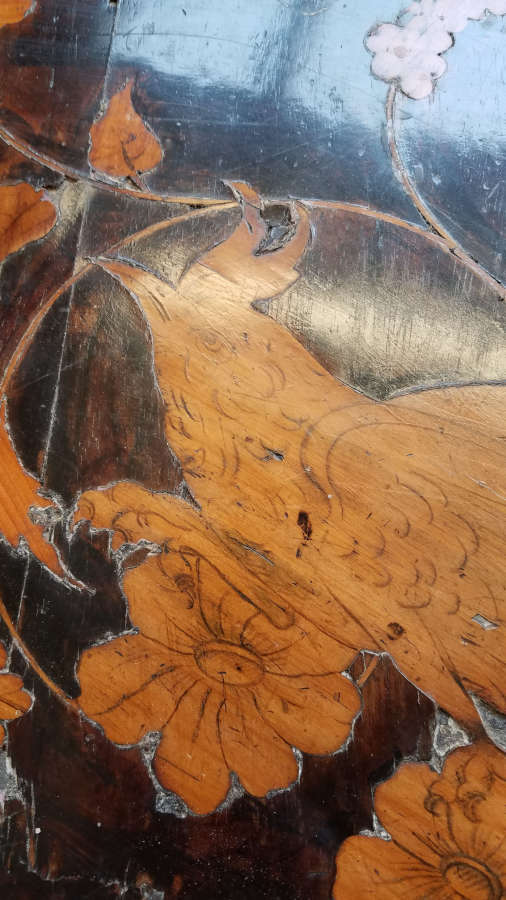
A portion of the Italian table that came in for restoration a while back. I’ll post more on this one later.
One thing about the marquetry is that the lines for the detail are not carved like first thought. They are drawn.
I didn’t think much of this at first, but when Graham needed to do some work on the table he discussed how important this detail is. If you have to use meths (methylated spirits – denatured alcohol) to clean or take off the finish for any portion, it can also erase the detail work so you have to be careful where and how you use any chemicals to clean a piece.
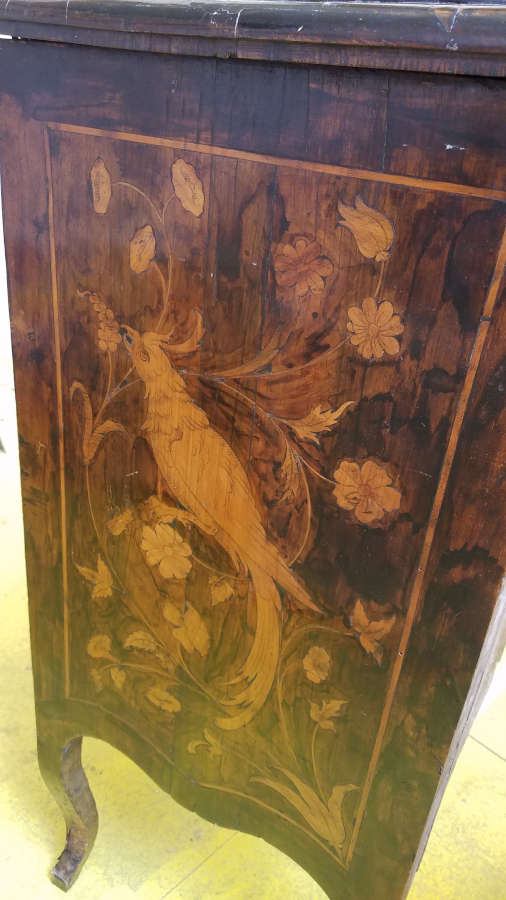
One major difference between the table and the chest is that the table is all marquetry and veneer with a clear finish, whereas the chest is marquetry and a painted veneer.
Painted veneer. Veneer with clear finish.
Graham thinks this means the two pieces were made in the same shop, but the chest was a project for an apprentice. That makes sense to me and I’m running with that theory.
One project that really took me by surprise while at the Chippendale school was a mirror that ended up requiring more brand new skills than I would have thought possible.
I already knew that I wanted to do letter carving and I knew which quote I would use. I first saw the quote “The lyf so short, the craft so long to lerne.” in a picture of a fireplace mantel in a craftsman style home of Gustav Stickley, who was one of the first, and most well known, US mission (arts and crafts) style furniture makers. I then did some research to find out that it is from a poem by Chaucer, called “Parliament of Fowls” which is about how love and life are crafts that take a lifetime to learn. It is also thought to be the origin of St. Valentine’s Day. That said, I only knew it as a quote about traditional crafts and still think of it that way.
It started out as a simple drawing. At this point, I was so focused on my other project that I didn’t put a lot of thought into the scale or proportion, but I knew I wanted an arts and crafts style mirror.
This plan lasted long enough to start dimensioning the lumber and then went through several modifications (in my head). Then, when we ordered the glass I realized I had designed the frame too large, so it went through another major modification.
I thunk and thunk and then thunk some more over the resizing and what shape the mirror should take but had already started laying out the letters since the letter size and font would tell me generally what shape the mirror would take. I knew from the beginning exactly which font I wanted to use on this as I’d seen it used quite often for arts and crafts lettering, but I just didn’t know what it was called. I searched several font websites and found it on https://www.dafont.com/dyer-arts-and-crafts.font and also on https://www.1001fonts.com/dyer-arts-and-crafts-font.html
This is a public domain font and is free for all kinds of usage.
Dyer Arts and Crafts font.
I didn’t want the letters too small as that would make the carving more difficult so when I settled on a size I printed them out, cut and spliced them into their lengths and lay them out on the lumber. Here I needed to make sure my kerning was consistent because I was splicing groups of letters together.
I was worried that as I started to outline the letters onto the wood with the gouges that the letters would move and I’d lose my place, so I also used graphite paper (carbon paper) to trace the outside lines of the letters. This turned out to be overkill and actually created more work for me because I then had to remove the tracing afterwards, which turned out to be more difficult and fiddly than I had planned.
You can see the result of the tracing paper in a few of the letters.
The letter carving itself was very enjoyable and cathartic. I would be so engrossed in my carving that hours would fly by and I’d have to force myself to take a break, stretch, grab a cuppa, chat with the other students, and then dive right back in.
Once I’d reached a point that my rough out of the letters was finished, I shellacked the letters. This was to exaggerate the roughness and show me where I needed to concentrate my efforts to smooth the sides and the outlines.
I’d shellacked the top row, but not the bottom yet.
The roughing out of the letters was the quick part. I spent more than twice as much time smoothing the sides and edges.
After the rough out of the letters. Next I’m on to the smoothing.Getting there.
Once I’d finished the smoothing of the letters, I was ready to stain and then gild. I later found out that this was the wrong order and next time I’ll gild and then stain. The reason being that when I finished gilding I had to sand the surface in order to create the crisp edges, but doing that removed most of the stain. I then had to restain after I had finished sanding. Not a huge issue as the restain cost me a part of a day and I had to let it dry overnight before shellacking.
I also had to regild the letters as I initially didn’t follow the tutor’s instructions correctly. Richard Walker at http://watergild.com/ was the visiting tutor for our gilding instruction and was great to work with. He never cracked a joke and we always knew when he was being serious. 😉 After realizing my mistake and regilding the letters, I sanded then restained using my super secret mix of water dyes.
Some of the testing I did for the mirror frame. Not all, but some.
After letting the stain dry overnight, I shellacked the front side. This was so I could finish staining the edges without it bleeding into the front.
As I was doing all of this I also worked on the side pieces and created the mount in the back to hold the glass. I don’t have pictures of that, but may add some at a later date.
I also didn’t take pictures of the glass/water gilding on the glass, and I’m really kicking myself now. That process was incredibly interesting and I can’t wait to do another project like this. Again, Richard was excellent to learn from as he was able to walk me through the process several times (I kept getting sidetracked on other stuff and would come back and say, “uh, I can’t remember what you said to do here”). Very patient and a great teacher.
First, I laid out the background, which was white gold (I think it has an Italian name, but can’t remember). Then, I scratched out the outline of the roses. For each rose I started with red gold, then added white gold to the center. I then scratched out the leaves and used green gold. I finished by scratching out the stems and then painted over the back with black acrylic paints. I’ve really condensed the process here because I don’t have a photographic record of the steps, but even though there are a lot of steps here and I had to wait overnight for the water to dry before I could move on to the next portion, it went surprisingly quickly. I will post pictures of the process when I do my next glass gilding project.
And the finished product, with 7 coats of shellac. I’ll add more pictures later.
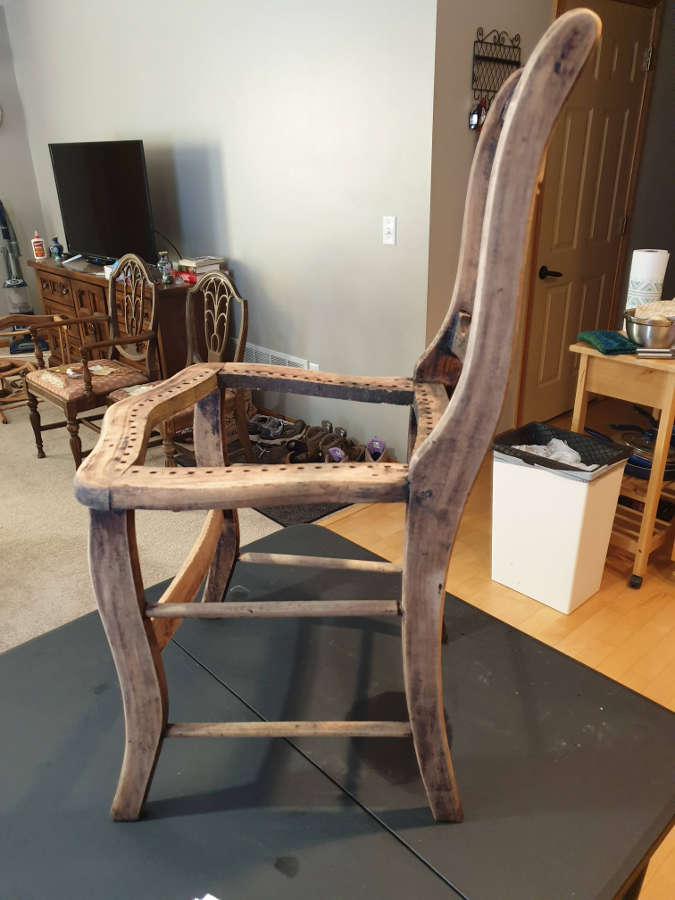
A few months ago, my wife and I picked up a couple of chairs that we wanted to work on. Both had caned seats and one (the Empire style rocker here ) also has a caned back.
Two projects we picked up several months ago.Caning before removal.
I’d been reading about seat caning for a while and have been following Ed Hammond and The Wicker Woman on YouTube. The book I got was “The Craft of Chair Seat Weaving, with Cane, Rush, Splint, and Rope” by George Sterns. The book is a very good starter and I referred to it quite often for the basics. The YouTube videos are much better for the details and to better be able to adjust for the curves and other fiddly stuff. I also used Ed Hammond and The Wicker Woman as guides for the “no knot” method for the underside.
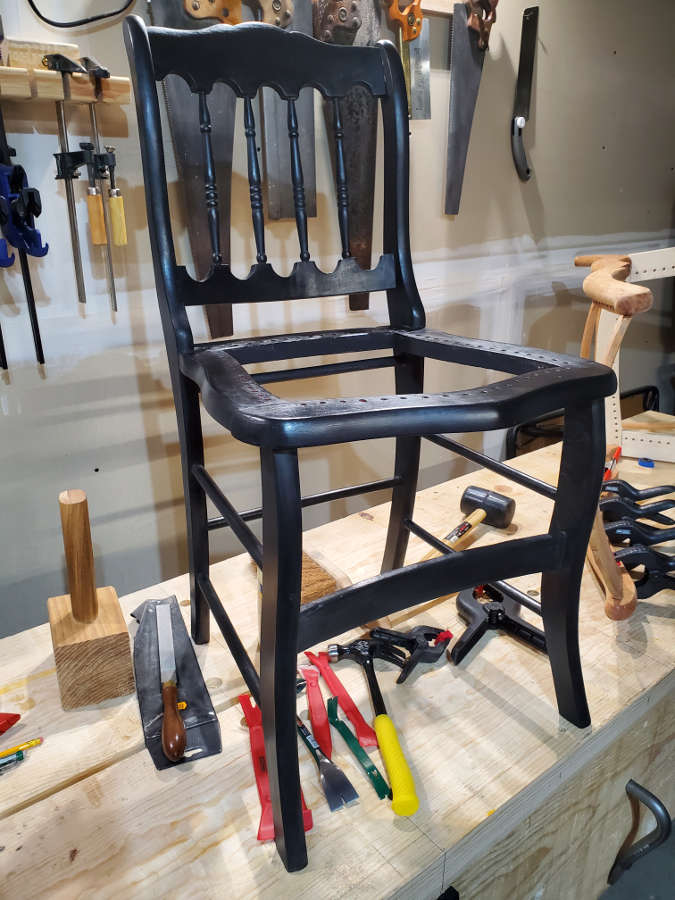
To start out, I stripped the chair and then prepped it for a new paint job. I went with milk paint and initially tried what I thought was Barn Red, but turned out to be closer to Hot Pink. Rather than remove this and start over I just painted Pitch Black over it. I did not want to distress this, but I figure that it will distress naturally very nicely with the red/pink underneath.
I stripped the chair and then had a good look at the joints to make sure everything was solid. The chair was in great shape so I didn’t need to redo any joints.Not the colour I was looking for.Much better! A few coats of Pitch Black and then a few coats of wax later and it’s ready for caning.
I had several false starts on the caning portion. As I got past the verticals and into the horizontals I had to unweave several sections and start over. It took quite a bit of thinking, doing, undoing, thinking, doing, undoing before I got the verticals and horizontals that I thought would work.
This was attempt 3 or 4. Can’t be sure.
Once I got into the diagonals I realized that there were still issues with spacing in the horizontals and verticals. I had to figure out how to either work around some of these obstacles or redo them. I ended up doing both.
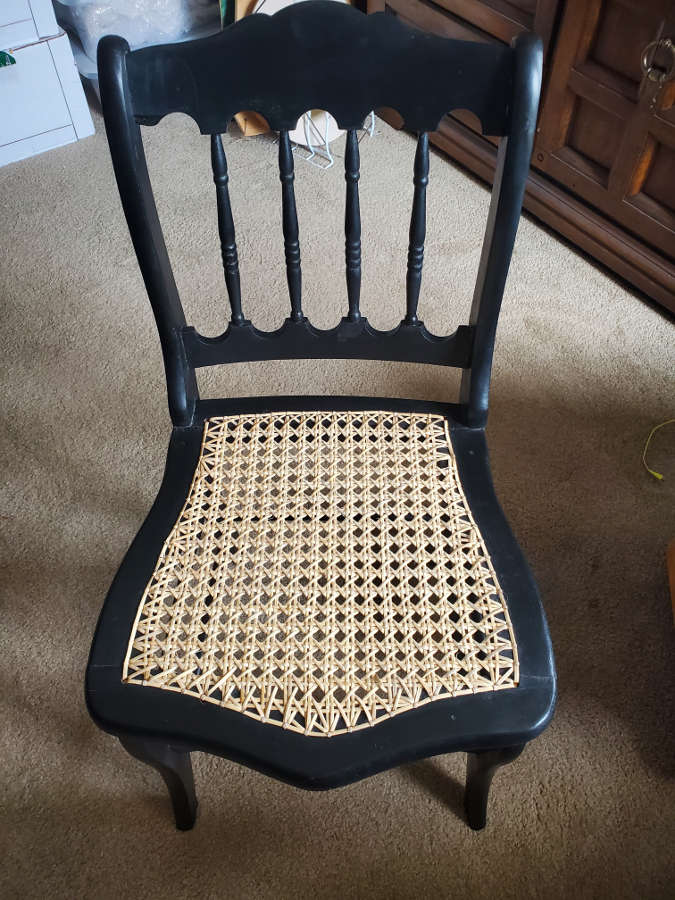
I will probably redo this seat in the future, but once I get the border finished it will reside in our kitchen for a while.
Still need to add the border around the sides and front. This has been a huge learning experience, but I do feel better about getting started on the Empire Style Rocker, once my repairs are finished on that one.
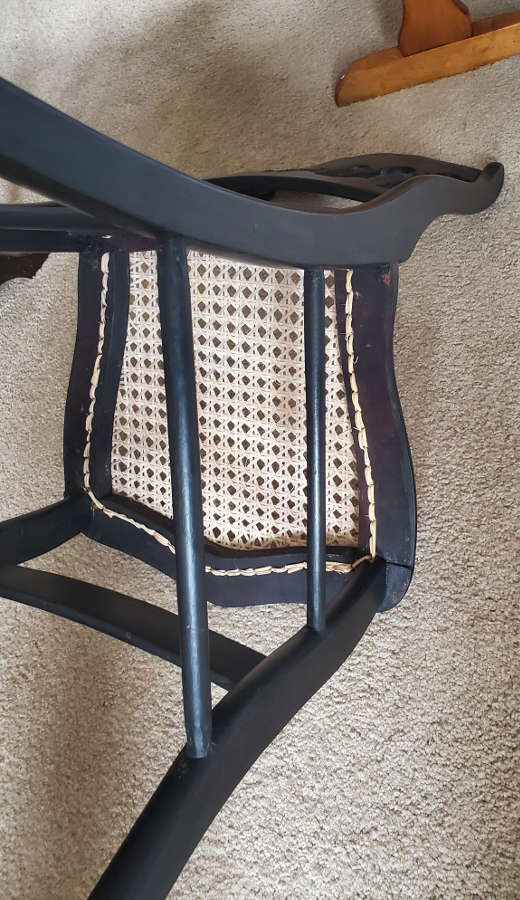
Update 26 July 2020: I finally finished the last of the border and cleaned up the underside.
I ended up doing more of a hybrid ‘no knot’ with a couple of knots due to being unable to plan ahead or stage my cane ends well enough. I surprised myself with how strong these cane seats are: I’ve already sat in this chair a few times and I’m a rather large person.
I have a couple more caning projects coming up am ready to improve on this one.
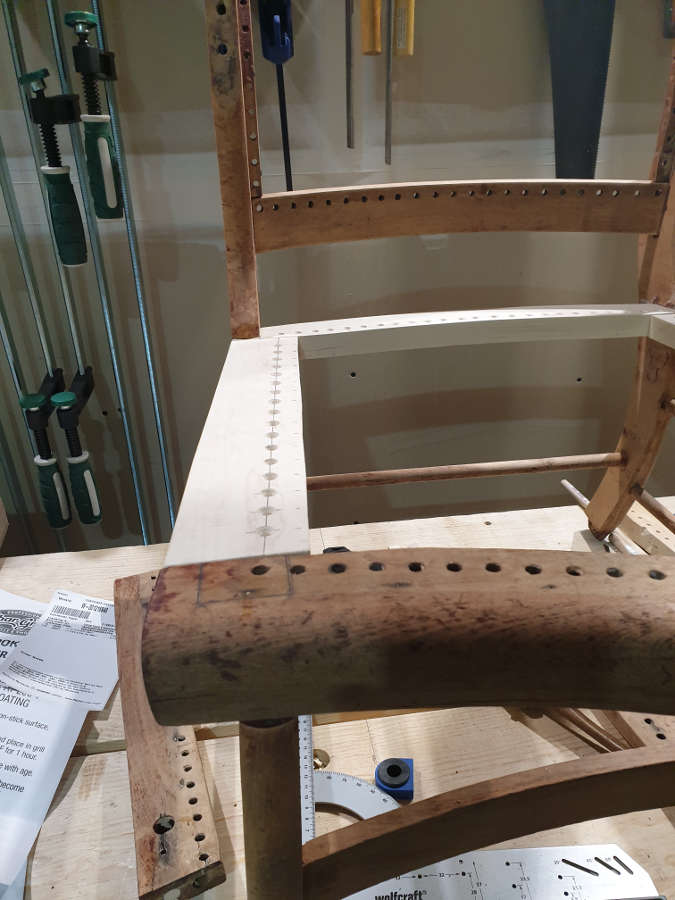
In Part 1, I had finished stripping and disassembling the rocker and had decided to replace the rockers and the side pieces of the seat. After that, I also decided to replace the back of the seat. This because the sides had been connected to the back with dowels, but the way the dowels and the joints fit, they did not make a good joint. If you look at the picture below, you’ll see that at each end, a half a hole for a dowel. So one of the dowels on each side was not even embedded in the back piece.
I then looked at the way the sides connected to the front piece and decided that instead of a couple of dowels, I’d use a loose tenon. This would create more shear strength, across the grain, at this crucial point.
Unfortunately, I didn’t take any pictures of the loose tenon or any of the fitting process, but I do have pictures with layout lines and also where I filled in the original dowel holes.
My pencil mark shows where the loose tenon is.This shows where I filled the dowel holes in order to remove the mortise for the loose tenons.
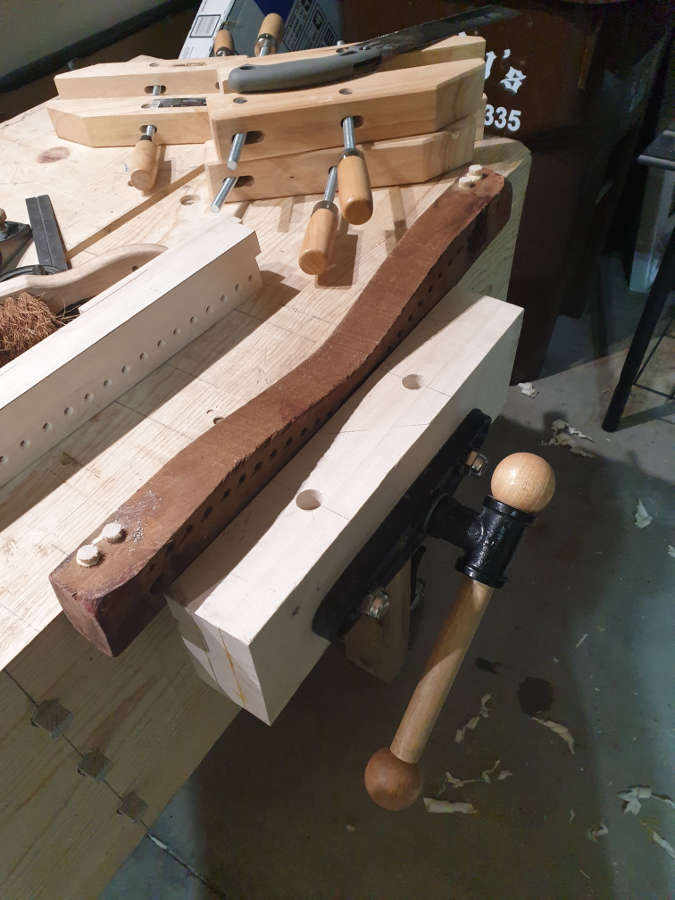
The following pictures show me cutting and shaping the back piece.
Making the replacement back piece.
I took the number of holes from the original and spaced them a little more evenly before drilling them out.
I countersunk the holes.
Using a bit from a roll that a wonderful friend and classmate from the Chippendale Furniture School gave me.
Thank you Gordon! @twintreedesign Initial fitting of the back piece.
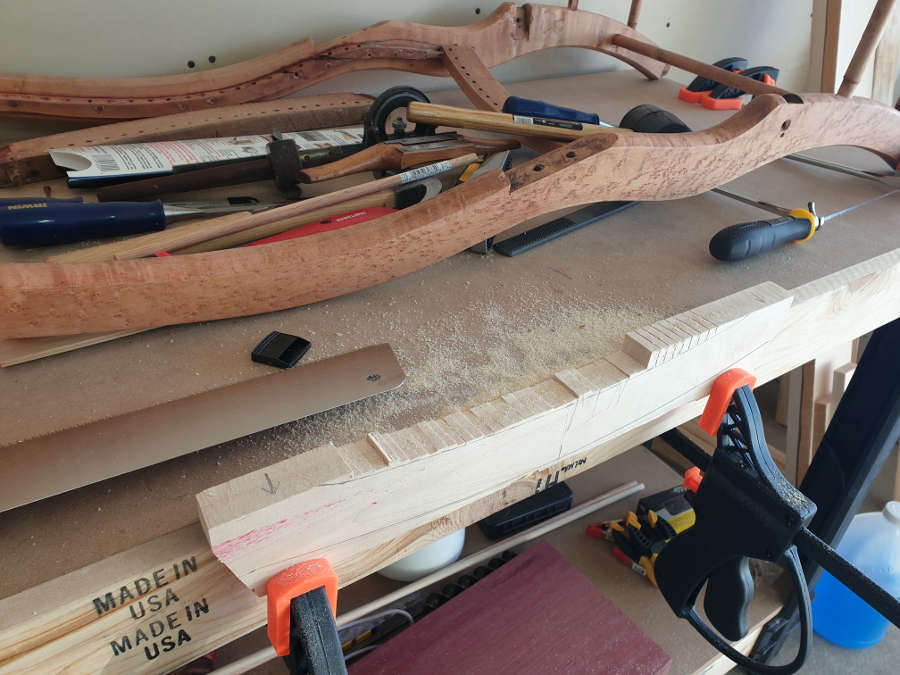
After quite a bit of dry fitting and tweaking the joints, I was ready to glue up the seat.
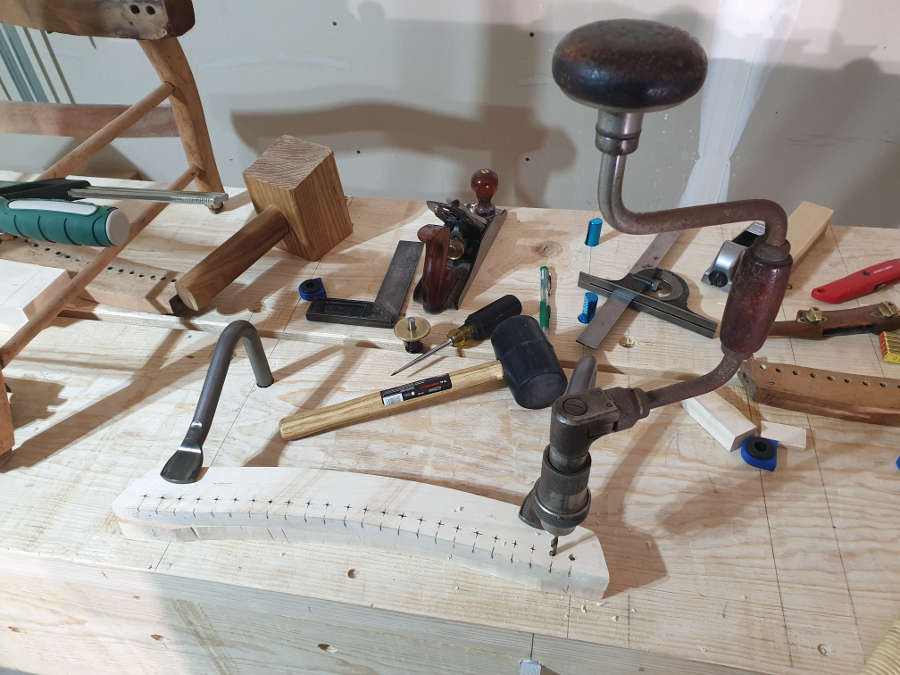
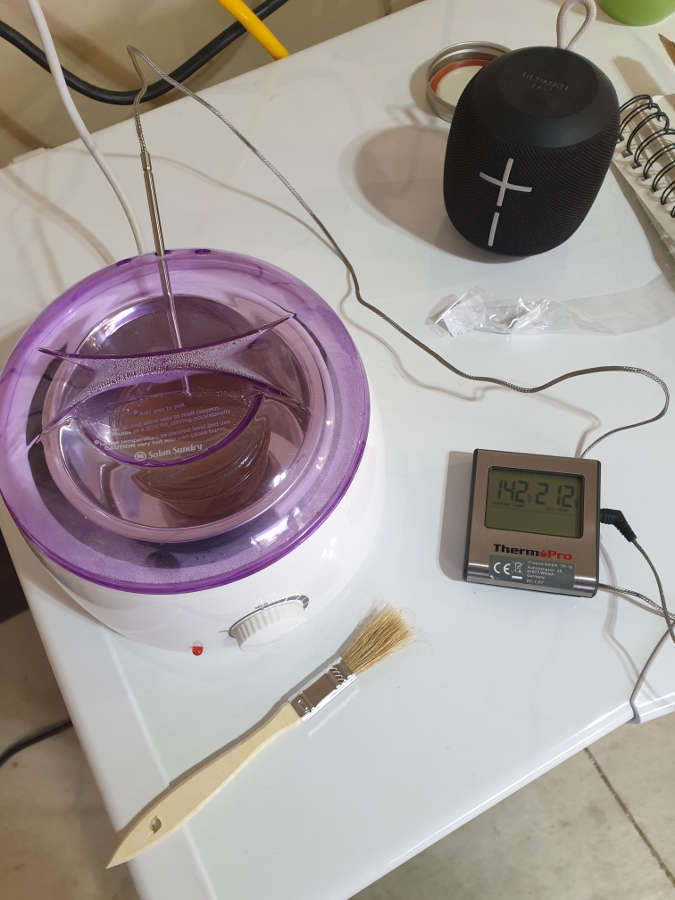
For most of my projects, I tend to use hide glue for the joints and PVA for the splits, cracks, and fills (like for filling the dowel holes). My thinking is that for most, if not all, repairs I can use PVA adhesives because the idea is that they should never need to be undone at all…ever. This is for repairs and restoration jobs, but not necessarily for conservation work. For the joints, I use hide glue because I want to be sympathetic to the piece and I want to make sure that the piece can be repaired / restored in the future and still be sympathetic to the piece if that future restorer wishes. If in the future, someone repairs the piece with whatever adhesive they have available, that’s fine because I won’t be around to see them muck it all up 😉
My ultra high tech hide glue melting pot. Plus if I ever need a bikini wax, I’m set.Seat is fitted and the chair (except for the rockers) is ready for glue up.
For Part 3 I’ll remake the rockers and discuss the changes I made to the dimensions. I’ll also discuss the back frame and the broken pieces I had to replace for the caning.
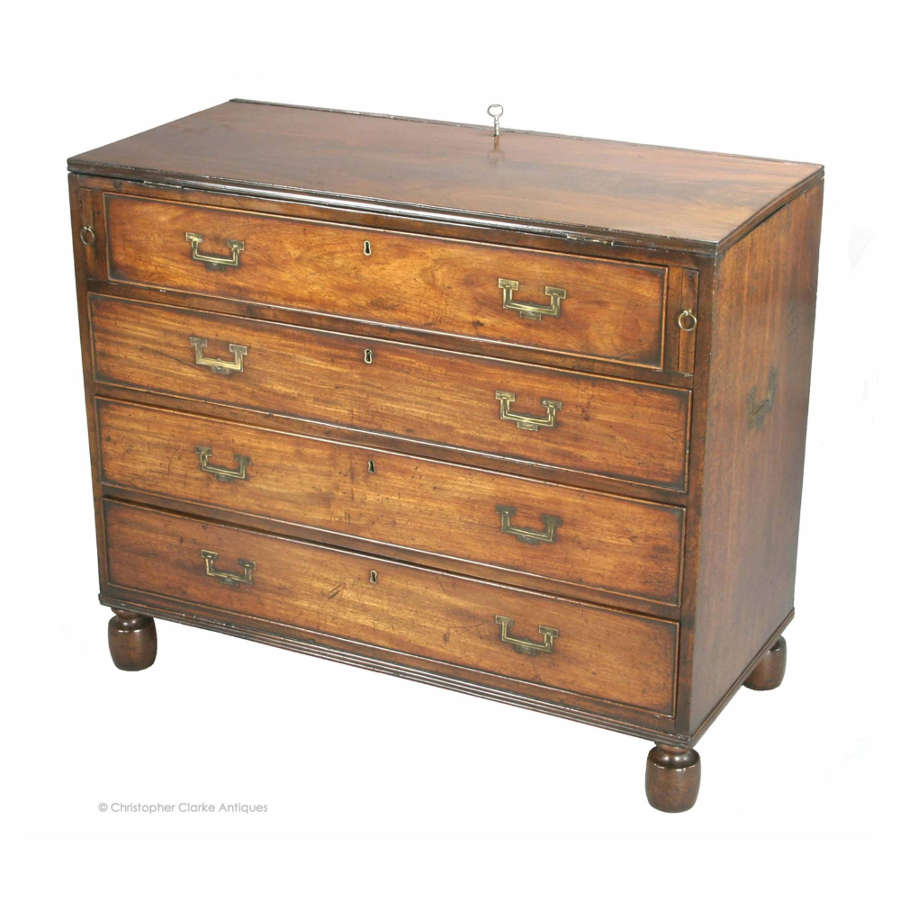
The first thing about Campaign Furniture that got me interested in the style was that many of the pieces broke down for travel or had hidden uses. Some of these designs seemed playful in that what looked like a chest of drawers turns into a desk, or when a small table breaks down into a briefcase-sized box with carrying handles.
I find a piece like this just fantastic as it packs so much utility into such a small space.
Legs and stretchers are stored inside.This is one of my favourite designs. The gallery and writing space are large enough to be useful and small enough to be mobile. The stretchers are very important as without them the legs would not last a day, especially on uneven ground or with the racking and twisting of use near a battlefield.
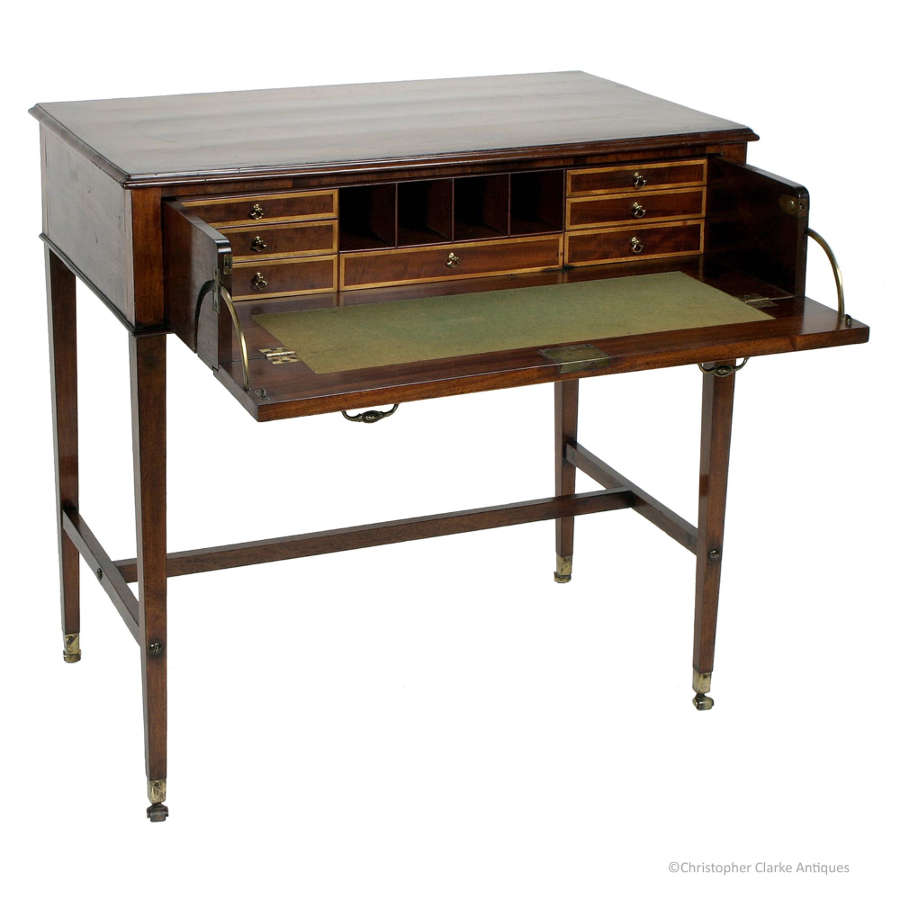
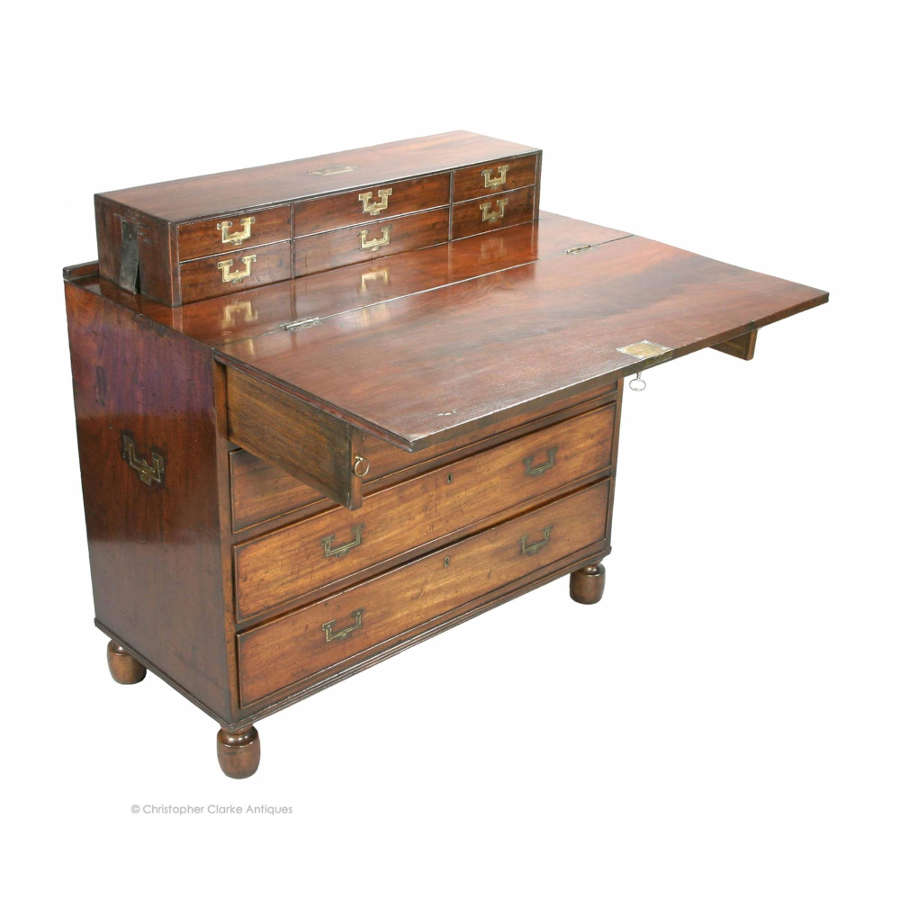
The chests that convert to secretaires or desks are beautiful pieces. There are several different methods of hiding the writing surface and gallery, like below where the top folds out and rests on lopers and the gallery pops up on springs.
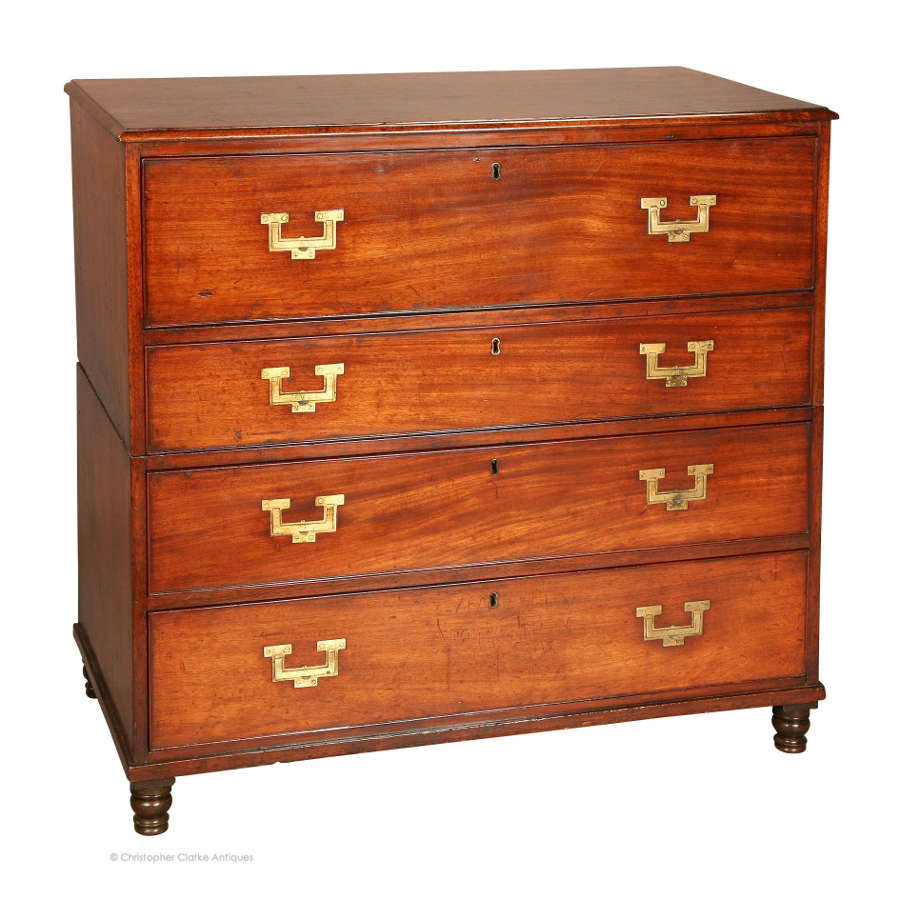
The following is the most prevalent style though and is what I styled my campaign chest after (I’m still working on it and plan to have it finished sometime this millennium). My drawings (from my other post) show that I am using the quadrant stays like the following example, instead of lopers like the above example, to support the writing surface.
Chest Secretaire early 19th Century
One thing that I found while planning my campaign chest is that much consideration must be given to the height of the drawers so that the writing surface is comfortable to use. Once you get the writing surface at the correct height, you then have to look at the size of the drawers and if you want symmetry from top to bottom. In my case, I decided to go with a larger drawer at the bottom and top and then smaller drawers in the middle. This was also factoring in the height of the feet.
Patent furniture and campaign furniture are not the same. Patent furniture became an important part of a military officer’s inventory because of its great utility, but some campaign furniture is not patent furniture, but simply breaks down for travel or is made to be more durable (with brass strapwork and corner protection).
My next post on campaign furniture will be when I start working on my own piece again. Hopefully soon.
So, my glacial progress on these first restoration and repair projects has been a bit disheartening, to say the least, but I’m within spitting distance of finishing the small oak dresser, so here we go.
This is the 2nd project in a group of about a dozen that I’ll be working on in between my day job and getting my workshop insulated (which I will write about in another post). It is an oak dresser that originally came with a mirror. The mirror may be in the group of mirrors that I received with these projects, but I have not tried pairing them yet. The dresser is likely early 1900s or, less likely, late 1800s. The drawer fronts and top are solid oak and the interior is in good shape. The casters are original wood wheel and brass and the drawer hardware appears to be original as well.
Serpentine front small oak dresser. It’s in pretty good shape except for some burns, water stains, and other discolouring.
The dresser was not in bad shape but required some work done to the damaged top, so I got out the card scrapers to remove the burns, then filled the shallow divots with shellac which I coloured to match the rest of the top. Some alcohol and a scrubber got out most of the rest. I then put a few coats of shellac and then some dark wax (Kingdom Restorations). Clare, a tutor at the Chippendale International School of Furniture used to say, “Dark wax can hide a plethora of sins.” In this case, it helps even the tone across the top.
I also needed to replace a damaged runner. This was the only “woodworking” needed for the project.
Damaged runner on the bottom.
I then cleaned out the corners of the panels of the frame and panel sides. This may seem like a nit-picky thing, but in this case, I wasn’t going for a heavily patinated look. Getting rid of the black gunk in the corners just sharpened the edges and “youngened” it up a bit.
I replaced the old casters with reproduction casters from Van Dykes Restorations. The new casters are beautifully made and all I needed to do was plug the old holes, then drill new holes for the new casters.
New caster wheels were just a wee bit larger than the old ones, but the larger wheels roll more smoothly over carpet or rugs. The new casters also have ball bearings – very nice.This picture shows a hole that has been plugged and is ready to be drilled for the new caster. This shows that on one of the back legs there was some separation between the different sections of the leg, so I used the glue squeeze out from the peg to put those back together.
While I was working on the casters I noticed that when they were making this dresser, they used a table saw or similar to cut the mortises for the side rails.
On this side you can see the kerf of the saw, so it looks like it took 2 passes to get the right width for this tenon.For the two top short drawers, the saw just went the entire length.
After this I noticed that the stiles for the side panels were starting to separate so I cleaned the old hide glue out and cooked up a few ounces to re glue.
The hardware was not in horrible shape but a few of the bail pulls were either missing rosettes or the rosettes were damaged so I searched E-Bay and found some nice ones and also found some that I liked at Van Dyke’s Restorers. Even though I found some knobs there as well, I decided to keep the original.
Old knobs and new pulls.
One thing I didn’t replace (yet) is the missing escutcheons for the two top drawers. Why, I can’t even begin to say, except that brain farts are real.
I just have a few fiddly bits to finish up like the escutcheons and runner blocks for the drawers to keep them from jamming, but other than that this has turned out to be a very pretty and usable piece of furniture.
Don’t look at the missing escutcheons!Before re gluing the sides.Top turned out beautifully. The cigarette burns and other stains came out very well. There is one divot that I didn’t fill because it was wide but shallow and I figured it was not very noticeable. If I had this to do over again, I might put the time into filling and colouring it, but probably not.
I’ll probably take a look at some brighter, shinier hardware for this one, but I doubt that I’ll go with it. I like the darker hardware on this. I will probably post some pictures with the brighter stuff though, just for comparison.
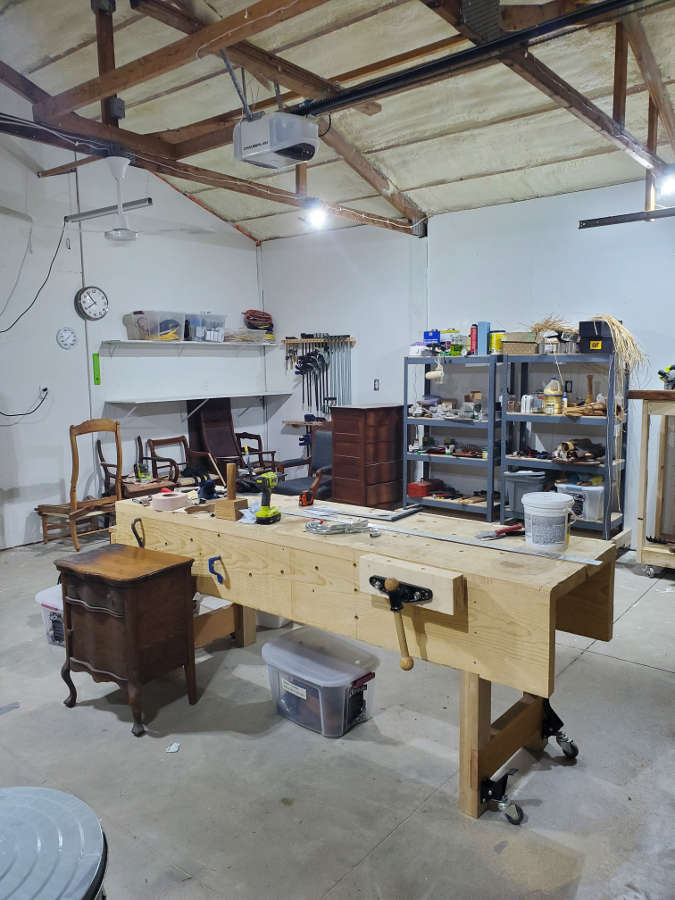
I’ve made some progress on the workshop and I am finally able to start new restoration projects (Susan and Aron, I’m sorry it’s taken so long!).
I have two walls pretty much done. Only two more to go.One of my first projects that I’ll be taking on is in front of the bench. My chair projects are in the background.
I didn’t have to paint the walls, but it makes a massive difference when working. Much of the time I will have the doors closed and with no windows, this small space is really dark even with the equivalent of 500 Watts of lighting (it’s all blue ‘daylight’ LED lighting).
Only two more walls to finish.
Even though I consider this very close to being done, I have a lot more work to do. I still need to sheath the ceiling, which will be fun times. And I’m putting in a very small ductless minisplit to cool the space in the summer and heat in the winter.
My next posts will be about my next projects, finally.