In Part 1, I had finished stripping and disassembling the rocker and had decided to replace the rockers and the side pieces of the seat. After that, I also decided to replace the back of the seat. This because the sides had been connected to the back with dowels, but the way the dowels and the joints fit, they did not make a good joint. If you look at the picture below, you’ll see that at each end, a half a hole for a dowel. So one of the dowels on each side was not even embedded in the back piece.
I then looked at the way the sides connected to the front piece and decided that instead of a couple of dowels, I’d use a loose tenon. This would create more shear strength, across the grain, at this crucial point.
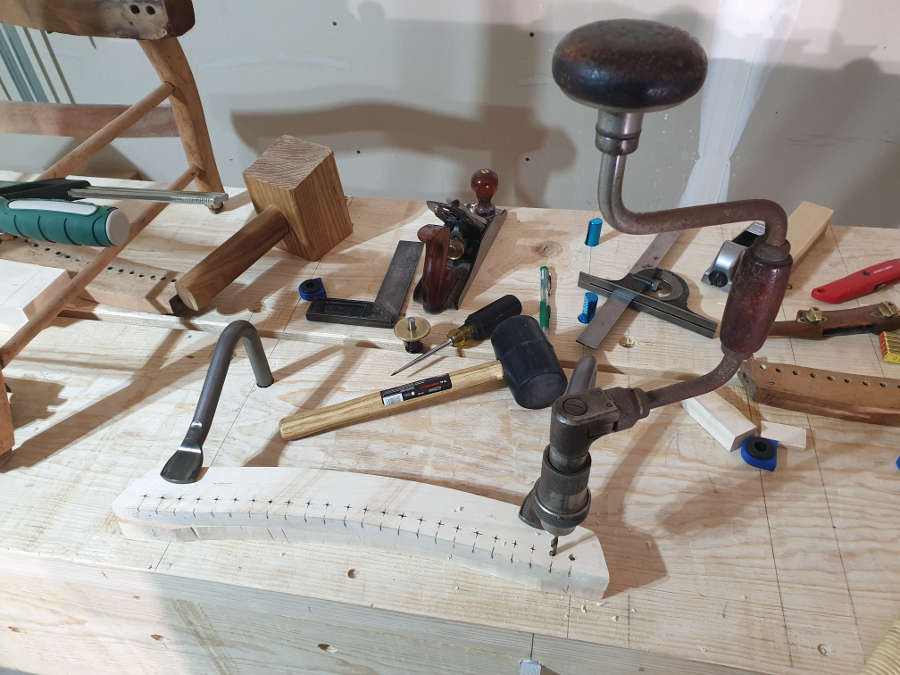
Unfortunately, I didn’t take any pictures of the loose tenon or any of the fitting process, but I do have pictures with layout lines and also where I filled in the original dowel holes.
My pencil mark shows where the loose tenon is.This shows where I filled the dowel holes in order to remove the mortise for the loose tenons.
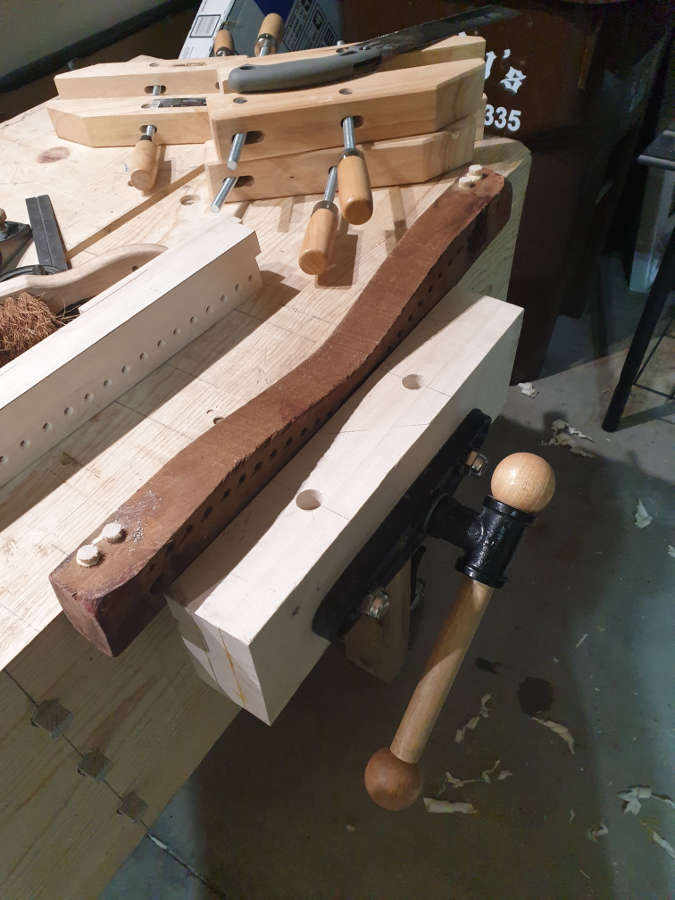
The following pictures show me cutting and shaping the back piece.
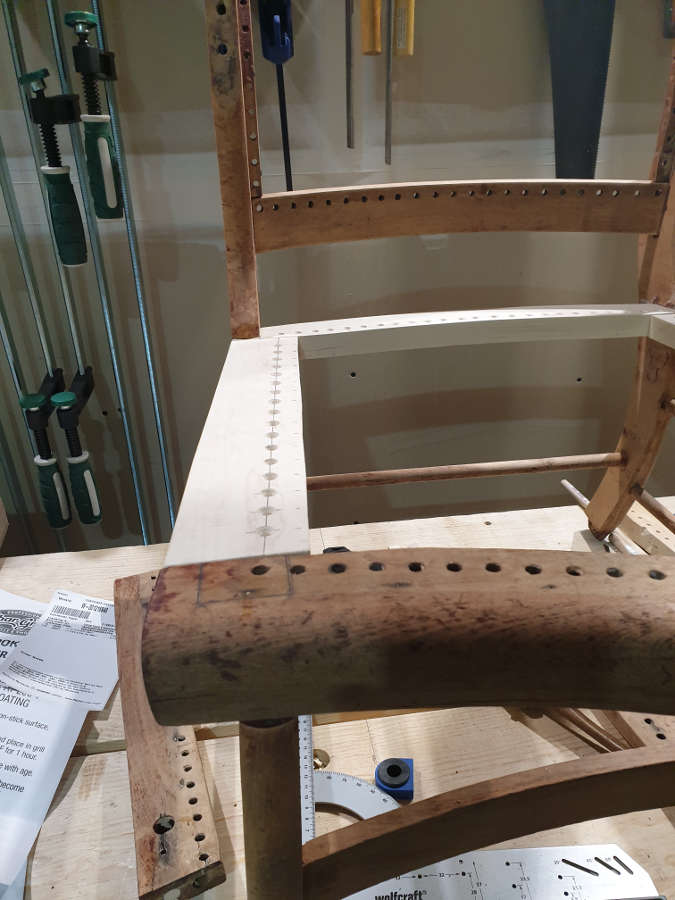
Making the replacement back piece.
I took the number of holes from the original and spaced them a little more evenly before drilling them out.
I countersunk the holes.
Using a bit from a roll that a wonderful friend and classmate from the Chippendale Furniture School gave me.
Thank you Gordon! @twintreedesign Initial fitting of the back piece.
After quite a bit of dry fitting and tweaking the joints, I was ready to glue up the seat.
For most of my projects, I tend to use hide glue for the joints and PVA for the splits, cracks, and fills (like for filling the dowel holes). My thinking is that for most, if not all, repairs I can use PVA adhesives because the idea is that they should never need to be undone at all…ever. This is for repairs and restoration jobs, but not necessarily for conservation work. For the joints, I use hide glue because I want to be sympathetic to the piece and I want to make sure that the piece can be repaired / restored in the future and still be sympathetic to the piece if that future restorer wishes. If in the future, someone repairs the piece with whatever adhesive they have available, that’s fine because I won’t be around to see them muck it all up 😉
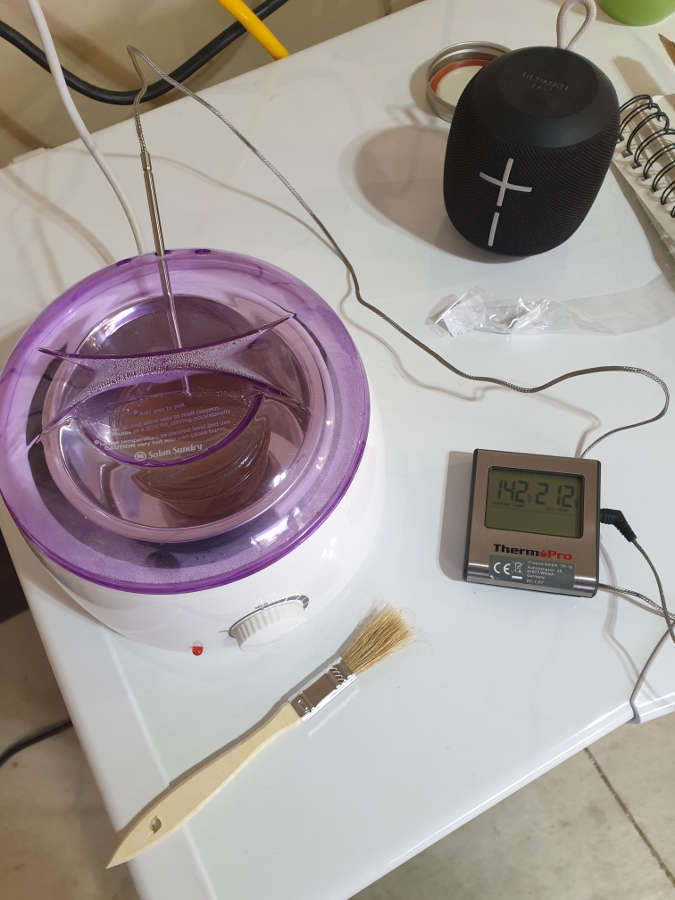
My ultra high tech hide glue melting pot. Plus if I ever need a bikini wax, I’m set.Seat is fitted and the chair (except for the rockers) is ready for glue up.
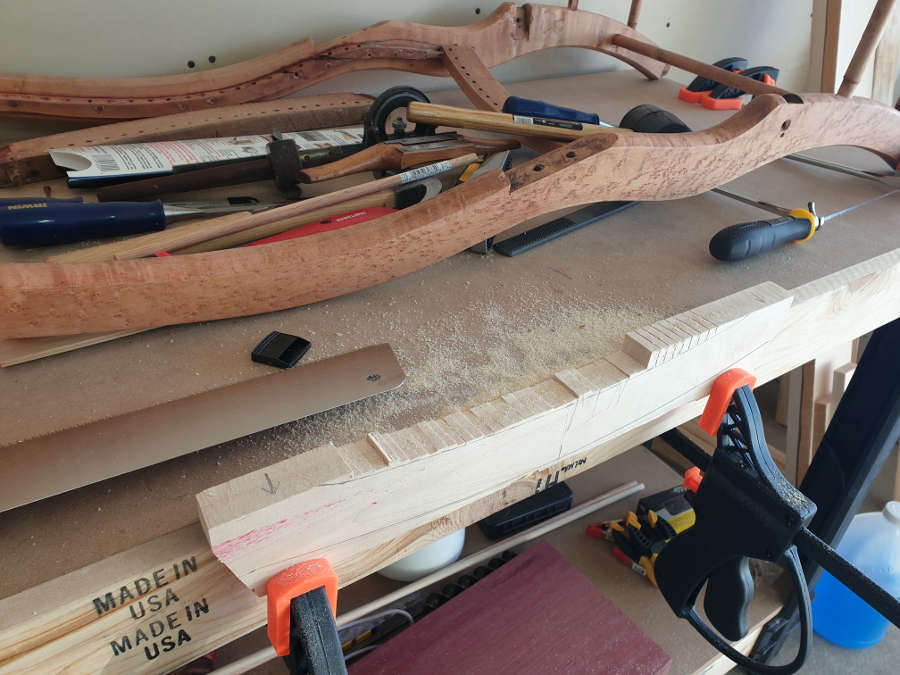
For Part 3 I’ll remake the rockers and discuss the changes I made to the dimensions. I’ll also discuss the back frame and the broken pieces I had to replace for the caning.
The first thing about Campaign Furniture that got me interested in the style was that many of the pieces broke down for travel or had hidden uses. Some of these designs seemed playful in that what looked like a chest of drawers turns into a desk, or when a small table breaks down into a briefcase-sized box with carrying handles.
I find a piece like this just fantastic as it packs so much utility into such a small space.
Legs and stretchers are stored inside.This is one of my favourite designs. The gallery and writing space are large enough to be useful and small enough to be mobile. The stretchers are very important as without them the legs would not last a day, especially on uneven ground or with the racking and twisting of use near a battlefield.
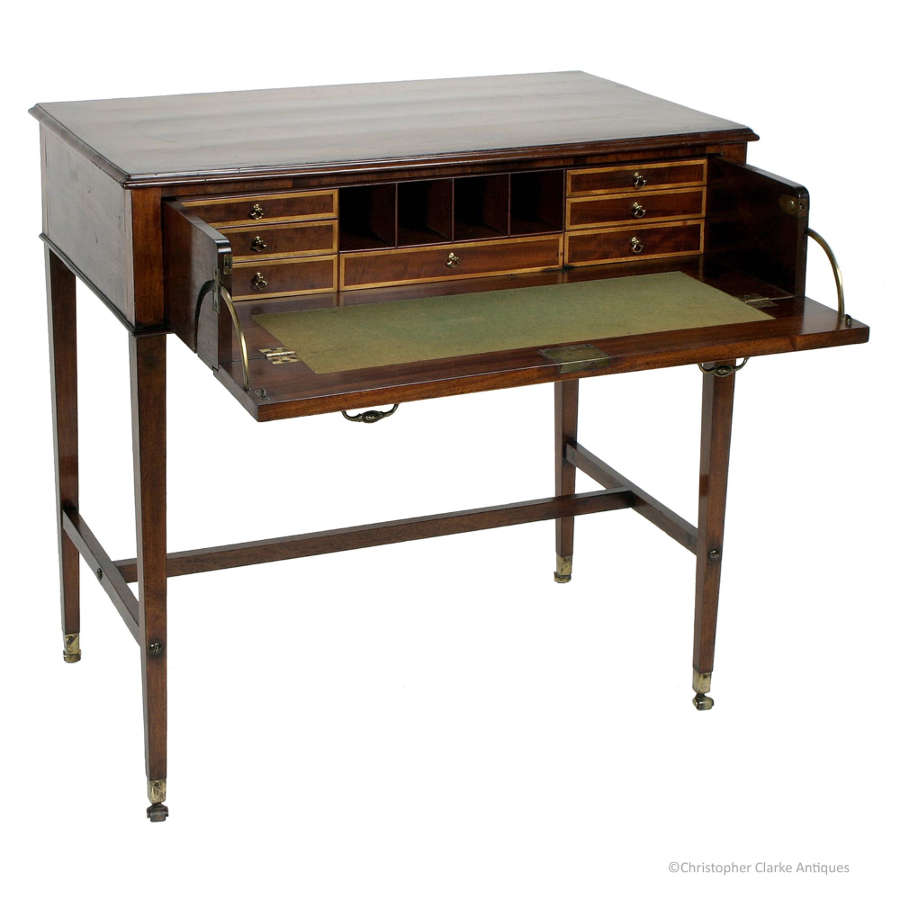
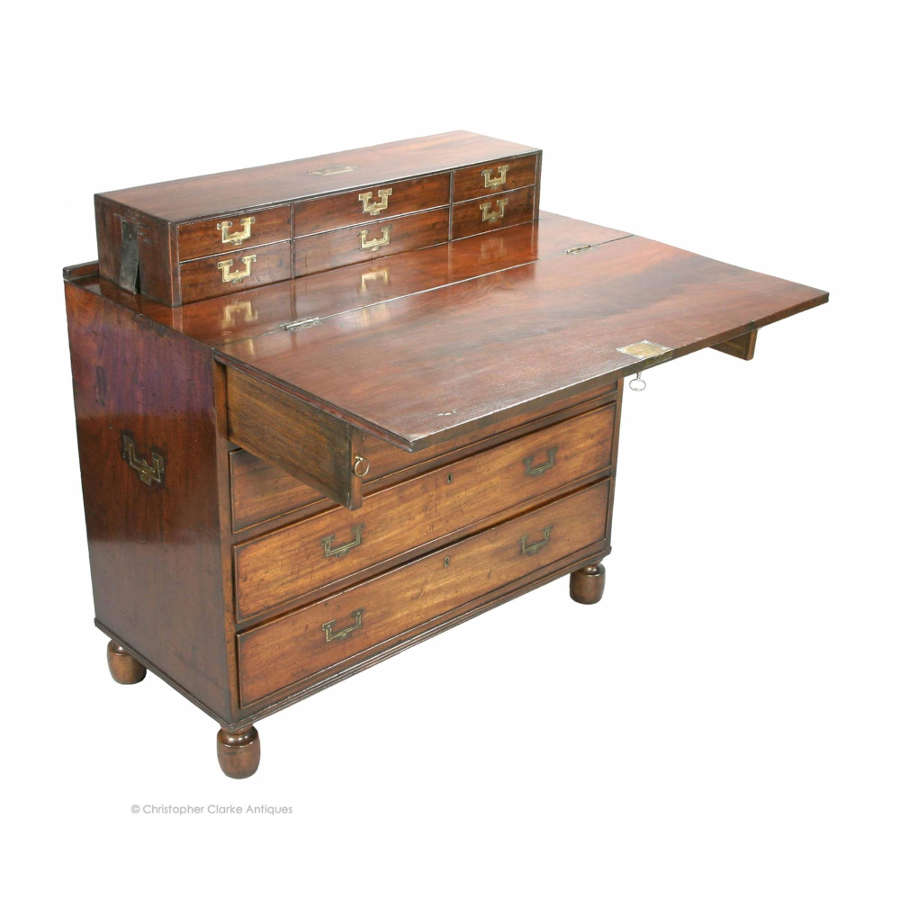
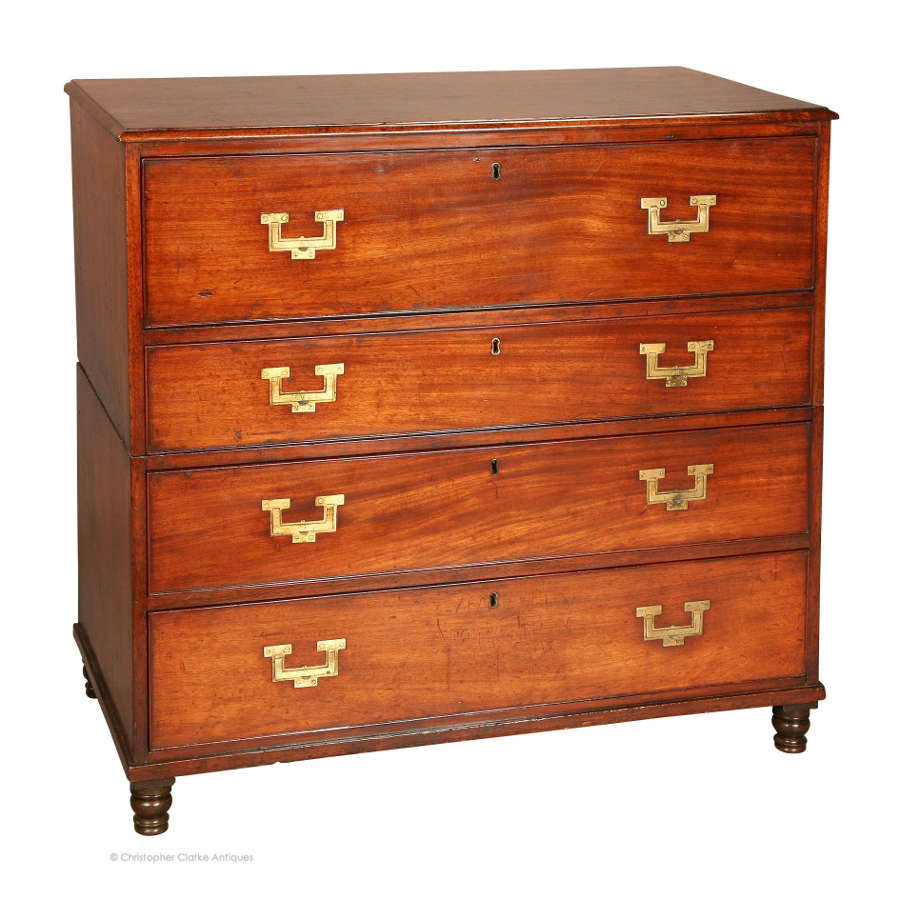
The chests that convert to secretaires or desks are beautiful pieces. There are several different methods of hiding the writing surface and gallery, like below where the top folds out and rests on lopers and the gallery pops up on springs.
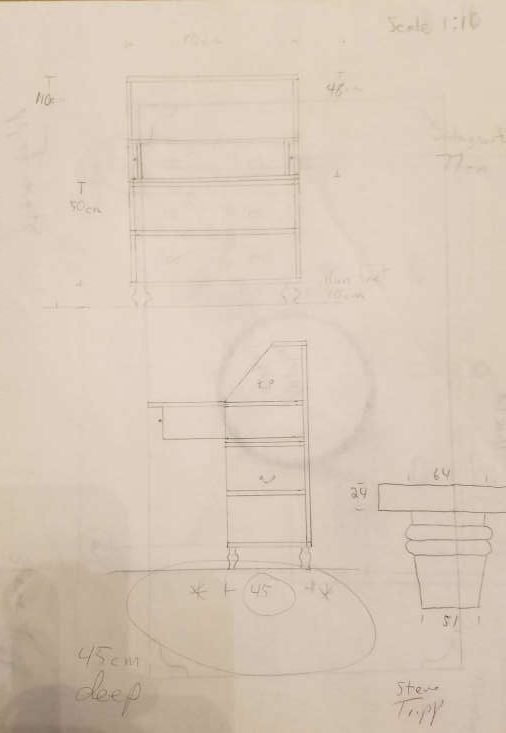
The following is the most prevalent style though and is what I styled my campaign chest after (I’m still working on it and plan to have it finished sometime this millennium). My drawings (from my other post) show that I am using the quadrant stays like the following example, instead of lopers like the above example, to support the writing surface.
Chest Secretaire early 19th Century
One thing that I found while planning my campaign chest is that much consideration must be given to the height of the drawers so that the writing surface is comfortable to use. Once you get the writing surface at the correct height, you then have to look at the size of the drawers and if you want symmetry from top to bottom. In my case, I decided to go with a larger drawer at the bottom and top and then smaller drawers in the middle. This was also factoring in the height of the feet.
Patent furniture and campaign furniture are not the same. Patent furniture became an important part of a military officer’s inventory because of its great utility, but some campaign furniture is not patent furniture, but simply breaks down for travel or is made to be more durable (with brass strapwork and corner protection).
My next post on campaign furniture will be when I start working on my own piece again. Hopefully soon.
So, my glacial progress on these first restoration and repair projects has been a bit disheartening, to say the least, but I’m within spitting distance of finishing the small oak dresser, so here we go.
This is the 2nd project in a group of about a dozen that I’ll be working on in between my day job and getting my workshop insulated (which I will write about in another post). It is an oak dresser that originally came with a mirror. The mirror may be in the group of mirrors that I received with these projects, but I have not tried pairing them yet. The dresser is likely early 1900s or, less likely, late 1800s. The drawer fronts and top are solid oak and the interior is in good shape. The casters are original wood wheel and brass and the drawer hardware appears to be original as well.
Serpentine front small oak dresser. It’s in pretty good shape except for some burns, water stains, and other discolouring.
The dresser was not in bad shape but required some work done to the damaged top, so I got out the card scrapers to remove the burns, then filled the shallow divots with shellac which I coloured to match the rest of the top. Some alcohol and a scrubber got out most of the rest. I then put a few coats of shellac and then some dark wax (Kingdom Restorations). Clare, a tutor at the Chippendale International School of Furniture used to say, “Dark wax can hide a plethora of sins.” In this case, it helps even the tone across the top.
I also needed to replace a damaged runner. This was the only “woodworking” needed for the project.
Damaged runner on the bottom.
I then cleaned out the corners of the panels of the frame and panel sides. This may seem like a nit-picky thing, but in this case, I wasn’t going for a heavily patinated look. Getting rid of the black gunk in the corners just sharpened the edges and “youngened” it up a bit.
I replaced the old casters with reproduction casters from Van Dykes Restorations. The new casters are beautifully made and all I needed to do was plug the old holes, then drill new holes for the new casters.
New caster wheels were just a wee bit larger than the old ones, but the larger wheels roll more smoothly over carpet or rugs. The new casters also have ball bearings – very nice.This picture shows a hole that has been plugged and is ready to be drilled for the new caster. This shows that on one of the back legs there was some separation between the different sections of the leg, so I used the glue squeeze out from the peg to put those back together.
While I was working on the casters I noticed that when they were making this dresser, they used a table saw or similar to cut the mortises for the side rails.
On this side you can see the kerf of the saw, so it looks like it took 2 passes to get the right width for this tenon.For the two top short drawers, the saw just went the entire length.
After this I noticed that the stiles for the side panels were starting to separate so I cleaned the old hide glue out and cooked up a few ounces to re glue.
The hardware was not in horrible shape but a few of the bail pulls were either missing rosettes or the rosettes were damaged so I searched E-Bay and found some nice ones and also found some that I liked at Van Dyke’s Restorers. Even though I found some knobs there as well, I decided to keep the original.
Old knobs and new pulls.
One thing I didn’t replace (yet) is the missing escutcheons for the two top drawers. Why, I can’t even begin to say, except that brain farts are real.
I just have a few fiddly bits to finish up like the escutcheons and runner blocks for the drawers to keep them from jamming, but other than that this has turned out to be a very pretty and usable piece of furniture.
Don’t look at the missing escutcheons!Before re gluing the sides.Top turned out beautifully. The cigarette burns and other stains came out very well. There is one divot that I didn’t fill because it was wide but shallow and I figured it was not very noticeable. If I had this to do over again, I might put the time into filling and colouring it, but probably not.
I’ll probably take a look at some brighter, shinier hardware for this one, but I doubt that I’ll go with it. I like the darker hardware on this. I will probably post some pictures with the brighter stuff though, just for comparison.
It’s been quite some time since my last post and I was going to blame it entirely on my ongoing upgrade of the workshop, but that would be a fib. I have half a dozen posts being drafted, but I just haven’t put the time into getting them done and published. That said, I wanted to show what is partly responsible for my lack of material.
My new workshop is a pole shed that was built in 1993 (I have the inspection paperwork from the previous owner). It has electricity and 2 circuits with an overhead door, some lights, and two outlets, so my first project was to wire it as a usable workshop. For this I had an electrician come and look at the setup. He let me know that the feeder from the house to the workshop was good for 100 Amp, so I made my improvements based on that and now have multiple outlets on each wall. I also added more lighting and will eventually have 2 separate circuits for lighting. I also added a circuit for temporary electrical heating. I say temporary because with our winters electrical heating is far too expensive.
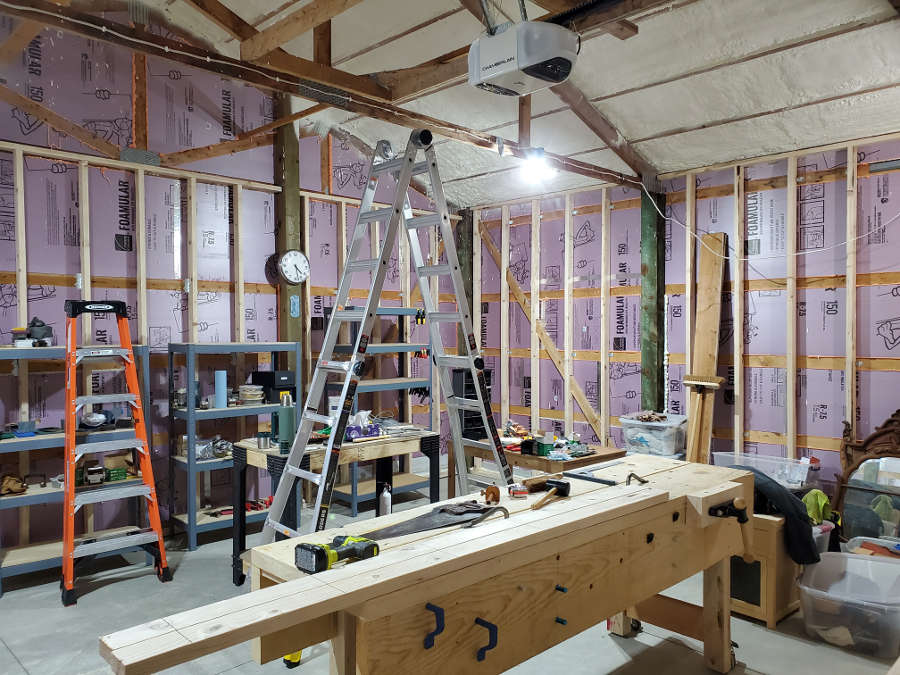
Before I began insulating.My temporary heater installed just in time for our cold snap. It didn’t get above 0 degrees Fahrenheit for 2 weeks and a few of those days did not get above minus 10.
I’m putting a lot of planning and effort into making this workshop usable year-round and for me, that means keeping it cool in the summer as well as warm in the winter. Since I work with shellacs, waxes, and other temperature-sensitive solutions I want to keep my workspace usable for as much of the year as possible.
I’ve had a workshop in our basement before (different home) and I loved it, but I couldn’t work on large pieces because of the stairs. The basement had an 8-foot ceiling and was insulated so it was an almost perfect 56 degrees year-round. All of my other workshops have been in the garage so I was only able to use it for a portion of the year. I’ve decided that this workshop will be usable year-round and I’m going to (for me) great lengths to make it so.
I mentioned the electrical first but that actually had to wait. The first thing I did was to put up foam board insulation (1.5 inch) and then used spray foam to seal the edges and foil tape to seal the seams between pieces of foam board. I then furred out the walls with 2 x 4 frames and studs 16 inches on center. This was so I could add 3 1/2 inches of rock wool batt insulation.
I then hired a local company to come in and spray the ceiling with closed-cell foam. They did an OK job, not great and not horrible, so I won’t say their name. That said, it is hit or miss with some of these businesses and the best you can do is a lot of research. They put up 3 1/2 inches (more or less) and it definitely made a difference in the workshop.
With the 1/2 inch OSB over the batt insulation.And I’m getting a workout cutting the sheathing.
I’m doing one wall at a time at this point (sheathing and painting) so as soon as I have the 1st wall done I can start working in the space.
This spring I’ll be getting a trench dug between the house and workshop to run a natural gas line for my heating next winter. I’ll also be installing a ductless mini-split this spring for cooling this summer. Before the trench is filled in I’ll also run some network cable for Internet access in the workshop as I do not want to do wireless between buildings.
This project is flowing at a glacial pace, but every once in a while I stop and realize that I have made some pretty good progress. I just can’t wait to have space to start my furniture projects again. There are so many of them I think I’ll be busy for a year at least.
I’ll be posting further progress, but hopefully I’ll be posting some of my other drafts before then as well.
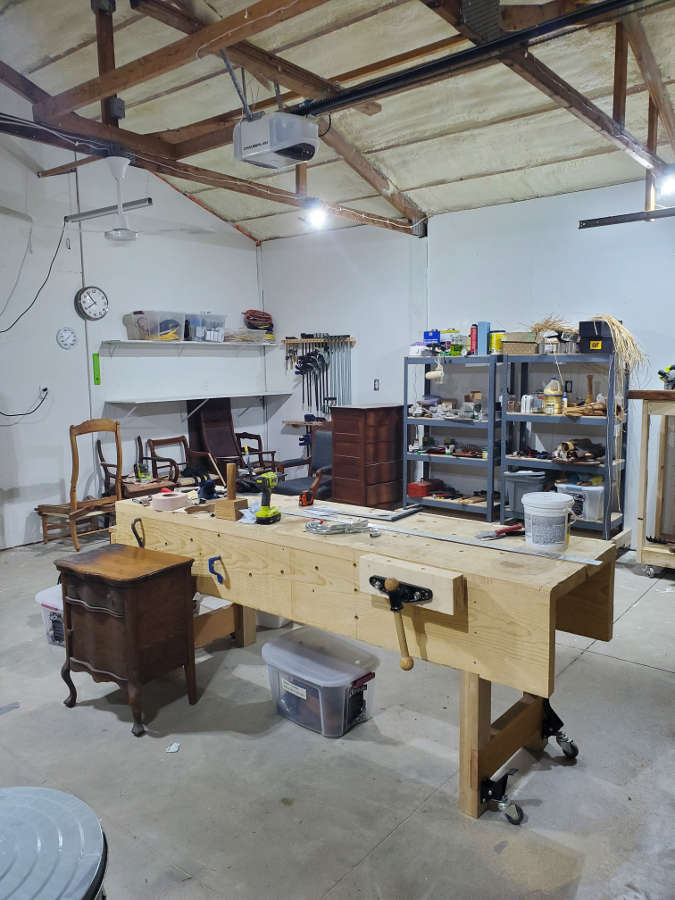
I’ve made some progress on the workshop and I am finally able to start new restoration projects (Susan and Aron, I’m sorry it’s taken so long!).
I have two walls pretty much done. Only two more to go.One of my first projects that I’ll be taking on is in front of the bench. My chair projects are in the background.
I didn’t have to paint the walls, but it makes a massive difference when working. Much of the time I will have the doors closed and with no windows, this small space is really dark even with the equivalent of 500 Watts of lighting (it’s all blue ‘daylight’ LED lighting).
Only two more walls to finish.
Even though I consider this very close to being done, I have a lot more work to do. I still need to sheath the ceiling, which will be fun times. And I’m putting in a very small ductless minisplit to cool the space in the summer and heat in the winter.
My next posts will be about my next projects, finally.
You can find the first part of my observations here. I’ve been interested in oak coffers for quite some time. I think it was Peter Follansbee who initially made me aware of them quite a few years ago. While researching green woodworking I came across Mr Follansbee’s website where he talks about early American furniture makers, furniture-making tools, and processes. His website is always informative, inspirational, and extremely valuable when it comes to green woodworking, 17th-century furniture making, tools, and bird watching.
The oak coffer was made almost exclusively with mortise and tenon joinery, although there are a few exceptions to this where dovetails or butted and nailed edges were used. Some later versions were made of walnut and other local wood, but by and large, the earliest coffers were oak and made with mortise and tenon joinery. This put them under the strict control of the Joiners Guild (members of the “Mystery of the Joyners”). This meant that within the City of London (and to varying degrees, elsewhere in England) from the 15th to 17th centuries, the guild had the authority to search workshops. These inspectors would ensure that only members of the guild were making joined products and that the craftsmen who were members followed the guild procedures and processes. The Carpenters and Turners also had guilds, and over the centuries they competed and merged with the others. The history of the guilds in Europe and the UK is fascinating, and I’m sure I’ll go down that rabbit hole and write about it sometime in the near future.
You have been warned.
I had been looking at coffers for quite a while and had my eye on several. One of the first coffers that I had a good close look at was at a Lyon and Turnbull auction in Edinburgh in Nov 2018. This was my first good up-close look at a 17th-century oak coffer, and I was over the moon. My oh so patient wife watched me make a spectacle of myself as I bounced from piece to piece at that viewing, but the 17th-century pieces stole the show for me. Over the next year though, I’d see quite a few other coffers, newer and older and in better and worse shape, and so I ended up being able to make somewhat intelligent comparisons.
The first oak coffer I had a chance to look at up close and personal was at a Lyon and Turnbull auction in Edinburgh. This piece ended up selling for £375
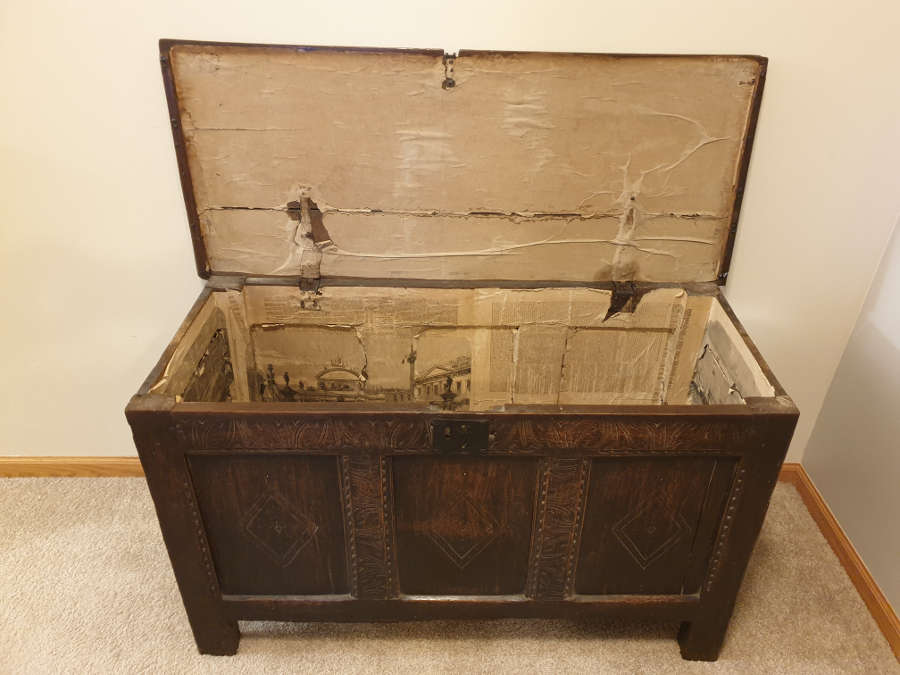
After almost a year in Scotland and then in England, looking at hundreds (if not thousands) of beautiful old pieces of furniture, and more specifically, oak coffers, we finally found one that fit our needs/desires. While living in March, Cambridgeshire in the UK, we purchased an oak coffer from the Risby Barn Antique Centre near Bury St. Edmunds. Since then, I’ve been slowly going over it to see how it was made, how it had been repaired, where it had lived, and trying to verify its age.
The oak coffer I’ve been studying.
We had allotted up to a certain amount for our purchase, but this coffer that we decided on was well below that. It was sold as an “Early 17th-century plank top oak coffer” and even though I’d seen many of the same age in better condition, this one caught my eye because of the repairs and the newspaper that was used to line the interior. I decided on this one not just because of its beauty but also because of the story it would tell, which to me, is just as important.
As I mentioned, the newspaper lining was one of the first things I noticed that set this one apart from most of the others I’d seen. In fact, after going over all of my pictures I don’t believe I had seen any other ones with newspaper lining so, BIG WIN. There isn’t anything about the paper lining that adds to the monetary value of the piece and more likely, it decreased the value by hiding the interior. But for me, it provides clues to the history of the piece, which is valuable. I’m going to write specifically about the paper lining in a future post, but for this post I’m going to concentrate on the legs and feet and those repairs.
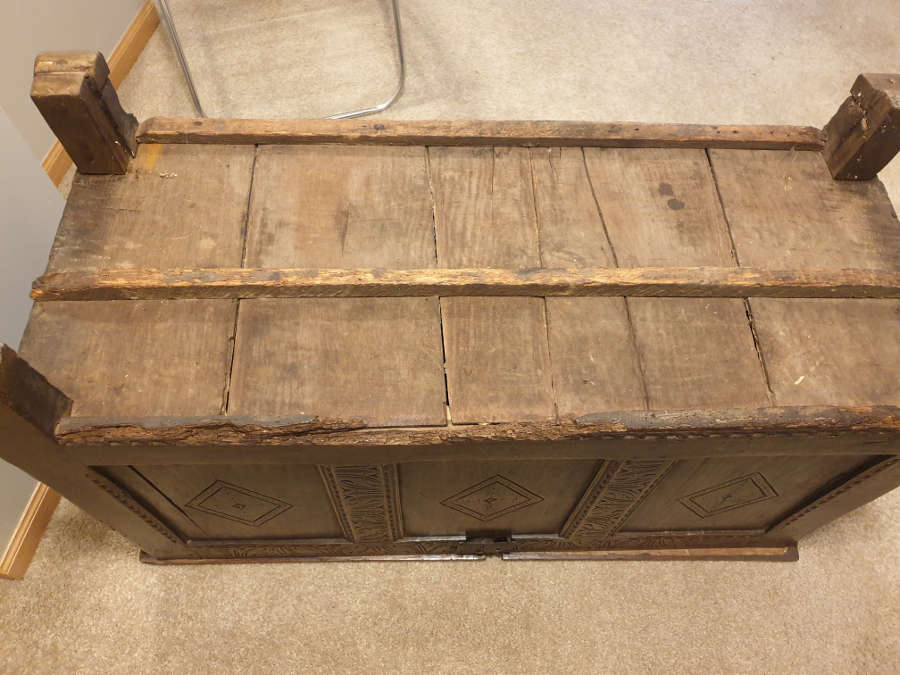
The legs are also the stiles of the panels and house the mortises for the side and front rails. The end grain of the feet have been soaking up any and all moisture on the floors for more than 300 years, and it is quite likely that the first several homes that this piece lived in had dirt floors.
Water and insect damage are visible in this picture.
The back legs have been damaged the most and after reading a bit about this it does make sense.
The back legs would have been up against an outside wall of either stone or wattle and daub (and no insulation or moisture barrier) so moisture and even standing water would not have been uncommon.
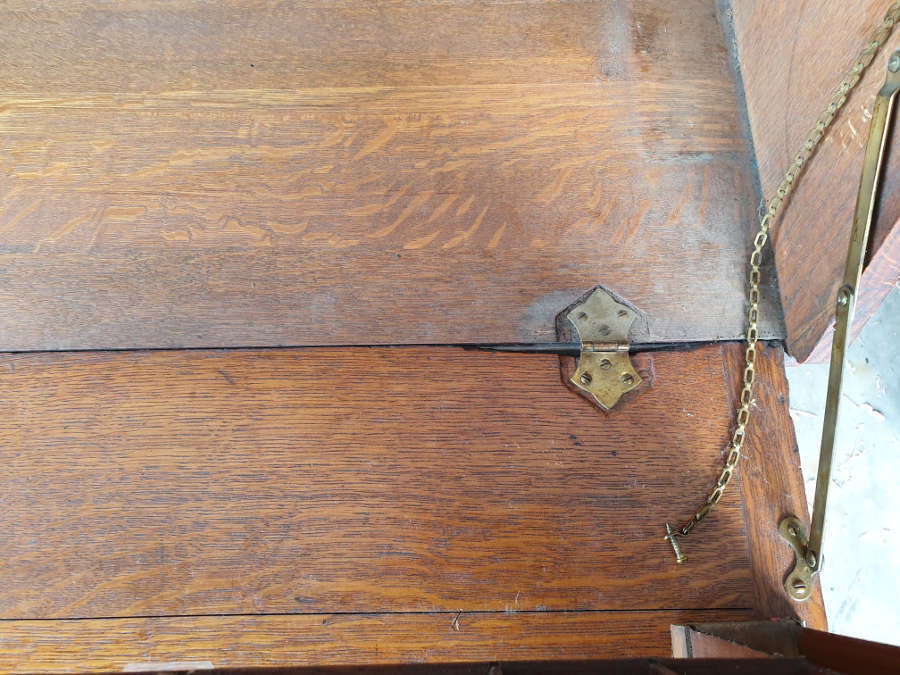
In the case of our coffer, the legs had probably deteriorated to the point that the person who repaired it simply had to cut them back to a point where they were not as rotted. That person then added two sections of new wood. The one behind the leg has the grain running vertically. This piece is likely to stabilize and strengthen the leg. The second section was on the bottom of the foot and had the grain running horizontally, so it would not wick as much moisture. This repair may have happened a century or so after it was built, but the next picture shows that the spliced piece behind the leg, as well as the block attached to the bottom, have been worn at an angle. This could mean one of two things. First, it might be that the person who added the repairs made the back legs too long and then cut the back legs at an angle to meet the front legs. I don’t think this is the case, but I could be wrong…Nah, I’m not wrong.
Back foot repairs at an angle.
I think what really happened here is that after the back feet were repaired, the front feet also experienced deterioration that resulted in them losing a bit off the ends over the centuries. As the front feet wore down, the back feet wore at an angle to compensate. One other thing I’ve noticed is that the vertical piece that was scabbed onto the back of the leg may not be nearly as old as the horizontal piece added to the end of the foot. This because that piece doesn’t show any of the deterioration that you would expect if it had been soaking up moisture for several centuries.
Not a great picture, but you can see that the end grain of the scabbed piece is not deteriorated.
This possibly means that the scabbed piece was added after the coffer moved to a home with non-dirt floors, thereby not wicking up as much moisture over the next hundred or so years.
For the next part of my observations, I’ll talk about the newspaper lining and how that fits into the piece’s history.
I mentioned in my previous post that the hinges for the slant top portion of the desk would be the most involved part of the restoration. The hinges had been replaced a few times and the hinge shape had changed as well. This not only left random holes but large shapes carved into the shelf and the lid.
It looks like these replacement hinges were a bit of a rush job. The mortise that the hinges are set in is too large for the hinge and the person doing the restoration may have used one chisel to remove the material. It also looks like the hinge may have been installed incorrectly, which then caused a portion of the lid to break off when the lid was opened. This is all speculation, but I like to put myself in their shoes and see if I can find explanations for the things I find.
As you can see there are a couple of different sizes carved into this piece and that along with the damage done to the edge of the lid told me that I need to repair these and not just put new hinges in there.
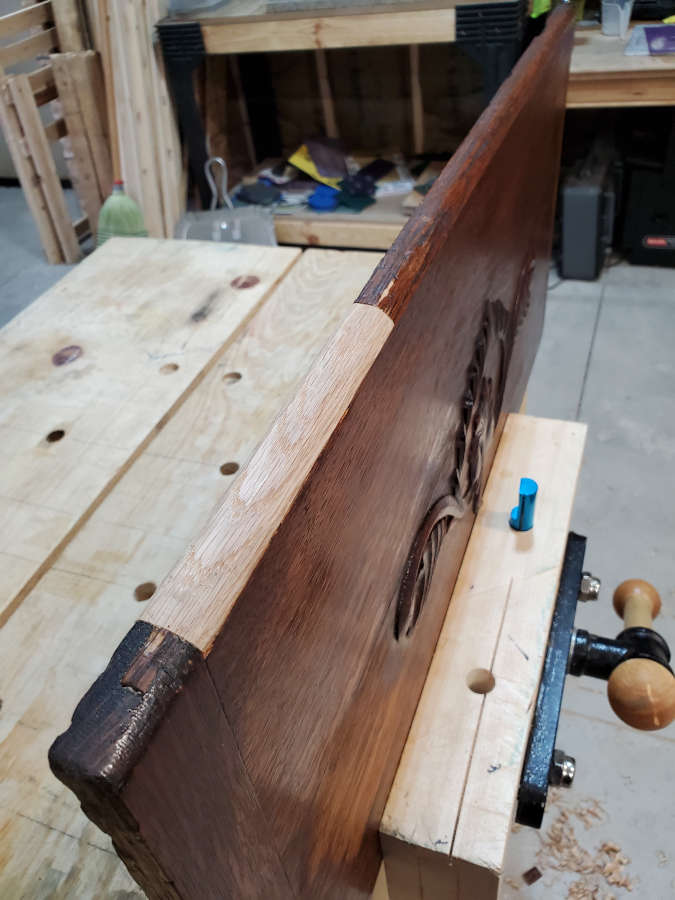
This is where the project gets challenging because I have to remove material and then splice in new material to make the piece stronger. In this case, I need to remove a section where the lid broke and also remove the material around the old hinge mortise. I then splice in the new material. When I cut these pieces I have to pay attention to grain direction, grain orientation, grain consistency (is it clear straight grain or curvy). In the case of the broken lid portion, I saw that the edge showed the flat sawn side and the flat top showed the quarter sawn. For the hinge pieces, I looked at how the quarter sawn grain ran and oriented the new pieces to mimic that.
Here you can see the flat sawn “cathedral” grain along the edge. This picture was taken after I had shaped the new material with a block plane, spokeshave, chisels, rasps and sandpaper.
In the picture above, you can see that I cut the mortise along the grain and oriented the patch so that the grain followed the surrounding grain. Once the piece was glued I then used a block plane and then sandpaper to bring the material down to level.
In my next post I’ll show the rest of the process of cutting in the new hinges and coloring and blending the repairs.