Slant top secretaire restoration, Part 5

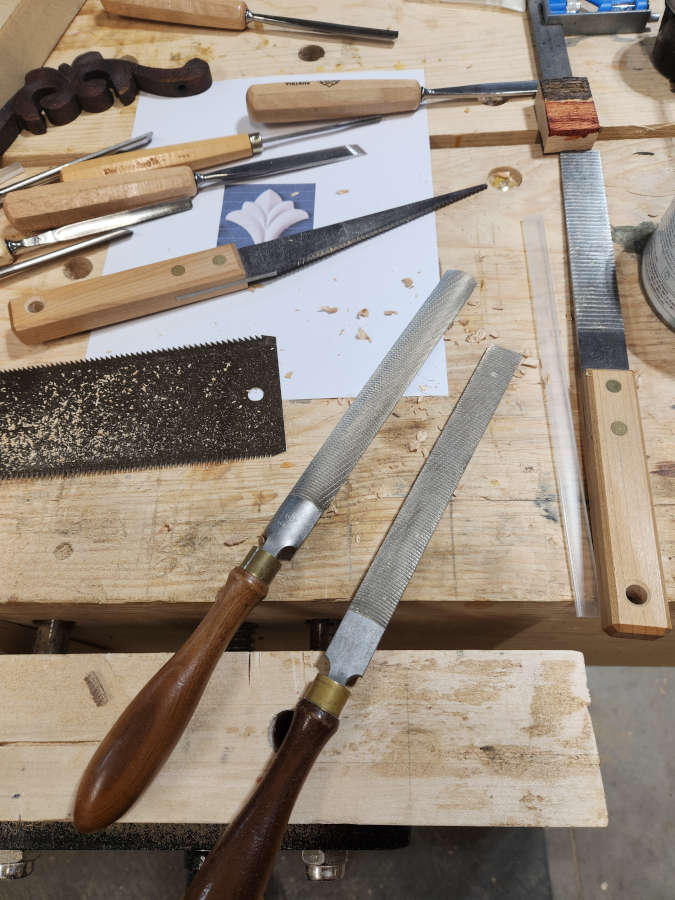
So, even with all the physical repairs that I’ve done on this piece, the portion of the restoration that has taken the most time and required the most precision is the hardware. I have replaced the slant top hinges, the slant top lock, the large drawer locks, the front door hinges, and the front door lock. The front door hinges took the longest of anything because they require the most accuracy, with the slant top hinges a close 2nd.

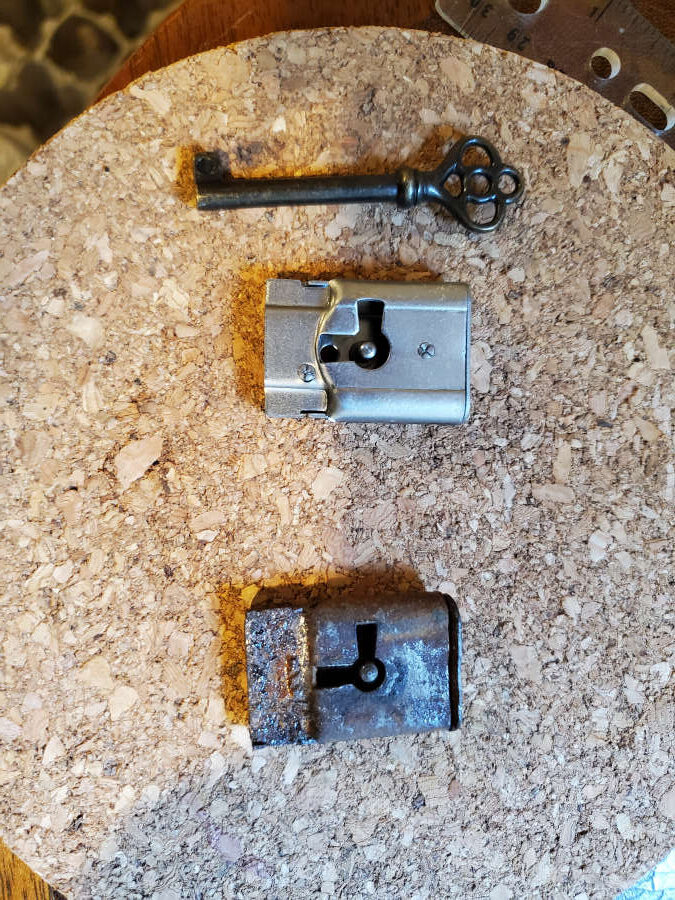
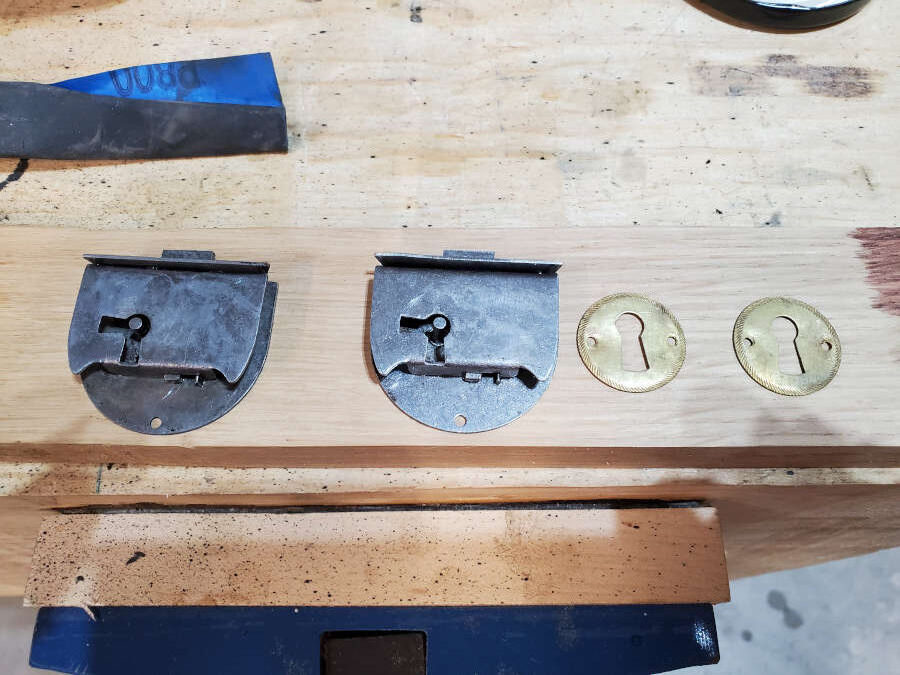
When I started this project, I wasn’t even sure that I’d be able to find the hardware I was looking for. I began my search on eBay and found some great hardware (for future projects), but nothing that I could use on this project. I then went to Van Dykes Restorers and found some very good possibilities for the hinges, but eventually moved on to Hardware of the Past (before they closed shop) for the escutcheons and the lock for the slant top.

Slant top lock replacement.
New lock in situ.

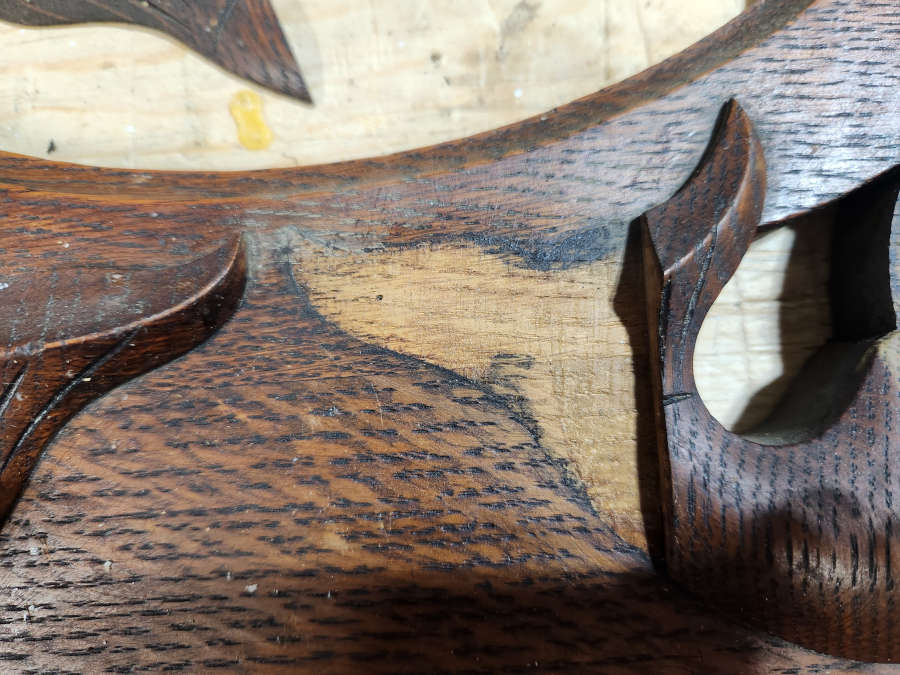
The hinges for the slant top were worrisome on many levels for me because not only was I repairing damage from previous repairs, but I then needed to fit and mount new hinges.

Can’t really see it from this angle, but the damage to the slant top meant that the hinge screws were about to tear out.

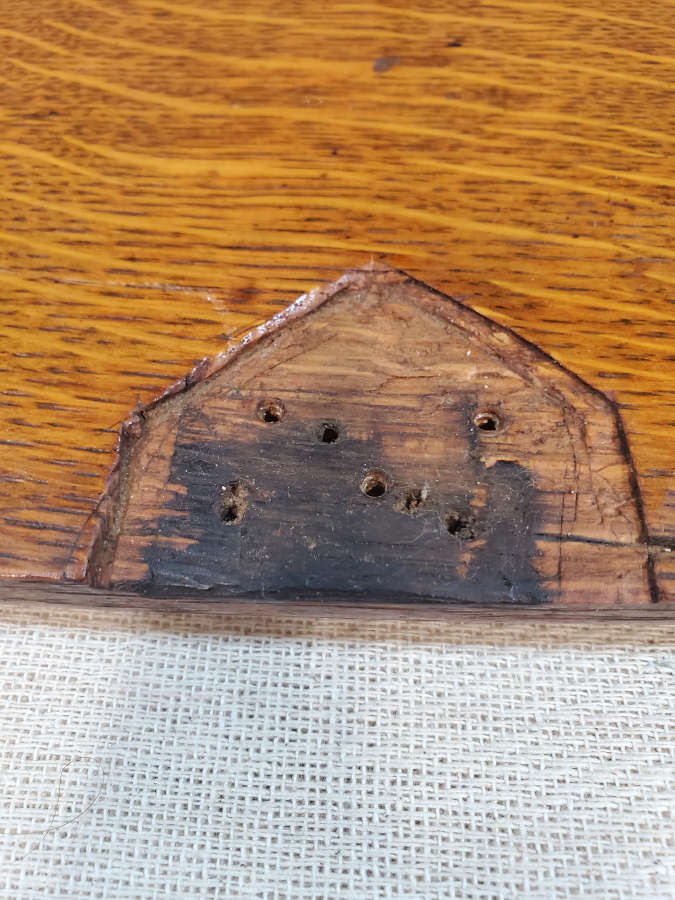
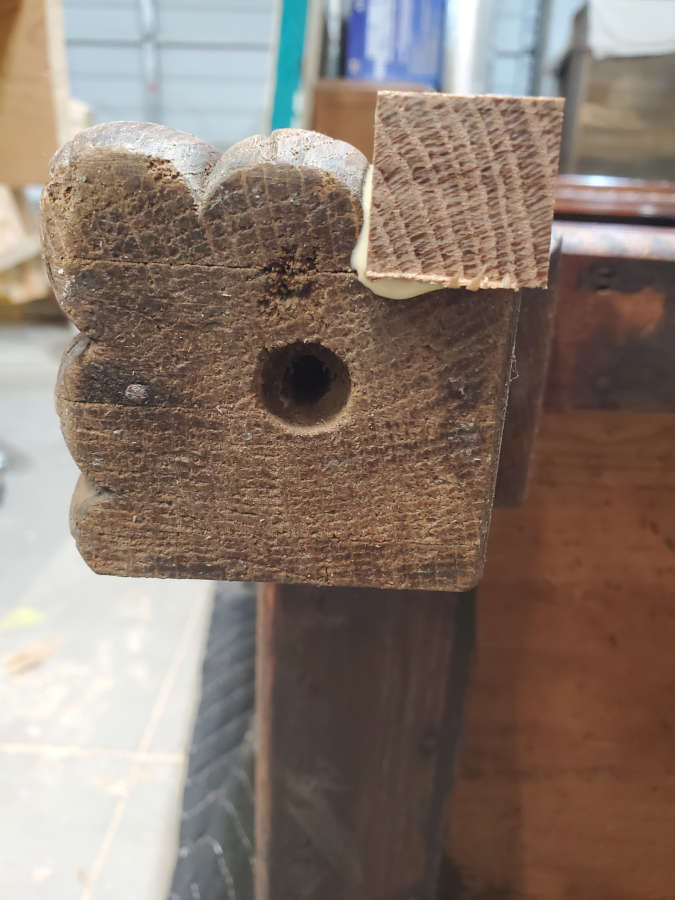
I had thought about leaving the mortises for the hinges and just trying to find a hinge the same size, but that was a no-go. There had been quite a few repairs and I wanted to make sure that my repairs were on solid ground, so I mortised out a lot of the previous repairs and then laminated in patches for the hinges as well as the damage to the edge of the lid.

That looks a right mess there.

I wrestled with the idea of laminating a strip all the way across the lid, but that would have been an unnecessary removal of a lot of original material.

Fitting the hinges.
Waiting for the correct (flat head) screws and a couple coats of shellac.

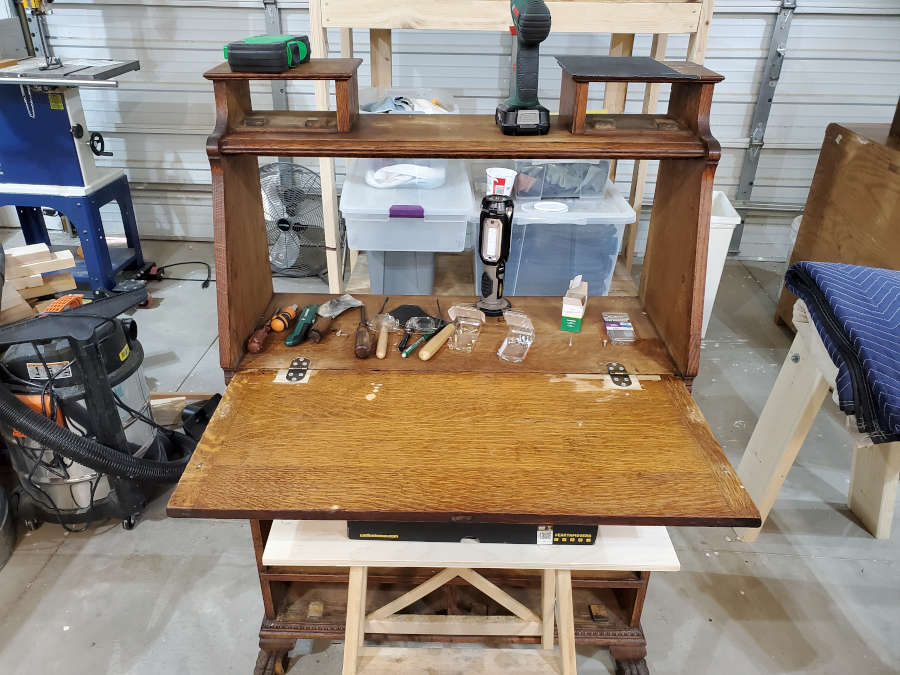
I then moved on to the locks for the large drawers. After the comedy that was me trying to remove the original lock from the lid, the drawers were very straightforward.

Replacement locks for the large drawers.

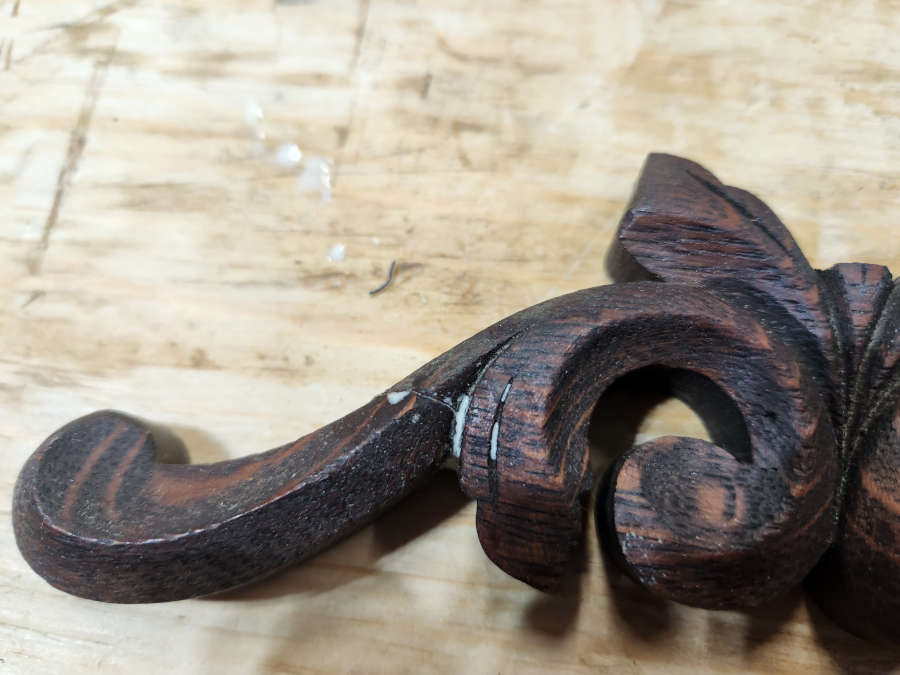
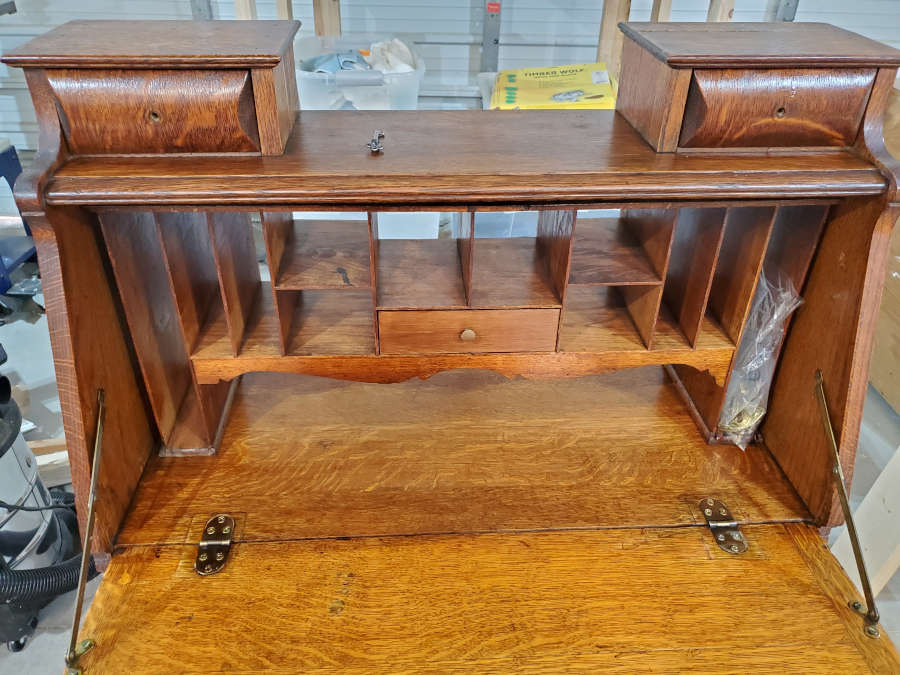
The front doors were the most fiddly of the hardware because I didn’t use the hinges that were there (they weren’t the originals), the doors hadn’t been hung correctly, and I had to repair some significant damage to one of the doors where a hinge had been torn off.

Some damage to the door.
Wash, rinse, and repeat for the other door.
After fitting and coloring.

I mortised the hinges into the doors and into the sides and the doors now close with a wonderfully small and uniform gap all around and the astragal covers the gap between the doors beautifully. I don’t have a picture of that yet, but it’s coming.

After all of that fiddly stuff, the podiatrist is finally in and will fix my lady’s broken toe.

Tune in next time. Same Bat Time. Same Bat Channel.

Slant top secretaire restoration, Part 6 – final

Last post on this project as it is finished and ready to go back to its owners. Lots of before and after pictures, but you can find the entire process here.

Before…
And after.

Replaced all of the hardware (locks, hinges, pulls, escutcheon).

Youngsters, young adults and woodworking.

A while back we visited the grandbabies and I was delighted to find that both of my granddaughters were interested in learning to use an axe and carving knife. I wasn’t sure how to start, so I began with the basics of showing them how to use an axe, how to hold it, how to stand, how to swing the axe, and the safety involved in each step. I took each step relatively slowly and quickly found that I needed to vary the speed of my instruction between the two. For my oldest granddaughter, this seemed to be more of a curiosity, a new thing for her to try, learn, and then store away for later use. On the other hand, my younger granddaughter was eager to soak up everything about the axe, the knives, the wood, safety, how to hold each tool correctly, and how to position the tools and wood. She was also the one who used the tools with either hand, just like I do. I have learned to use my hand tools with either hand out of necessity because I have arthritis in my shoulders and need to be able to switch up as needed. To see my grandbaby do the same thing, and to be such a quick study at it was very exciting and I was eager to continue to teach her in this fashion.

Even though their hands are much smaller, they both surprised me by being able to handle the axe very well. This helped me to realize something I had been very wrong about; that children can use some potentially dangerous tools under proper supervision. I had watched and read about other woodworkers teaching their children/grandchildren how to use power tools and hand tools and my reaction had always ranged from, “interesting” to “I don’t think so“, so when I got back home after our visit I realized that my view on this had changed. Not significantly, but enough that I could see the value in teaching younger people how to safely use tools. I think it dates me when I say that when I grew up, I learned how to use tools by hurting myself and then not doing that again. I have a responsibility to make sure that my grandbabies do not have to learn in this inefficient and unnecessarily dangerous way.

Plus, it’s fun and a wonderful way for us to spend time together.

Small elm bedside stand, Part 4

Ok, so it’s been a while since I’ve made any progress on the stand, but I have a very good excuse…and that’s a bald-faced lie. I have been working on our home remodel, but I’ve also started a few other projects so I’ve just been pretty distracted.

I decided to replace the bottom because the previous bottom (which was also a replacement) was too warped to fix.

This is the previous bottom, which was also a replacement. It was a nice thick piece of pine, but it twisted and warped so badly that I wasn’t even tempted to try to fix or straighten it.

I had some nice pine that I’m using for another project. The pieces were too narrow so I joined them and cut them to length.

The new piece was too thick so I got the scrub plane out and took off about 3mm (1/8th inch) from the face, then flattened and smoothed the face.

Using my scrub plane.
And following up to smooth the face.

I dry fit the bottom into the grooves in the legs and clamped it up to make sure the bottom was not too wide or deep.

After some tweaking. Shaved down the edges and sides so it fits snuggly but has room to expand. In this case the bottom will expand to the sides.

I’m pretty happy with the bottom and I’m ready to start glueing up the carcase. That will be in the next post.

Small elm bookshelf

Sometimes you reach a point where you feel you’ve lost all forward momentum and are stagnating. You might have a half dozen (or more) projects staring you in the face but you can’t seem to make any progress. You blame distractions, your day job, the home remodel, and any number of other possible excuses, but really you’ve hit one of your valleys.

In my case, I needed a quick win. A little project that I could get finished relatively quickly so I could then use that dopamine rush to carry me through to the rest of my projects.

And this small bookshelf was the perfect project for that.

An elm bookshelf that needs a bit of help.
The top shelf had most of the stain and finish worn off and some fairly deep scratches.
The second shelf had a paint stain and also had the stain and finish worn off.
The bottom two shelves were in the best shape.

I started by taking it all apart, which was pretty quick and easy. There were screws holding the piece together and then dowels that ran along the sides. The dowels slid out quite easily, and then the legs/stiles unscrewed from the shelves.

Elm grain is some of the most beautiful of all woods in my opinion.
The feathery look makes the experience tactile. You just have to touch it.

Once I had it apart I stripped each piece. I don’t normally strip a piece I’m working on because you lose the color and patina that many people look for in antiques. In this case, I decided to strip it because the majority of the surfaces were in bad shape and had already lost their patina and color.

I then assessed the pieces and decided that every surface needed to be sanded to get past the damage. And again, I normally don’t sand a piece I’m restoring but in this case it was already so far gone that sanding was necessary. And I’m glad I did because as I got past all of the damage and discoloration I reached some beautiful grain.

After stripping and sanding I cleaned everything with alcohol and instead of shellac, I used pure tung oil with citrus solvent. Normally I’ll use shellac, and then wax to match the color of the repaired parts and sections to the original. In this case, there was no original surface remaining so I went with

The bookshelf after 2 coats of tung oil.

***Edit. This is the second version of this post because I had to restore the website from a backup and lost the 2nd half of this post.

I was going to keep this piece in the shop for a bit longer because there is some color variation that I could even out with a couple coats of dark wax, but I needed this project as a quick win. I needed it for the dopamine rush that I can use to continue on with my other projects. Plus we really needed a bookshelf for all of our cookbooks.

The top shelf looking good with its beautiful grain.
The second shelf with no more paint stain. Also showing its beautiful feathery grain.

My next post will probably be on the small elm stand.

Mirror for Slant Top Secretaire, Part 2

You can read part 1 here.

It’s been a while since I’ve done anything with the mirror, so I had to go back over what I had actually accomplished since then. That took all of 5 minutes because all I had done was remove some loose pieces and do a bit of cleaning.

I had more time to work on the piece so I got out my super high-tech wax heater and mixed up a batch of hide glue.

This is the wax heater that I use for my hide glue. There were already holes in the lid so I use one of them for the temperature probe that I taped with duct tape so it’s at the right depth. Inside the heater is a small glass jar with hide glue granules and water. The glass jar is sitting in a water bath that is about 1/2 way up the side of the jar. This is for even heating of the hide glue.

I’ll write a separate post about how I mix and make my hide glue.

While the hide glue was heating up, I went back over the surface area for the loose pieces that needed to be reattached.

This shows how dirt and gunk (the technical term) worked their way under the loose pieces. This will make the adhesion less stable.
This shows glue along the edge, but not in the center. This might be a bad repair where the person just tried to squoosh some glue along the edge of the part without removing it to get underneath.
This one is pretty clean with no build-up of old glue.
This section has been cleaned up pretty well.
Pieces glued back on.

I also glued the top piece back together.

Broken finial (or top ornament).
I used regular wood glue on this since it is a repair of a broken piece.

One thing I wanted to touch on here is that when I’m doing repairs, I’ll use different types of adhesive or glue depending on what I’m working on. If there is a piece that is broken and needs to be put back together, then I’ll use wood glue or possibly epoxy. However, if I’m attaching parts to a frame or to other parts, or if I’m putting a joint back together (mortise and tenon, bridle joint, dovetail) then I’ll use hide glue.

Once I had all of the pieces reattached to the frame, I started working on the pieces that were missing. On this frame there were only two pieces missing, and they were both very straightforward and required very little carving.

One part that was broken and missing.
I used a tiny cleaver to rive a scrap piece of oak, so that the grain orientation matched the frame.
The tiny cleaver was probably a cheese slicer or something similar, but it’s the perfect size for riving treenails or pegs for joinery.
After shaving and sanding it down to size.
Hide glue is ready.
After some chiselling.

Once the glue had dried, I chiselled it down.

The triangular piece took a bit more fiddling but was not difficult to carve down to shape.

A small piece missing from this lion.

I started with a small rectangular piece and slowly filed away a portion just to get it to fit in that space. I made sure the grain matched the piece next to it. I knew the piece was bigger than I needed, but that was not an issue as it gave me something to hold on to while I filed it.

Shows that I’ve just started filing a corner.
The corner has been filed so it fits in the space.

Once I had the corner filed I glued the piece in place. I then began carving the piece to match.

I had also glued back together the frame itself since it was in pieces.

A piece of the frame after cleaning the joint.
A previous break that had been repaired (I think).
Even though there isn’t a lot of surface area for glue, I didn’t change this by adding a deeper channel or anything. I think this will be enough surface area for a stable glue up.

So this is where I am now. This picture doesn’t show it, but both of the new pieces have been carved and are ready for color matching. I’ll get started on that and will have it in the next post.

Mirror for Slant Top Secretaire, Part 3

You can see my previous post here.

The color matching for the pieces was pretty straightforward. The only two colors I needed were dark walnut and red mahogany, with some dark wax to blend everything. I started with a thin coat of garnet shellac before adding the color.

Shows the piece with a thin coat of garnet shellac.
Also with a thin coat of garnet shellac.
This shows both pieces with coloring. I added some dark wax after this to blend.

When I had finished this portion, I then move onto the finial, or ornament, on the top that had broken.

Shows the broken ornament.

I wasn’t sure what the original missing piece looked like, so I did a bit of research on acanthus leaf designs and found something that I thought would work in this case. I then printed it to scale and then transferred that to a piece of oak.

Shows the picture printed to scale and my initial carving.
Once I had the outline, I cut it out but left the base attached so I could more easily do the carving.
The picture shows the tools I used to do the carving and shaping.

For this part of the project, I used several of my carving chisels and gouges. I also used my floats for some fast material removal and my rasps for the finer detail removal.

Once the carving was pretty much done, I colored the piece, then cut it off and glued it onto the rest of the ornament.

Shows the piece with some color.
And attached to the rest of the ornament.

At this point, all that was left was to attach the ornament to the frame and put the glass back in.

The finished piece.
The finished piece from the other angle.

This was a pretty straightforward restoration, even though it took far too long to finish.

I can’t wait to see it on the secrataire.