Ok, so it’s been a while since I’ve made any progress on the stand, but I have a very good excuse…and that’s a bald-faced lie. I have been working on our home remodel, but I’ve also started a few other projects so I’ve just been pretty distracted.
I decided to replace the bottom because the previous bottom (which was also a replacement) was too warped to fix.
This is the previous bottom, which was also a replacement. It was a nice thick piece of pine, but it twisted and warped so badly that I wasn’t even tempted to try to fix or straighten it.
I had some nice pine that I’m using for another project. The pieces were too narrow so I joined them and cut them to length.
The new piece was too thick so I got the scrub plane out and took off about 3mm (1/8th inch) from the face, then flattened and smoothed the face.
Using my scrub plane.And following up to smooth the face.
I dry fit the bottom into the grooves in the legs and clamped it up to make sure the bottom was not too wide or deep.
After some tweaking. Shaved down the edges and sides so it fits snuggly but has room to expand. In this case the bottom will expand to the sides.
I’m pretty happy with the bottom and I’m ready to start glueing up the carcase. That will be in the next post.
Several months ago I finished a Victorian Secretaire, which you can read about here. Later, I was shown a mirror that is believed to go with it and I was asked to restore it as well. This is the beginning of that process.
The mirror after a quick wash, but before any other work.This is the piece that we think the mirror goes to. It’s the Victorian Secretaire that I restored almost a year ago.
I started by cleaning the piece. First, with a rag and alcohol, I wiped the piece down to remove most of the dirt. This also helped to smooth out the shellac finish, which had become damaged over the years.
The tools used for the cleaning were dental instruments (picks), old toothbrushes, plastic bristle brushes, soft metal bristle brushes, and old cotton rags.
The goal at this point is not to get the piece completely clean, but to be able to see the small joints and crevices to expose any looseness or issues with individual pieces.
I then checked the frame for loose parts. There was already a piece missing, and as I poked around I found several others that were loose. I used a putty knife to slide under the pieces and pry them out. There were small finish nails that had been used to fasten some, but not all of the pieces. The nails were part of several previous repairs and not original.
The nails used to fasten the loose pieces are all different sizes so the repairs were likely done at different times and by different people.This shows most of the pieces that were loose.
I could have left the loose pieces nailed and just injected some hide glue underneath to refasten them, but there was so much dirt and gunk under the pieces that the glue wouldn’t have anything to adhere to.
This shows that even after some scraping and brushing that there is still dirt where the piece had been. My goal here is to clean the space under each loose piece enough that the hide glue has stable wood to adhere to.
I’ll be using hide glue to adhere the loose pieces back on to the frame, but if there are any broken pieces I’ll use modern wood glue to repair them.
This brings me to something that I’ve talked about a bit before, but I haven’t really gone in depth. The difference between furniture repair, furniture restoration, and furniture conservation is very interesting in that it is different for almost every piece of furniture. In my case, almost every piece I work on is a combination of the three with repair and restoration being the primary tasks and conservation always being in the background. The Victorian Secretaire and this mirror are a great example.
The Victorian Secretaire and this mirror came to me broken to the point of being unusable. If this had been a piece of historical significance that was going to go to a national museum, I would have simply cleaned and stabilized the pieces. This would have included soap and water to clean and then a museum quality finish to stabilize. The specific finish would depend on the location, the museum, and the conservator. I have followed Don Williams for a while and can recommend his writing and videos.
If the piece was being restored so that it could be displayed (but not used) in a local museum or private home I would have cleaned it and then repaired only enough for it to be placed and then observed. I would not add any material to the pieces, nor would I remove any material unless it was to make it stable enough to move into its final location.
Since I knew this piece was a “user”, I knew that I would have the most leeway to bring the piece back almost to its original state. I could remove material if I needed to in order to make the piece sturdier, I could remove the finish if necessary in order to blend old and new material. I could add new hardware to make the piece usable. I could even improve the piece with better hardware and or materials than it initially had as long as I kept the changes sympathetic to the age and design of the piece.
This is part of the decision making process that goes into each piece that I restore and so there is some combination of repair, restoration, and conservation in every project and ever piece that I work on.
My next post will have more of the process of cleaning and repairing.
It’s been a while since I’ve done anything with the mirror, so I had to go back over what I had actually accomplished since then. That took all of 5 minutes because all I had done was remove some loose pieces and do a bit of cleaning.
I had more time to work on the piece so I got out my super high-tech wax heater and mixed up a batch of hide glue.
This is the wax heater that I use for my hide glue. There were already holes in the lid so I use one of them for the temperature probe that I taped with duct tape so it’s at the right depth. Inside the heater is a small glass jar with hide glue granules and water. The glass jar is sitting in a water bath that is about 1/2 way up the side of the jar. This is for even heating of the hide glue.
I’ll write a separate post about how I mix and make my hide glue.
While the hide glue was heating up, I went back over the surface area for the loose pieces that needed to be reattached.
This shows how dirt and gunk (the technical term) worked their way under the loose pieces. This will make the adhesion less stable.This shows glue along the edge, but not in the center. This might be a bad repair where the person just tried to squoosh some glue along the edge of the part without removing it to get underneath.This one is pretty clean with no build-up of old glue.This section has been cleaned up pretty well.Pieces glued back on.
I also glued the top piece back together.
Broken finial (or top ornament).I used regular wood glue on this since it is a repair of a broken piece.
One thing I wanted to touch on here is that when I’m doing repairs, I’ll use different types of adhesive or glue depending on what I’m working on. If there is a piece that is broken and needs to be put back together, then I’ll use wood glue or possibly epoxy. However, if I’m attaching parts to a frame or to other parts, or if I’m putting a joint back together (mortise and tenon, bridle joint, dovetail) then I’ll use hide glue.
Once I had all of the pieces reattached to the frame, I started working on the pieces that were missing. On this frame there were only two pieces missing, and they were both very straightforward and required very little carving.
One part that was broken and missing.I used a tiny cleaver to rive a scrap piece of oak, so that the grain orientation matched the frame.The tiny cleaver was probably a cheese slicer or something similar, but it’s the perfect size for riving treenails or pegs for joinery.After shaving and sanding it down to size.Hide glue is ready.After some chiselling.
Once the glue had dried, I chiselled it down.
The triangular piece took a bit more fiddling but was not difficult to carve down to shape.
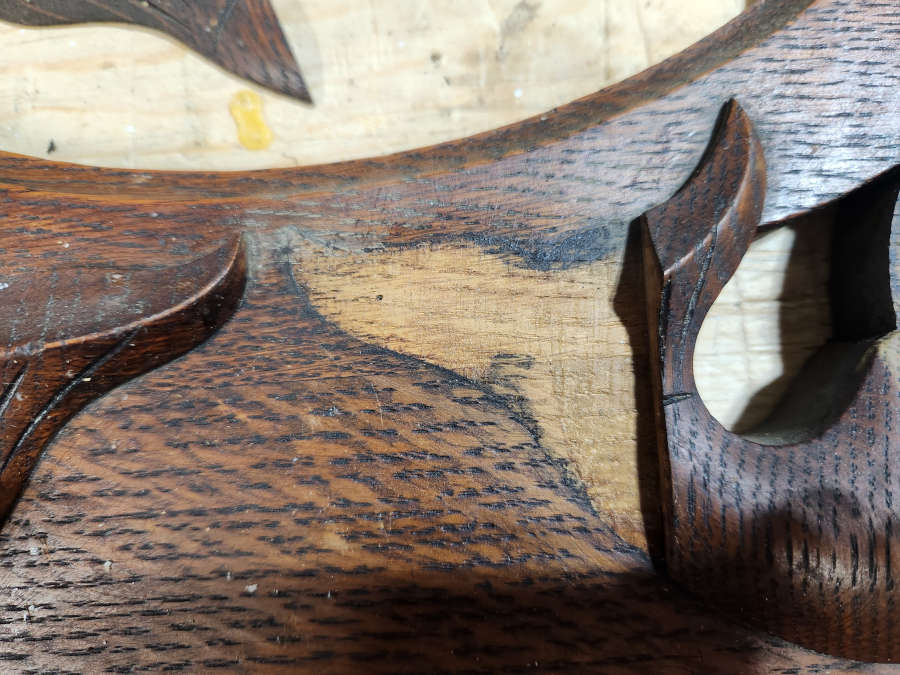
A small piece missing from this lion.
I started with a small rectangular piece and slowly filed away a portion just to get it to fit in that space. I made sure the grain matched the piece next to it. I knew the piece was bigger than I needed, but that was not an issue as it gave me something to hold on to while I filed it.
Shows that I’ve just started filing a corner.The corner has been filed so it fits in the space.
Once I had the corner filed I glued the piece in place. I then began carving the piece to match.
I had also glued back together the frame itself since it was in pieces.
A piece of the frame after cleaning the joint.A previous break that had been repaired (I think). Even though there isn’t a lot of surface area for glue, I didn’t change this by adding a deeper channel or anything. I think this will be enough surface area for a stable glue up.
So this is where I am now. This picture doesn’t show it, but both of the new pieces have been carved and are ready for color matching. I’ll get started on that and will have it in the next post.
The color matching for the pieces was pretty straightforward. The only two colors I needed were dark walnut and red mahogany, with some dark wax to blend everything. I started with a thin coat of garnet shellac before adding the color.
Shows the piece with a thin coat of garnet shellac.Also with a thin coat of garnet shellac.This shows both pieces with coloring. I added some dark wax after this to blend.
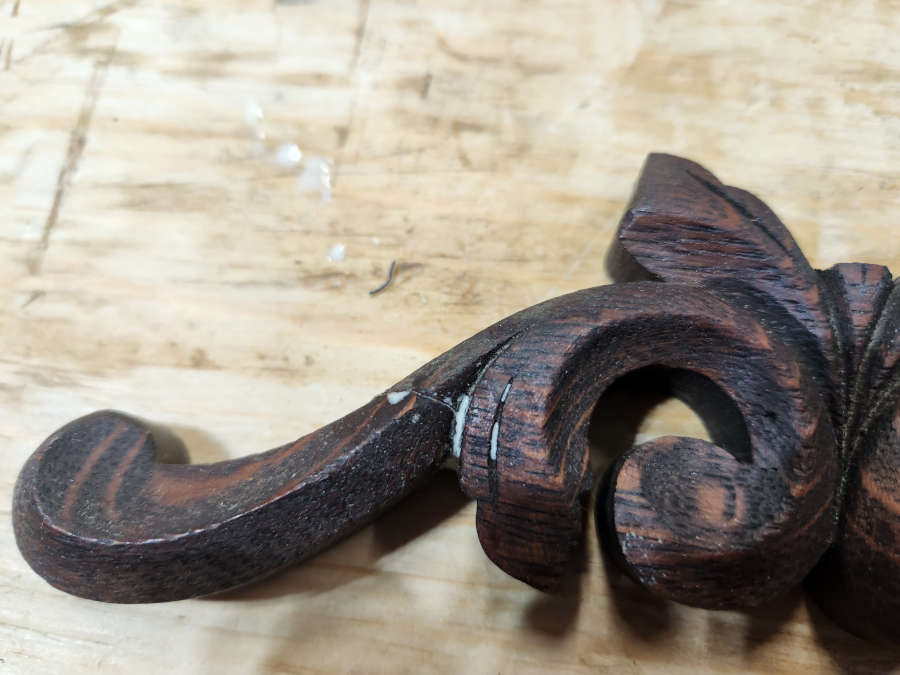
When I had finished this portion, I then move onto the finial, or ornament, on the top that had broken.
Shows the broken ornament.
I wasn’t sure what the original missing piece looked like, so I did a bit of research on acanthus leaf designs and found something that I thought would work in this case. I then printed it to scale and then transferred that to a piece of oak.
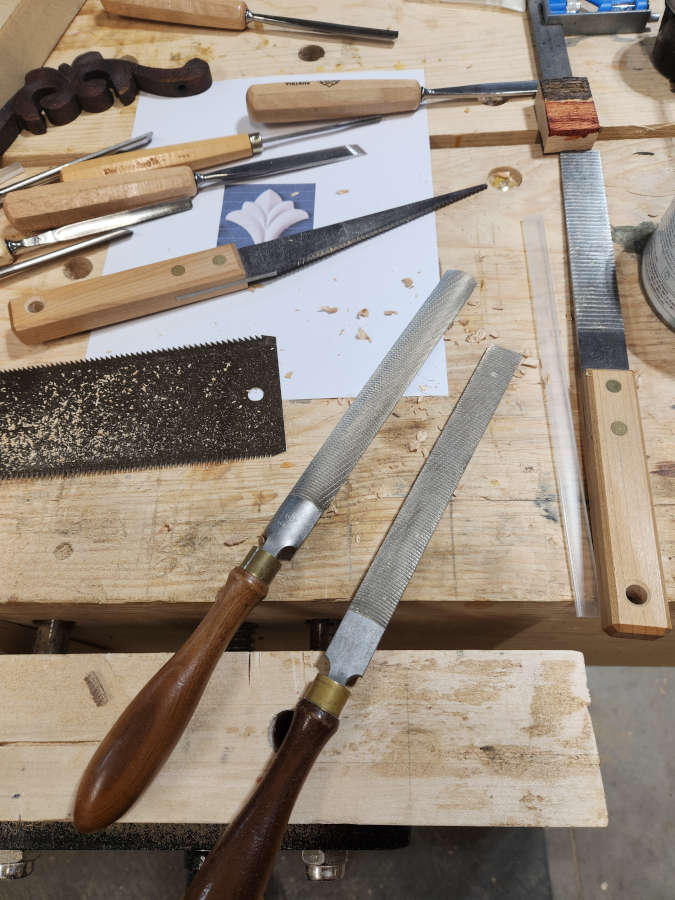
Shows the picture printed to scale and my initial carving.Once I had the outline, I cut it out but left the base attached so I could more easily do the carving.The picture shows the tools I used to do the carving and shaping.
For this part of the project, I used several of my carving chisels and gouges. I also used my floats for some fast material removal and my rasps for the finer detail removal.
Once the carving was pretty much done, I colored the piece, then cut it off and glued it onto the rest of the ornament.
Shows the piece with some color.And attached to the rest of the ornament.
At this point, all that was left was to attach the ornament to the frame and put the glass back in.
The finished piece.The finished piece from the other angle.
This was a pretty straightforward restoration, even though it took far too long to finish.